Sunday, June 20, 2010

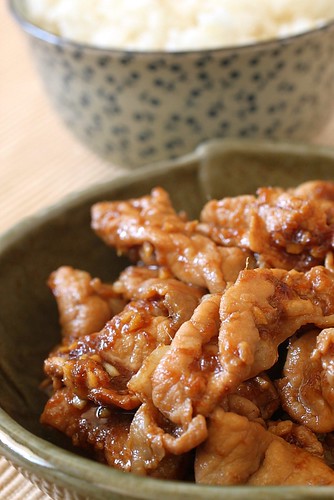
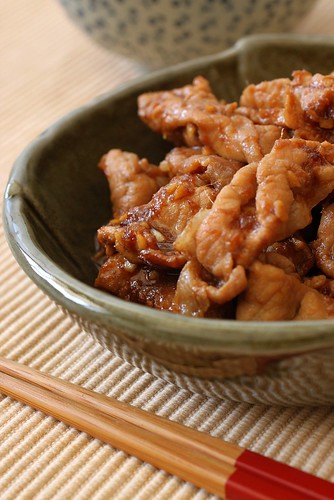
Pan Fried Ginger Pork - 豚のしょが焼き


Ginger Pork2


There was an article in the papers last week reporting that stocks of Japanese Kurobuta (black hog) and Japanese Wagyu Beef in Singapore are running low.  Following the break out of foot and mouth disease in Japan in April, the Agri-Food and Veterinary Authority of Singapore has put a ban on the import of these premium meat.

I am a big fan of Kurobuta which refers to the rare Berkshire Black Hog bred in Japan. It is the Wagyu equivalent for Pork. I still remember when I saw it many years back at the local Japanese supermarket, I was fascinated by the even marbling of the pork and subsequently, when I had the chance to taste it, I was quite impressed by how tender and flavourful it was. The best way to enjoy a prized meat as such would be to season it simply with salt and pepper and grill it. However, due to its rather expensive price tag, (S$4-S$5/100g) these are normally sold at the local supermarkets here minced or sliced thinnly in Sukiyaki or Shabu shabu cuts - not exactly the best cuts for grilling.
Ginger Pork 3
I was lucky to chance upon some US Kurobuta on sale last week. Choosing the Sukiyaki cut for more bite, I couldn't wait to cook this.
One of my favourite Japanese Pork recipe is the very accessible Pan Fried Ginger Pork.  Extremely simple and quick to make, this dish goes beautifully with steaming hot white rice. It is so flavourful that one runs the risk of having too much white rice with it. In addition, the grated ginger really lends a warm and comforting feel to the dish.

Of course, one does not need to use Kurobuta Pork for this but I do like my pork to be sliced very thinnly for this dish and the Sukiyaki cut would be my choice. So here's for all who needs to cook a quick,easy and tasty meal.

Ginger Pork (100)
Recipe :

Pork (Sukiyaki Cut)                 250g
Sake                                        1tbsp

Grated Ginger                          1tbsp
Grated Garlic                           1tsp
Mirin                                        1tbsp
Japanese dark Soya Sauce       1tbsp
Sesame Oil                               1tsp
Sake                                        1tbsp
Sugar                                        1/2 tsp

Method :

1. Marinate pork with 1tbsp of Sake and leave for 10 mins.
2. Mix all the other ingredients together and mix well with a fork.
3. Heat a frying pan and add 1/2 tbsp of oil. Fry marinated pork until pork changes colour.
4. Add the sauce mixture and let simmer for about 5 mins.

Friday, June 18, 2010

Bubble Tea - 珍珠百香果绿茶


Bubble Tea 2

Bubbles 8

Starch Ball Collage

Bubble Tea Collage 2

Bubble Tea - that one time ubiquitous beverage from Taiwan that got the whole Asian market smitten over its bouncy starch balls. For the lack of a better vocabulary to describe the texture of the bubbles, the Taiwanese have even coined a term of their own, describing the slightly chewy and bouncy bite as 'QQ'. I remember when this became popular about 10 years ago, franchise stalls of Bubble Milk Tea (珍珠奶茶) spawned like shoots after a rainy season. When everyone wanted a piece of the action, fierce competition set in, resulting in price erosion, unsustainable profits and eventually businesses folded like a pack of cards.

I suppose it was a relatively easy drink to make - it doesn't take much to figure out the recipe - Tea, Flavoured Syrup, Milk and of course the Starch balls. The ones that still remain in Taizhong, where this originated from invariably gain their popularity for their milky tea variety. I've heard how people had commented that they prefer the beverage from a particular shop because the milk tea is more fragrant.... well, this doesn't really appeal to me because I am not a milk tea person. I always take my tea and coffee black. Hence when I order a Bubble Tea, it is always a flavoured clear tea - for me, the pleasure in taking this beverage is chewing on the QQ tapioca starch balls (粉圆).

Recently I noticed a little revival of the Bubble Tea in my neighbourhood when a Taiwanese Bubble Tea chain store, KOI Cafe,(check out LadyIronChef's review)  opened its outlet here. I didn't try to go near the shop for a few months because everytime when I passed it, there was a long queue and there were people sitting on benches waiting for their order.... Finally one morning last week, on my way to the National Library, I took advantage of the thin crowd at the early opening hours of the store and ordered my first KOI Bubble Tea. I ordered a Passion Fruit Green Tea Bubble Tea with sugar content reduced by 50%. (Yes, you are allowed to select if you want the sugar to be reduced by 50%, 25% or no sugar addition) As I waited in anticipation with my queue number, I watched  the very young crew work behind the counter. Almost immediately, I began to wonder if this shop is all about gimmicks. I began to suspect that the long queues that I had seen before may not be due to the outstanding drink recipe - but rather the result of a deliberate attempt by the crew to stall time as they move about listlessly, chatting, poking fun at each other, without giving a care about the 10+ odd customers standing around like puppies, holding on to their queue tickets... waiting.  I got really impatient, my brows furrowed, my lips pursed into a tight unfriendly line. When I finally got my order, it didn't blow my mind away, in fact it tasted syrupy and coyingly sweet. If not for the starch balls, I would have thrown the drink away. Well, maybe my judgement wasn't fair - perhaps they are better at the milk tea formulations. If anyone has tried their milk tea, please do share your views.

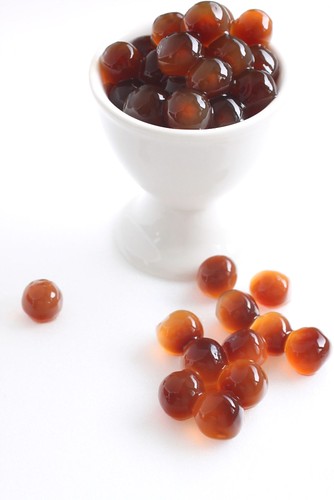
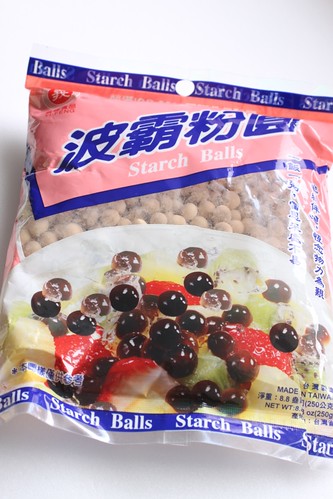
Anyway, the good thing that came out of this was that I was reminded of a packet of Starch balls which I have in my drawer. I thought I had bought this in Taiwan but the label behind the package had the address of the Singapore distributor and a $2.50 price tag. I strained my mind to recall where and when I had gotten this but my mind is blank. Curious if it is possible to achieve the same QQ texture as the shops with these, I followed the instructions and tried my luck.
IMG_2327

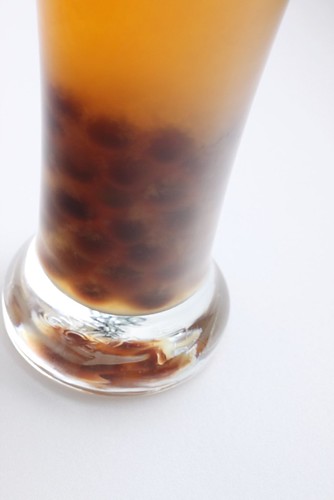
And dear readers, if like me, you are going primarily for the starch balls in these drinks, stop spending $3 for the drink - you can get a whole load of starch balls with this little packet. I brewed one of my favourite green tea (Gryphon's Jasmine Pearl Tea Infused with Rose) , blend it with the Lemongrass Passion Fruit Cordial which I had bought early this year from Jones Grocery, loaded it up with the Starch balls and I couldn't be more satisfied!

Bubble Tea
Now, all I need to do is to remember where I got these starch balls from... if anyone has seen it somewhere, do share - otherwise there are 2 actions I can take : call the distributor ; stock up during my next trip to Taiwan!

And oh, a gentle reminder : go easy on these store-bought milk tea - because they are laden with sugar and creamer - a cup a day expands waist line by 4 inches!!!
Bubbles 5(100)
Recipe
Starch Balls           100g
Water                    600g

Tea Bag                 1
Water                     500g (adjust strength according to personal preference)
Sugar                      1-2tsp (adjust sweetness to taste)

Lemongrass Passion Fruit Cordial (from Jones)  1/2 tbsp (adjust according personal preference, other cordials can be used)

Method:

1. Boil 600g water in a pot. Add Starch balls in to boiling water. Stir and wait for water to come to boil again. Remove from heat once boiling begins again and transfer content into an electric rice cooker. Cook in the rice cooker for about 1 hour until balls are cooked through. (Overcooking will result in soft mushy starch balls. Undercooking will render the center of the ball uncooked)

2. Drain and pour starch balls into ice cold water to prevent starch balls from sticking together.
3. In a separate pot, boil 500g water and add tea bag. Boil tea bag for 1 min, add sugar and turn off heat and let tea bag steep until desired strength is achieved. Cool down tea.
4. Add tea, ice cubes and cordial into a cocktail shaker. Shake well to blend and pour into a glass with starch balls. Enjoy drink.
Thursday, June 17, 2010

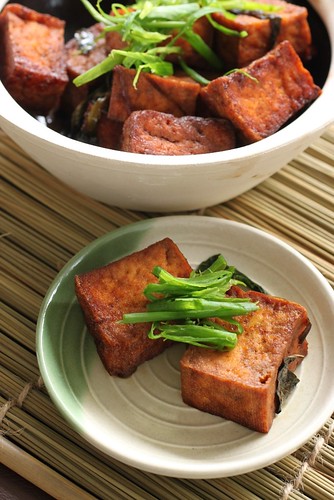
3 Cups Tofu 三杯豆腐


Tofu 4

Tofu 11
I believe the best 3 Cups Chicken (三杯鸡) I've had to date was prepared in Taiwan. My Taiwanese colleague had told me that every Taiwanese restaurant would most definitely have this dish on their menu. A restaurant which does not serve 3 Cups Chicken is not an authentic Taiwanese restaurant. Indeed, the Taiwanese have mastered this so well, that you can order almost anything to be cooked in this manner. In addition to the chicken, I've had 3 Cups Frog Legs (三杯田鸡), 3 Cups Eel (三杯鳗鱼), 3 Cups Eggplant (三杯茄子) and my favourite of all, 3 Cups Tofu (三杯豆腐).

The 3 Cups in the recipe denotes equal portions of Sesame Oil, Soya Sauce and Chinese Rice Wine. The Soya Sauce imparts the taste to the dish while the sesame oil and rice wine seduce the palate and senses with their heady fragrance... hence, very often, one is already sold by the warm, comforting smell even before tasting it. The single main ingredient in the dish is fried with all 3 cups of liquid and left to absorb the flavour over strong fire braising until all the liquid dries up and the whole dish tether dangerously at the brink of being burnt. In Taiwan, a 4th intoxicating element is added to the dish and that is Basil leaves (九层塔). The herbal infusion is so addictive that I have come to decide that any 3 Cups dish prepared without Basil leaves is just not right.

Tofu 10

I have never cooked any 3 Cups dishes and would not have been motivated to do it if not for seeing a recent post by 3 Hungry Tummies.(and yes, she used Basil Leaves!) Instead of using Chicken, I decided to try my hand at doing this with Tofu. A little more challenging because Tofu unlike meat dishes, will take longer to absorb flavours. The best 3 Cups Tofu dishes I've had in Taiwan are the ones that manage to draw in the flavours (入味).

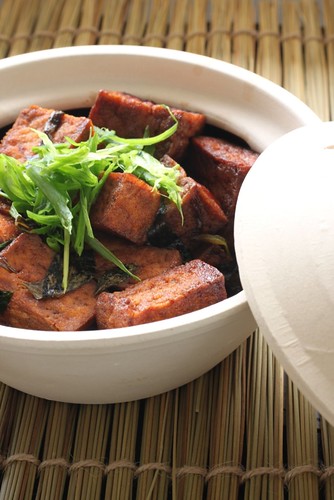
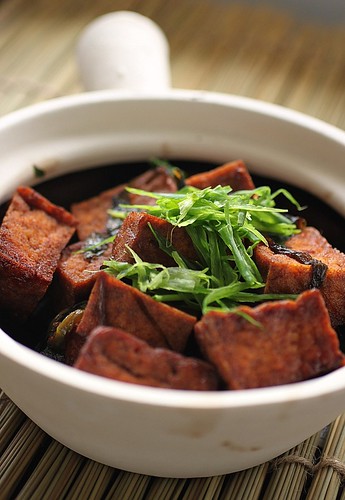
Hence armed with the basics from 3 Hungry Tummies' post, I proceeded to prepare my Tofu dish. My Tofu had alot of flavour but I suspect that I could have chosen the wrong Tofu for this dish. Using pressed Tofu (板豆腐) , this is firmer and not as smooth. The Tofu I remembered from Taiwan was softer in the center. I am now thinking, if I had used Silken Tofu, I will end up with a Tofu that would be softer in the center. Well no full marks for this attempt but at least I had the heady fragrance envelope the whole neighbourhood - my neighbour actually knocked on my door and asked me what I was cooking.... (smile)

Tofu 7(100)
Recipe :

Tofu                 1 Square cut into cubes

Garlic               8 cloves
Spring Onions  4 stalks (with bulb) cut into 5cm length
Ginger              3cm slices
Basil Leaves     1 cup

Light Soya Sauce            3 tbsp
Sesame Oil                     3 tbsp
Chinese Rice Wine          3 tbsp
Sugar                              1/4 tsp
Water/ Chicken stock      1 cup

Method

1. Deep fry tofu cubes in oil at 160C to get nice brown crispy skin.
2. Drain and set aside.
3. Heat up a wok to smoking. Add sesame oil. Fry garlic, and ginger briefly until fragrant. Add Tofu, Soya Sauce,and sugar. Fry over high heat for 1 min.
4. Add water/chicken stock. Continue to fry until half of the liquid is evaporated. Add wine,spring onions and cover. Braise until liquid is almost dry. Add in Basil leaves and stir fry quickly and dish out.
    

Tofu on Foodista

Tuesday, June 15, 2010

Cherry Pie


Cherries 5

Cherries 7

Cherries 4
Every so often, I get mesmerised by the photolicious creations I see at blogs and tell myself, I am bookmarking this to try as soon as possible. However, this always get side tracked and even forgotten once other priorities at work, not to mention plain tardiness set in. I have thought about this to myself so often - so many lovely dishes yet so little time to cook - not to mention so little calorie allowance to take them in...

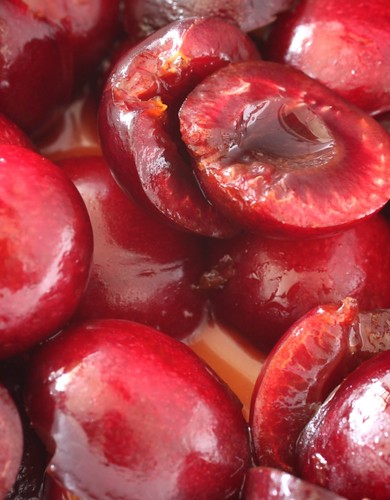
I chanced upon Dana's lovely blog, One Haute Plate last week while reading Amelia's blog. Dana's latest post featured a cobbler/pie made with seasonal cherries. I have never really baked with cherries but have always liked the tartness of cherries in pastry. Cherries must be in season now for I am actually seeing these being sold at the vegetable stall at the wet market here.

Cherries
Using Dana's Recipe, I decided to prepare 2 variations :
1) the lazy cobbler style where I simply placed the cherries in a little casserole and top it with a piece of pastry.
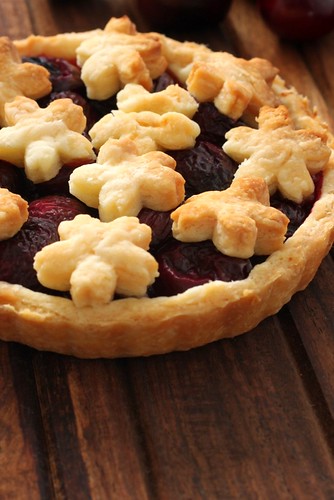
2) the mini pie version where the cherries are placed in a pie shell.

The cobbler style has a rustic appeal to it but had me stumped when I tried to photograph it.  The pie version, turned out well and was a breeze to photograph. The baked cherries were tart and delicious but what really delighted me was the flakiness of the pastry. I was expecting a texture akin to a typical sweet tart dough but was pleasantly suprised by the light and flaky pastry. If you could peer closely at the photos, you may be able to catch the flaky layers in the cross section of the pastry.
Absolutely delightful and  I can't wait to bake some more...

Cherries (100)
Recipe (from One Haute Plate, halved recipe)

Fresh cherries, pitted, 350g
Sugar , 2-3  tbsp (I cut down the sugar)
Cornstarch, 1.5 tbsp
Water, 1 tbsp
lemon juice, fresh, 1/2 tbsp

All-purpose flour, 165g
Salt, Pinch
Butter, chilled, unsalted, 113.5g
Ice water  1-2 tbsp
Sugar, for sprinkling

Method :

-Wash and pit cherries. Place in large mixing bowl and add cornstarch, sugar, water, and lemon juice. Mix together and set aside for 10+ minutes.

-Mix flour and salt, and using a fork, pastry cutter, or better yet, Cuisinart, blend flour mixture and butter together until crumbly.
-Slowly blend in 2-3 tbsp iced water until mixture adheres together, but is not too sticky. Add a little more water if necessary. Refrigerate for 10 min when finished.
-Set oven to 200C and butter a pie or casserole dish. Stir cherry mixture and transfer to dish.
-Roll out dough and use a cookie cutter to create 2-4 inch shapes of your choice (a water glass can stand in for this if need be). Layer dough shapes evenly with a 1/4-1/2 inch overlay to insure even baking.
-Sprinkle crust with sugar and bake for 45-55 minutes or until filling has gelled and the crust has browned. (I omitted this)

Sunday, June 13, 2010

Sesame Ball - More Snacks To Watch The Ball Goes By....


Sesame Ball 2

Sesame Ball 3

Watching the World Cup Matches on TV in Singapore has become ridiculously expensive this year. The only one smiling is FIFA. For the information of those who do not reside in Singapore, until 2 months ago, the 2 main cable TV providers in Singapore were still tussling over the screening rights of the World Cup 2010. I am not sure if the competitive tussle had resulted in the higher subscription fee viewers have to pay but in the end, both cable providers got to screen the matches and the poor viewers like us, have to fork out between S$70 -$94(USD54 - USD 67)  to watch the games at home. Call it duo monopoly, extortion whatever but avid football fans will still have to either pay or find other ways to watch the games. Some friends have come up with a list of places to watch free screenings but apart from the community center, most other options like pubs and restaurants will still have you digging into your pocket and I believe that this year, we will have less public venues screening the games due to,again, the higher screening license fee they will need to pay this year. One pub chain, I remember reading, has to spend S$2million this month just to screen the matches on their wide screen TVs. I hope they make enough money to cover the cost. Football fans who had gritted their teeth and forked out $70-$94 to get the games at home will most likely be less inclined to go out and spend extra at a pub. What amazes me is that FIFA's revenue from the TV rights alone is more than US$2 billion.

The National TV station dished out the opening match freebie to us last Friday and even though it was a somewhat bland game (for me, at least) , most of us were willing to sit in front of the TV with Snacks and Drinks in hand to partake in the free extravaganza ....

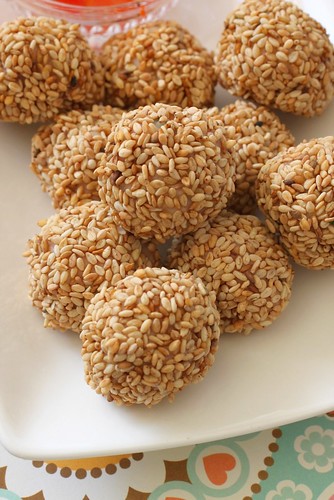
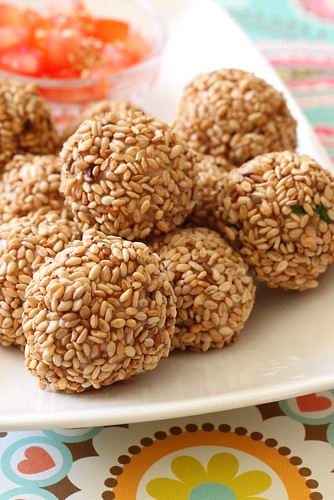
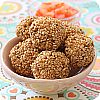
With the Tofu Puff Snack, I had some minced meat stuffing left over. Reluctant to make another deep fried dish, I decided to coat it with sesame and bake it. What you get is a  juicy and equally tasty snack... but with less guilt.

Sesame Ball (100)

Recipe Please Refer to Tofu Puff Snack.

Method :
1. Preheat oven to 180C
2. Shape the mince into small balls and roll it in sesame seeds.
3. Bake for 10mins.


Friday, June 11, 2010

Crispy Stuffed Tofu Puffs - Snack To Watch The Ball Goes By...


Tofu Puff 1

Tofu Puff 5
A couple of years ago when I was in the US for a business meeting during the cold cold month of Feb, I had a chance to experience the feverish buzz that infected the whole nation on Superbowl Sunday. It is possibly the most important game of the National Football League. This is a time when pubs start gearing up for the crowds and luring in customers with their Superbowl specials. At the domestic front, friends and neighbours make plans to gather at home to watch the game over a scrumptious buffet of Superbowl spread. Just wait until Feb and suddenly you see Foodgawker and Tastespotting being flooded by submissions of Superbowl Treats/ menus.

Typical food to watch the game with include - Buffalo Wings, Chips with Exotic Dips, Burgers, Ribs, Popcorn, Pizzas - Snacks in every permutation you can think of - washed down of course, with free flowing beer, what else?

Today, the 2010 World Cup raises its curtains and will proceed to hypnotise millions of football fans around the world. We have a new product launch scheduled later this month, right in the middle of the games and one customer actually asked me why the hell are we doing  the event during World Cup month?
' People take leave to stay at home to watch games! The stock market will be sleepy... business trips will be postponed!' Yeah, yeah, yeah... I am no football fan, I support the team with the good looking players.

Tofu Puff 3

Tofu Puff 2

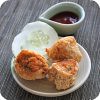
Anyway, for those who plan to have a party gathering at home for the games, here's a tasty snack with an Asian twist that is guranteed to please.  I think I have seen this done by a few fellow bloggers before but I can't recall who they are. But this is from a cookbook I have which features minced meat dishes - "Grounded Meat Sancks" (巧手绞肉小吃店).  The Tofu Puffs (available from Chinese grocery stores) are slit and inverted to have the spongy inner layer exposed. Minced meat is then stuffed into the pocket and deep fried. Very easy to make and always a crowd pleaser - especially when dipped in Sweet Chilli Sauce...

Tofu Puff 250-1(100)

Recipe :

12              beancurd puff
150g          Minced pork
150g          Fish paste
50g            Shelled prawns (chopped)
1 stalk        Continental parsely
1                Egg white
1tbsp         Tapioca flour

Seasoning
1tsp           Salt
1/2 tsp       Chicken powder (optional)
1tsp           Pepper
1tsp           Sesame Oil
1tsp           Sugar

Method :

1. To make filling, mix minced pork, fish paste, chopped prawns and remaining ingredients (except Tofu Puff) and seasoning and blend until paste becomes sticky.

2. Make a small cavity of each beancurd puff, turn over the inside. Next stuff in filling mixture until full. Deep-fry at low heat first, then high heat till golden brown. Remove, drain and serve with Chilli sauce.

Tofu on Foodista

Wednesday, June 9, 2010

Graffiti In My Kitchen - Raspberry Cupcake


Raspberry Cupcake 2

Raspberry Cupcake 5

Singapore is that little dot of an island at the southern tip of Malaysia. It is well known for its clean, green garden city image, its chilli crab, its super efficient system and.... as the sharp tongued and super sacarstic Sue Sylvester had spouted in Glee , " ask anyone who safely walked the immaculate sidewalks of Singapore after winning an international cheerleading competition and they'll tell you one thing; CANING WORKS." . Yes, thanks to Michael Fay,the fame of our strict jurisdiction often precedes us and I am sure the world is going to hear more about us in the coming weeks as the system grapples with another high profile vandalism case.

For those who have not heard, some arse-iching fellows had decided to challenge the system and possibly showcase their artistic talents by breaking into our subway depot and spray painted 2 carriages with bold colourful graffitti. The duo, a Swiss National working as a business consultant in Singapore and a British guy will be charged with trespass and vandalism.The Swiss guy is now out on bail while the other British guy is still at large. This incident sparked off some very active debates over how these guys should be charged. Some argued that they should not be caned because the graffiti they sprayed on were actually quite artistic... but I doubt that the beauty of the artwork would be powerful enough to move the judges to show clemency. In fact, in terms of the counts of offenses, they probably are in deeper waters than Michael Fay.

When the news broke, I remember thinking to myself - these guys are blatantly telling the world that they want to be caned -surely the whole world must know that vandals get caned in Singapore!  Then, there came more speculation of their 'art' - apparently the graffiti bore the signature of Mckoy Banos. Mckoy Banos are the stamp of  2 'artists' notorious for spray painting trains all over the world ... like some modern day Zorro who goes around tagging their mark on trains.... the good deed?... to bring art closer to the heartland?... a bit of a stretch, I guess. Nevertheless, this adds on a fascinating dimension to this case. It is still unclear if this duo is the real 'Mckoy' but  I am already envisioning the headlines... 'Mckoy Banos Caught  & Caned In Singapore' - that would be a blast! I am waiting with bated breath to see how our 'art-loving' judges would rule this controversial case when it opens for trial on 21st June.

Raspberry Cupcake 5

In the mean time, I am trying to create a little graffiti in my own kitchen... What a feat! Didn't know that it could be so difficult to create pleasing graffiti in a cup cake! I had wanted to create some abstract swirls using raspberry and blueberry puree... and ended up with lame sputters of colour instead.
Well, all the best to the graffiti artists, I will be devouring my cupcakes while I wait for the verdict...

Raspberry Cupcake 1 (100)
Recipe :

150g         Cake Flour
1 tsp         Baking powder
1 tsp         Salt
170g         Sugar
115g         Butter
1 tsp         Vanilla Extract
2               Eggs
125g         Milk

Raspberry Puree
Blueberry Puree

Method :
1. Preheat oven to 180C.
2. Sift flour, baking powder and salt and set aside.
3. In a mixing bowl, cream butter at low speed until white and creamy.
4. Add sugar a tbsp at a time to butter and continue to mix until dissolved.
5. Add Vanilla extract.
6. Add beaten egg in a slow drizzle while mixing the creamed butter.
7. Add flour and milk in alternate portions.
8. Half fill mold / cupcake casing with batter.
9. Scoop 1/4 tsp of Raspberry Puree and 1/4 tsp of Blueberry puree over batter. Continue to fill up mold with batter. With a tooth pick / skewer, swirl the batter to disperse the puree.
10. Bake for 20mins at 180C.

Monday, June 7, 2010

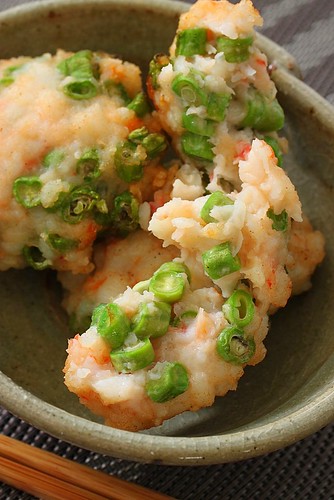
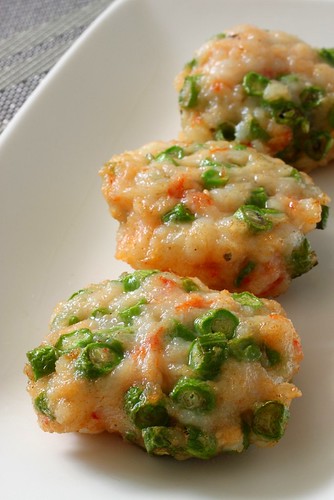
Prawn Fritter With Long Beans - 豆角虾饼


Prawn Patty 7

Prawn Patty 8

Prawn Patty 4
A few years ago when I was staying in Guangzhou,China I would hop over to Hong Kong for the weekend and it was during those days that I chanced upon a cooking program in Hong Kong hosted by the very direct, sacarstic and outspoken So Sze Wong (苏施黄). So Sze Wong who is a famous radio DJ is infamous for being picky about food. I was told by my Hong Kong distributor that growing up in a well-off family, she has basically acquired a fussy palate and truly knows how to eat well. (There is a difference between one who likes to eat and one who knows how to eat, 喜欢吃vs懂得吃)

The first series of her cooking program was known as "So" Real Time Cooking (一粒钟真人苏). In the show, So cooks unpretentious dishes that most of us would have eaten at home. Unlike typical cooking programs where ingredients were already pre-prepared, she does everything real time. With the 60mins timer ticking away, we will get to see her peel prawns, wash vegetables, pluck vegetables - exactly what you would expect to see if you were to sit in your mother's kitchen and watch her prepare dinner... It may sound a little boring but So, being the radio DJ she is would chat away while she busys herself with the food. The objective is to have 3 dishes sitting on the table at the end of the hour. I like the program because she actually imparts alot of tricks and food preparation knowledge that modern working ladies like us would never be able to pick up from cookbooks. In her program, you won't find recipes as she does not believe in measuring cups and spoons for home cooking but she is particular about the ingredients she works with. She uses only fresh sea prawns, fresh chicken (she would even reject frozen chicken wings) and to her, the supermarket is a place you go only for toilet paper and washing detergent.....

Prawn Patty 1


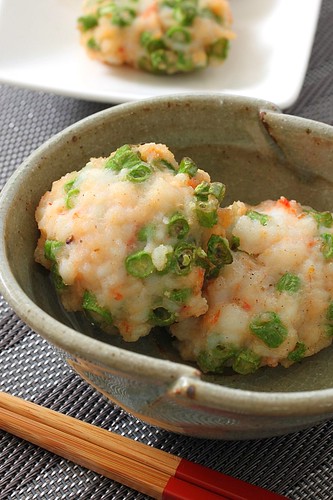
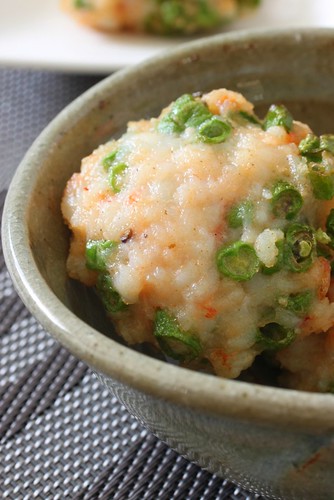
At the market, I spotted some fresh sea prawns and decided to prepare the prawn fritter dish I remember from her show. She referred to the prawns as Sea Prawns (海中虾) - I am not certain if this refers to fresh sea water prawns or to a particular species of prawns but apparently, this is the only type of prawns one should use in order to get a crunchy (爽口) texture in the prawn fritter. Other types of prawns tend to have a more mushy texture. For the less fussy, I guess any type of prawns would be fine. Possibly there are ways to treat the cheaper prawns to get a crunchy texture (e.g. treating the prawns with a little alkaline solution) but when good quality ingredients are used, cooking can become a little more fool proof... :)  The fritters are definitely a keeper. The flavourful bouncy crunch from the prawn meat went well with the crisp crunch of the long bean.
It may be too much to spend $5 for the 6 little prawn fritters (not including utilities..haha) but while I can, I would like to eat well within my means... and may all of you get to eat well too...

Prawn Patty (100)
Recipe :
Fresh Sea Prawns     300g
Long beans               6 pieces
Salt
Pepper
Sugar
Sesame Oil
Oil for frying.

Method:
1. Shell and devein prawns.
2. Use the back of a cleaver, slap down on the prawns to flatten and chop to mince.
3. Place minced prawns in a large deep bowl. Add salt, sugar, pepper and sesame oil to season. Stir well with chopsticks until a little pasty. Set aside for 20mins to marinate.
4. Dice the long beans.
5. Scoop marinated prawns with palm of hand and throw it vigorously back into the bowl. 'Slam' the minced prawns a few times until the minced prawns become pasty and gluey.
6. Mix diced long beans with minced prawns. Shape into small patties.
7. Fry patties until golden brown. If time allows, fry the patties over strong fire again just before serving.

Saturday, June 5, 2010

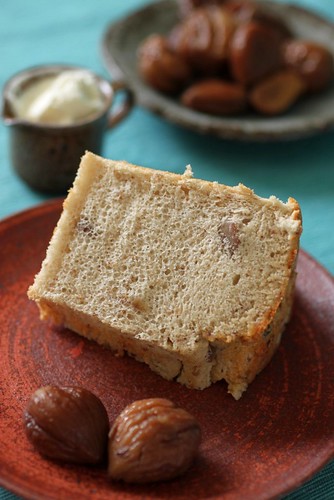
Marron Chiffon Cake - 栗のシフォンケーキ


Marron Chiffon 11

Marron Chiffon 8

Marron Chiffon 7

Marron Chiffon 3

The Chiffon Cake is decidedly my favourite cake. I favour it because it is light, cottony and low fat. I believe there are many out there who like this cake for the same reason as I do. I am quite confident in whipping up a basic chiffon - the basic pandan chiffon, orange chiffon etc do not intimidate me. However, as with most meringue based confectionery, the chiffon can become fickle and delicate when you try to disturb it.

I strive to be adventurous when I cook/bake and with the chiffon, I always have to brace myself for failures when I try something new. I've had my fair share of frustrations when I tried to introduce fresh fruits into the recipe. Chocolate, too destabilise the egg white and I remember baking 3 chocolate chiffon cakes, one after another, before I managed to get an intact, chocolate rich airy chiffon cake.

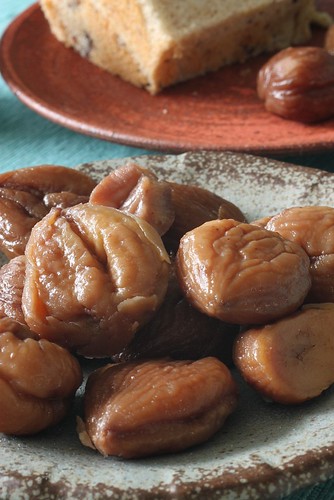
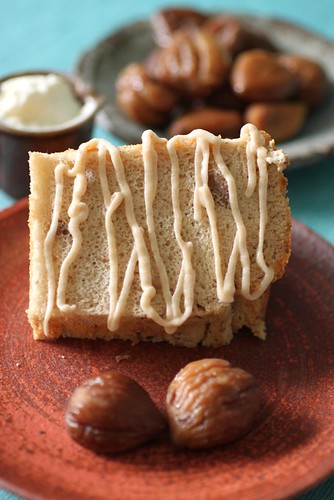
It has been quite a while since I last baked a chiffon cake and it was only when I saw the can of Marron Puree which I had bought in Japan last year, that I was prompted to re-visit the chiffon cake again. One of my favourite chiffon cake recipe book is Chiffon Cake Special Recipe by Kozawa Noriko (小沢のり子) . There are 25 recipes in the book and non-of them are plain chiffon cake. The Marron Chiffon Cake tries to recreate the Mont Blanc using a chiffon cake base. Incorporated into the cake is a blend of Marron Puree, Marron Paste and cooked Chestnut. Noriko had frosted the chiffon with whipped cream before topping it off with Marron Puree whipped cream.  I have decided to do away with the frosting as I do not want to risk ruining the cake with my lousy frosting skills.

The challenge of introducing solids into a chiffon is ensuring the meringue stays stable -otherwise, it may give way to huge voids upon baking. I don't like to add baking powder or cream of tartar when I bake my chiffon - I have this TWISTED VIEW that using baking powder and cream of tartar in a chiffon cake is cheating... but that is just me, no offense intended. Call me a chiffon cake purist but that is how I like my chiffon cake - I like to stare intensely at the egg white while they are being whipped to the right stiffness. And because I like my chiffon cake to have a soft and moist texture, I need to be very careful not to beat the meringue into spiky stiffness. The meringue should be beaten to yield firm peaks - firm enough to support the weight of the bubble whisk but still yield a slightly droopy hook at the end of the peak - that is my end point cue.

Marron Chiffon 12

Marron Chiffon 10

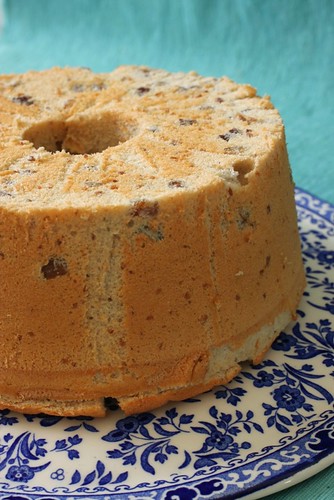
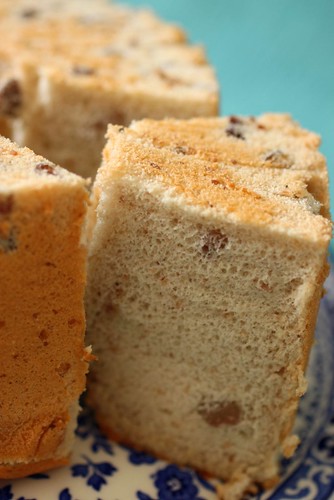
This is my first attempt at the Marron Chiffon and apart from 2 visible small holes on the cake surface, I would say that this has been a successful attempt. I am a little suprised by the elegant taste that the Marron paste and puree have imparted to the cake - made all the more pleasant with the Marron puree cream. Also, I believe I can try to use more cooked chestnut bits to yield a more fulfilling bite next time.

My next chiffon cake challenge? I have not quite decided yet. 4 down (Blueberry, Murasaki Imo, Marron and Pumpkin) - 21 more to go.

Marron Chiffon 13(100)

Recipe

Meringue
Egg White 110g
Sugar 55g
Corn Startch 5g

Egg Yolk Base

Egg Yolk 40g
Water  50g
Canola Oil  40g
Marron Paste  35g
Marron Puree  35g
Flour  55g
Diced Cooked Chestnut  90g

Cream
Fresh cream   20g
Marron Puree 20g

Method  :

1. Preheat oven to 160C.

2.In a mixing bowl,  add egg yolk, water and oil. Beat mixture at low speed until foamy. Add in Marron paste and puree.  Add flour and continue beating at low speed until thick and gluey.Fold in diced marron.

3. In a seperate mixing bowl, whip egg white until foamy. Add the sugar and cornstarch mixture in 3 additions. Whip egg white until firm but not stiff. I generally whip the egg white until the tip of the foam would still droop a little. The foam should be able to support the weight of your bubble whip.

4. Add 1/3 of meringue into egg & flour batter. Fold well to mix.

5. Stir remaining meringue to ensure no separation. Add half of the remaining meringue into (4). Fold carefully to combine.

6. Add all remaining meringue to (5) and fold carefully to combine.

7. Pour into a 17cm chiffon pan. Bake at 160C for 15 mins.

8. Remove from oven and immediately invert chiffon pan to cool.

9. Cool down completely before removing cake from pan. Slice the cake and serve with whipped marron cream.