When I started blogging about 2 years ago, someone left a nice message for me in my comment column. An outstanding baker, this lady had commented how happy she was to see a fellow Singaporean blogger bake French pastry when most of the time, the local food blogging scene are only limited to chiffon cakes, brownies, muffins.... I felt flattered by the comments but at the same time, an uneasiness had also set in. As much as I enjoy experimenting with macarons, madeleines and cupcakes, I also know that these have never been part of my core heritage. I grew up in a humble Asian household where we ate more kuehs than pastries.
It would be sad if our generation and the younger generations that follow would only know how to bake macarons and cupcakes. That is why I was really thrilled when I was able to get a place in Valerie Kong's Pau Class at Shermay's Cooking School. A hands-on class, we got to prepare our own Pau dough from scratch and we also learnt how to roll and pleat the dough - a skill I had desperately wanted to acquire and improve. Valerie's simple and clear instructions was easy to follow and quite a few of us were suprised that we were able to get the hang of it pretty quickly.
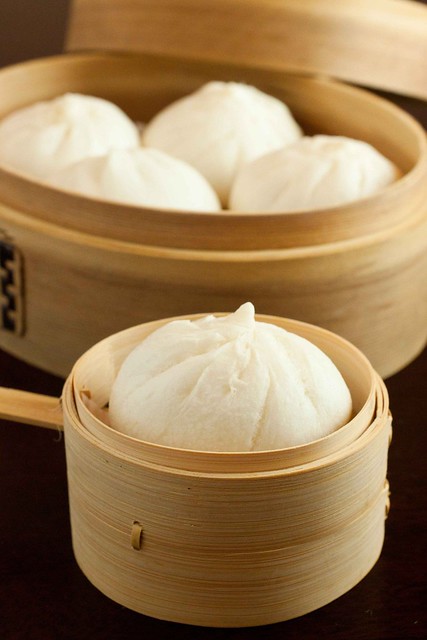
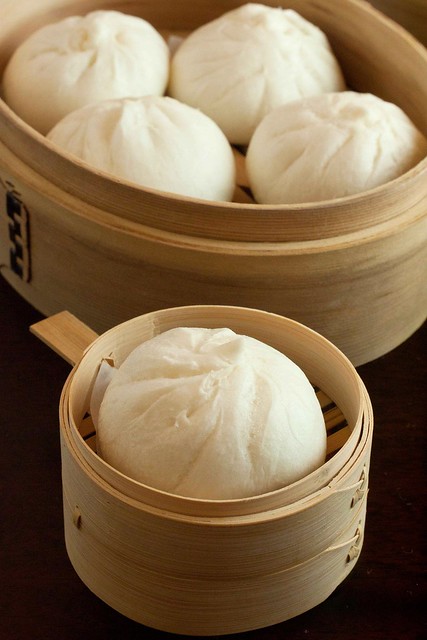
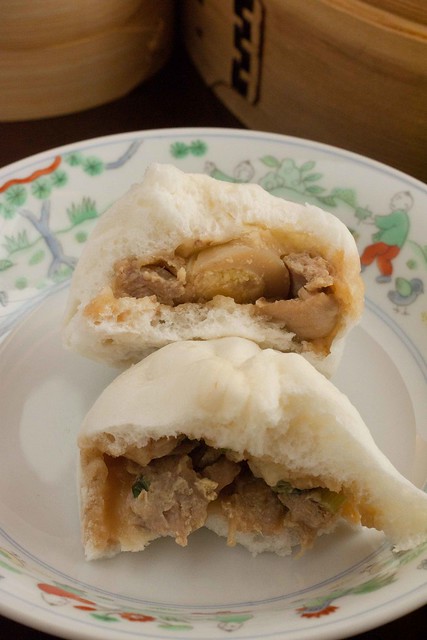
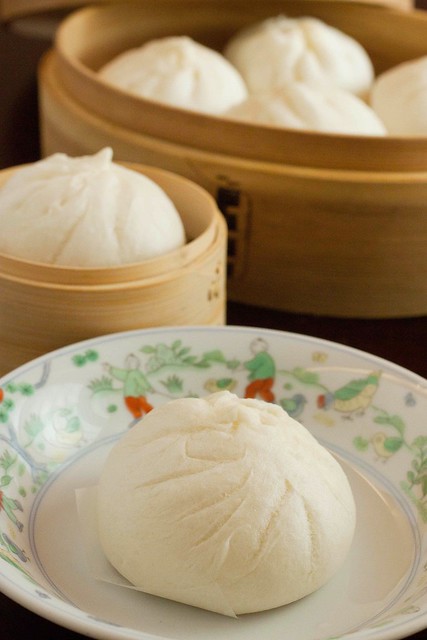
Emboldened by the session, I decided to compare the different Pau recipes I have in my cookbook library. This dough recipe that I am sharing here is not Valerie's recipe. This is a Mantou recipe that I found in a Hong Kong Dim Sum cookbook. The amount of yeast and baking powder for this recipe is much lower than Valeries' and I was intrigued by the addition of milk to the dough. What was missing from the cookbook was clear instructions. So the newly acquired knowledge at the hands-on Pau class was really valuable. I am very very pleased with this recipe - an easy dough to handle, the buns turn out very soft and fluffy. I had used Valerie's Chicken filling for this exercise so I will not publish the recipe here. However, with a dough like this, one can easily wrap it with one's favourite filling - be it sweet or savoury.
I would be proud to present these Pau to family and friends. I know that many will be pleased for these are flavours and food that we have grown up with.
P.S. : If you are interested to learn about Pau making, look out for Valerie's classes at Shermay's. I heard that all the Pau classes are now full so the earliest that these will be repeated would most likely be next year. So you may want to enquire with the school.
P.S. : I am also hoping that this would qualify for Edith's Heritage Food Trail event. Somewhat unorthodox as it does not really celebrate my Hainanese heritage in particular but I do hope you can join in the fun at Edith's.
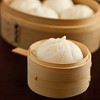
Dough Recipe : (from Dim Sum in Hong Kong)
Hong Kong Flour 150g
Dry Yeast 2g
Baking powder 2g
Sugar 28g
Milk 75g
Shortening (crisco) 2g (or lard)
Method :
1. Place all ingredients into a mixer and blend until smooth at low speed.
2. Ferment for 10mins at room temperature.
3. Blend in mixer again for 5 mins.
4. Divide the dough into pieces of 19g each. Roll out to form a round wrapping of about 2 inches in diameter.
5. Place filling in the center of the wrapping and pleat the edge to seal the bun with a round top.
6. Proof Pau at room temperature for 45 mins.
7. Steam Pau over boiling water for 15mins.

I love this! It reminds me of breakfast or snack time when I was a kid. We call it bakpao or bakpau or bakpo :)
ReplyDeleteI can see the pau is reall soft and fluffy. I made some meat pau two weeks ago too but I just used regular flour so the pau didn't turn out the way I wanted it. I will I can get some pau flour here and try out pau out. Thanks for the recipe/
ReplyDeleteI just attended her Pau class today! But my tau sar Pau went burst. :p
ReplyDeleteAnyway, the Pau u made look much much nicer then mine. I guess I need more practice.
The lady is indeed right! You step out of the comfort zone for sure.
ReplyDeleteThe last time i made pao, it was sooo bad that I could only have the filling(which my grandmother made). This post is tempting me to try it again!
@ JL- Good to find someone who has attended the class. Yes, practice is key but she has made it so easy to understand the pleating and rolling technique.
ReplyDeleteI must try your pau recipe. I have never used milk before. This may be reason it is so soft and fluffy :) Thanks for sharing the recipe. Love your photography skill!
ReplyDeleteI grew up eating plenty of paus. Those days, only can afford red bean pau. :) Thanks for participating in the heritage food trail, really love to see a Shanghainese dish if possible. That is if your time permits. Thanks for the support my friend. Appreciate it.
ReplyDeleteAiyah, Edith, I am a hainanese not a shanghainese...
ReplyDeletePaus is definitely an excellent choice for this heritage trail. I sure chomp down plenty of them while growing up... Definitely a childhood favorite. Would love yo try ur pau recipe...soon! Tks!
ReplyDeleteI attended earlier Valerie's Pau class too, after so many good reviews on her pau class on the net :) Your these paos also look soft & fluffy too :)
ReplyDeleteHere, some Hainanese coffeeshops sell Hainan Pau with different fillings.
ReplyDeleteThey are yeast raised paus, with no baking powder involved. It gives a chewy and non sticky feel to the palate. of which differs from Cantonese dimsum shops that offers paus raised with lots of baking powder that sticks to the teeth.
Your buns look so nicely pleated! I also made some meat buns last week using a M'sian cookbook but I dunno how to pleat my buns properly, it was all done by brute force eventually ;p
ReplyDeleteIf I were in SG, I would ask hubby dear to sponsor me to learn some pau-making ;)
cheers
Bee
one of my favourite
ReplyDeletewe make similar steamed buns delicious pictures
These look so professional and make me so homesick for Asia where pau's are available at nearly every street corner. I'd be useless making dough, won't even attempt, I'll just admire yours. I also enjoyed reading your fans' chit chatting.
ReplyDeleteI love the way you pleat your pau! It's so pretty! I've try pleating before, it wasn't easy to achieve this result! I love paus...I simply love it. And you chicken pau looked so good! Thanks for sharing the recipe!
ReplyDeleteJane- If you get the chance, try to sign up for Valerie's class. I struggled with the rolling and pleating too but Valerie had made it very simple to understand.
ReplyDeleteYour paus looks so soft and fluffy and the pleating so perfect...my paus always ended up with more dough than filling! Yours have such a generous portion in them!
ReplyDeleteYes on the milk as I remember helping my aunt with the pao dough when I was little. :)
ReplyDeleteSo good!
@Jeannie- I totally understand what you mean by more dough than filling... the more filling you pile on, the more difficult it is to wrap it. I am continuing to challenge myself with the quantity of filling...:)
ReplyDeleteThanks Shirley. Frankly, I found Shermay's courses just over-priced!! The hands-on session made it even more exorbitant! I had wanted to sign up for Valerie's bread sessions (in CC), but since you already had a bread recipe so good, I decided not to attend her workshop for bread anymore! :P
ReplyDeleteI think you've mastered the art of making pao! It's so light and fluffy!!
ReplyDeleteShall be making my own bao again soon. your baos look so delicate!
ReplyDeleteVery nice and soft pau! Makes me want to attend Val's class1
ReplyDeleteHomemade made paus are always the best, your paus look so soft and good.
ReplyDeleteShirley, your timing is absolutely perfect as I am planning to try my hand at making steamed char siew pau from scratch. You steamed bun looks great and fluffy, so I'm bookmarking this.
ReplyDeleteWow what perfect bao! I wonder where I could find hong kong flour around here...
ReplyDeleteThe baos are stunning!! Looks better than commercial ones! If you are selling them, i would buy one for sure :D
ReplyDeleteLove these chicken pau.. looks really pretty and I can tell it's fluffy!
ReplyDeleteThanks for a new recipe for us to try
ReplyDeleteThey say the art of making great tasting pau is in the kneading of the dough. I like vegetarian pau too. They're tasty.
ReplyDeleteI just made some chicken paus today too. But the pleating awful! I definitely need more practice. Yours look so pro. :) great job there.
ReplyDeleteI love making pau- it's really fun trying to pleat it! Your buns are pleated so nicely! :D And your mini steamer is so cute!!
ReplyDeleteYou're right, these did turn out perfectly =)
ReplyDeleteWhat is hong kong flour? All purpose, bread, cake flour?
ReplyDeleteHi Emily- Hong Kong flour is actually a very light and soft flour. The gluten level is low and I have been told that it is also very white. If you are in US, the better chinese grocery stores in Chinatown should have it. If not you can try to find a soft flour which one typically use for chiffon cake... in the US, I think the equivalent is Softasilk?
ReplyDeleteEmily- HK flour is also typically known as Shuixin fan... 水仙面粉
ReplyDeleteHi, I'm newbie to making pau, can the dough be mixed by a breadmaker instead or a hand mixer? Too tempting recipe not to try, just have to ask. Many tks.
ReplyDeleteChristine
@Christine- Yes, you can. I knead the dough with the bread hook at low speed (2) on my kitchenaide for 15mins. You need to knead until the dough becomes smooth like a baby's bottom! You will know when you feel the dough. When you are in doubt, you most are not there yet. It is really very very smooth.
ReplyDeletehi Shirley! This really looks fabulous. Will try this when I have my SG/HK food cravings!
ReplyDeleteHi Shirley
ReplyDeleteWill try out your dough one of these days. It looks so much more straightforward than the one I was using. Thanks for sharing. - shaz
Looks delicious! I just voted over at Knapkins. Now following too :-)
ReplyDeleteHi Kokken
ReplyDeleteI wonder must the pork or chicken fillings cooked first before wrapping. If the fillings are not cooked prior to wrapping, will the raw meats cook after the paus have being steamed?
Thanks
Priscilla Poh
Hi Priscilla- the raw meat will cook after the paus are steamed. Not to worry.
ReplyDeleteThese look amazing! This will be the next new recipe I try.
ReplyDeleteQuestion: the amounts listed seem like a very small amount? How many does this recipe yield? I'm wondering if I should double the recipe. Also, I'm surprised to see that this recipe doesn't use any water and yet it looks so perfect in your pictures without it! (love your photography, btw). I can't wait to try this out! =)
Love your site! This look absolutely amazing. I'm wondering how you activate your dry yeast since there is no warm water in the recipe?
ReplyDelete@Mechow: The milk replaces the water. This is indeed a small recipe. It yields about 12 small paus.
ReplyDelete@Anonymous: If you use the packet type instant dry yeast, you can just add the dry yeast to the flour without dissolving it in water first. However, as good practice, I usually mix the dry yeast with a portion of the milk to make sure that it is 'alive' before I mix it with the rest of the ingredients.
can i use canola oil instead of the shortening? thks
ReplyDeleteMay
Shirley,
ReplyDeleteThanks for sharing. I have been trying to make Pao just like those we can have it in S'pore or M'sia. I always love the Lotus paste Bun! Is that the Lotus paste bun dough receipy is the same as the chicken bun that you listed?
Carol.C
Hi Carol, yes, the bun dough recipe is the same.
ReplyDeleteHi there! I'm so attempted to start on the recipe right now but where can i find Hong Kong flour? is it those low gluten flour at the chinatown markets?
ReplyDeleteCan I use taiwanese pao flour? I dont have hong kong flour
ReplyDeleteDoes this smell like yeast after it comes out because I dont like the smell of yeast in the buns, I tried 3 times steaming, and baking buns, they all turn out smelling, and tasting like yeast.
Hi Shirley, Do you know if Valerie Kong has any cookbooks? I've been trying find some of her up coming classes but can't seem to find any...I live in Australia and I've read alot of post on her classes and would love to go to one of her classes one day. Is there any chance you could share this Chicken pau recipe via email please? Thanks Lochy
ReplyDeleteHi Lochy, unfortunately, I won't be able to share her recipe. She conducts most of her classes at the community clubs here in Singapore. You can check out http://one.pa.gov.sg
ReplyDeleteAs for the Pau recipe, I am personally quite pleased with this one that I have found in the cookbook. Hope you will give it a try,
Anonymous: I am not sure what do you mean by Taiwanese flour. Is it some form of bread flour? Hong Kong flour is a very low gluten soft flour. It is not bread flour. ( I also use Hong Kong flour for chiffon cakes)
ReplyDelete