You Will Be Redirected!
Please do not leave any more messages on this blog. I will not be publishing or responding to any more comments left here. You will be automatically redirected to http://www.atkokken.com All posts have been migrated. You will be able to locate any posts by performing a quick search at my new site. Thank you.
Sunday, October 24, 2010
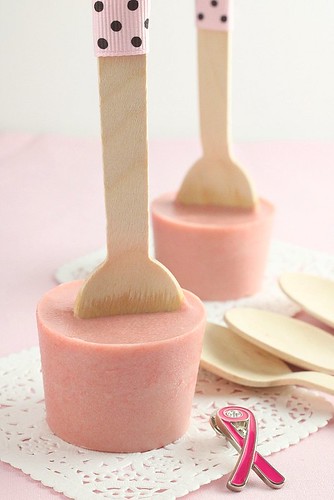
Raspberry White Chocolate Pops - Fund Raising For Pink October
We are moving into the tail end of the month long campaign in October by the Breast Cancer Foundation to raise awareness for breast cancer. Cancer, of any form is trecherous but breast cancer, in particular has an eery sense of relevance and reality among every woman. I think the heightened sense of relevance for most of us women stems partly from the fact that it is one of the most common form of cancer among women and partly from the fact that it strikes at the very core of what represents and celebrates our womanhood. I believe everyone of us have had friends who had been afflicted by breast cancer or had a close scare of getting it. I myself, have 2 friends who are breast cancer survivors. In addition, I also went through the anxiety of wondering if the fibroid lumps in my own breast would be malignant.
I recall some years back, L and myself were enjoying an intimate moment when he suddenly told me that he felt something different in my right breast. There was an awkward uneasy pause and immediately next day, I made an appointment with the doctors to have a mammogram scan.
True enough, the mammogram picked up a lump that was quite sizeable. The doctor then immediately proceeded with a Ultra sound scan for a better look at the lump. The accessment came only a few days later. Luckily, after studying the ultrasound films, the doctor told me that from the shape and the form of the lump, it did not look malignant. The better way to handle this would be to have an operation to remove the lump and perform a biopsy to be sure. Alternatively, I could let it stay and have them monitor the lump over a period of 6 to 12 months to see if the lump would change any further. Fearful of the prospect of going under a knife, I chose the second option. For the next 6 months, I went for 2 more ultrasound scans, both times, the lump remained unchanged. When I went for the yearly health screening a year later, I made sure I brought my films with me for the doctor to compare against the new scans. Nowadays, I make sure I do a mammogram and ultrasound scan 2 times a year and it still slightly freaks me out whenenver I do my scans, fearful that they may find something unpleasant.
I count myself priviledged enough to be eligible for regular scans like these. Yearly health checks are covered by company and as I don't normally fall ill, my yearly doctor's allowance are more than enough to cover me for additional scans. Not everyone is as lucky as I am....
In Singapore, the Breast Cancer Foundation (BCF) is a non-profit organisation that strives to increase awareness of breast cancer, promotes early detection and treatment of the disease, and provides support services. I have never experienced the trauma of going through cancer treatment and I fervently pray that I will never have to experience it but for those who have been dealt a shorter hand in life, they will need all the support they can get - be it financial or emotional.
During this month of October, BCF Singapore launches its own Pink Ribbon Campaign in the hope to increase awareness and raise funds to support the affected. One of the brilliant team ups for the campaign is with DBB to come up with a series of provocative bodyart posters to raise awareness for the event. I love the driving catch phrase of " Are you obsessed with the right things? "... knowing that Vainity is a Woman's middle name, this poignant approach delivers a heavy dose of reality and drives home the significance of perspective of breast cancer. This is my favourite....
" Are you obsessed with the right things? The difference between a pimple and breast cancer is that of life and death. Regular breast checks are the best way to fight cancer. Show support for the women in your life by purchasing a Pink Ribbon."
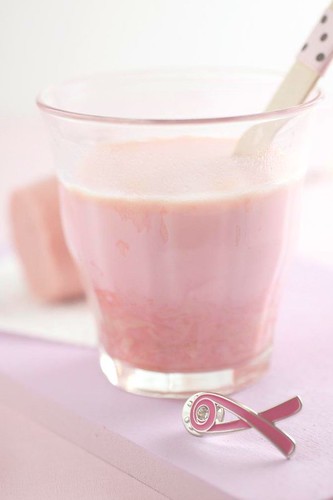
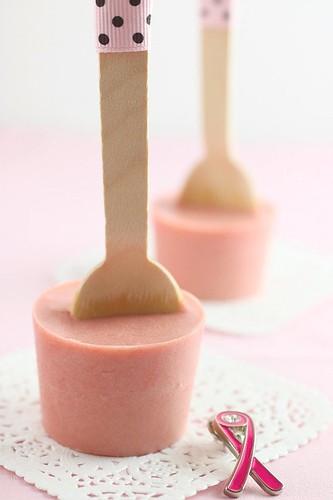
In support for the Pink Ribbon Campaign, I am sharing here my simple recipe on Raspberry White Chocolate Pops which I first saw at the Donna Hay store. These chocolate pops are supposed to be stir- melted into hot milk to yield a creamy white chocolate drink.
In addition, I am also helping the Singapore Breast Cancer Foundation to sell their Pink Ribbon Collar pins in the hope to raise funds for their support efforts.
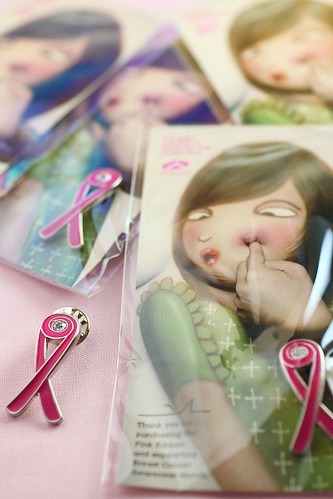
Each pin costs S$5 and I will be returning the pledge cards to BCF by 15th Nov. For those who wish to purchase a pin, please drop me a comment or email with your contact detail. Due to logistics limitations, I will only be able to open this fund raising to those who are residing in Singapore.
I hope to get your support for BCF. Thank you!
Recipe
White Couverture Chocolate 125g
Pink colour paste A few drops
Raspberry Extract 1/4 tsp
Method
1. Melt white chocolate in microwave oven or over a bain marie.
2. Add colouring and extract and stir until smooth with a spatula.
3. Pour chocolate into a small paper cup or mold. Position a disposable spoon in the cup. (my bamboo spoons are from Donna Hay :))
4. Refrigerate until chocolate is set.
5. To enjoy, heat up a cup of milk and stir (4) into the milk.
Wednesday, October 20, 2010
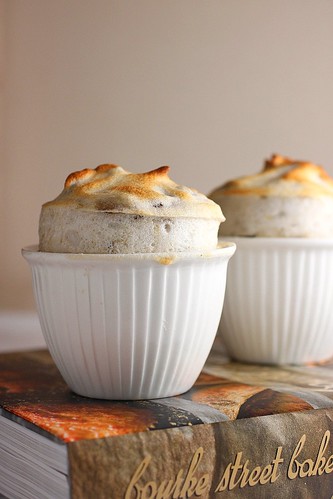
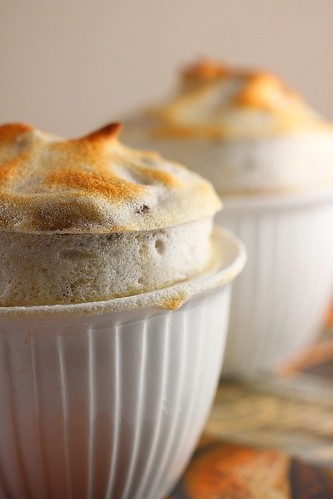
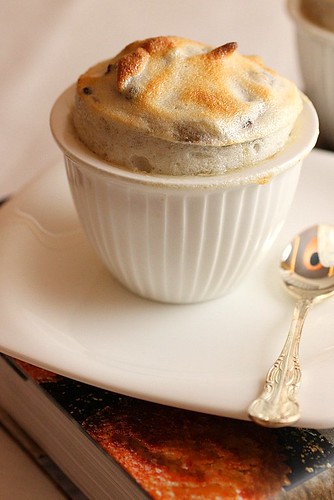
Banana Macadamia Nuts & Chocolate Souffle
Once in a rare rare while, all the forces come together and make everything gel together so effortlessly that you are tempted to believe that you could possibly be a genius...
At the risk of sounding shameless, that was exactly how I felt last night when I made this as a last minute push to generate my second post of the week before I fly off to Bangkok for the rest of the week. Amidst all the commitment at work, I only had time to bake and photograph this while Ugly Betty was airing over TV last night....
This being a new recipe for me and for the infamously temperamental Souffle at that, I was very very apprehensive. Unsure if it would rise or if it would retain its form after baking, I had to take a few precautions. I chose to work with minimum fuss, using the most sturdy cookbook I could find on my shelf as the only setting prop and had my camera mounted on standby. While waiting for the butter to soften, I even did a few dry run shots with the empty ramekins just to figure out how I could position the souffles... if they behave. When working with a souffle, always bear in mind, the souffle waits for no one, you have to be ready for it.
Unlike the last souffle I made, this one took longer to rise in the oven and had me worried for quite awhile.
I had to extend the baking time to brown it properly and when I took it out of the oven, I wasn't sure if it was done.
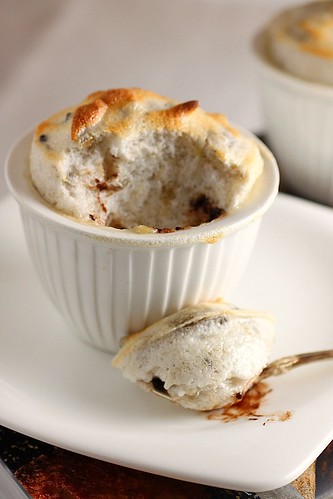
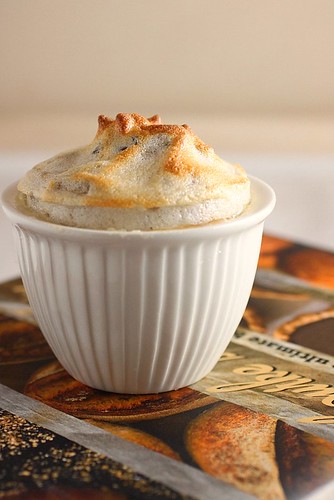
Working quickly to transfer these to my 'photo set',I proceeded to click quickly, fearing all the while that the airy foam would collapse on me. Luckily, for about 10-15mins these babies held their form for me. You can actually see them receding in the photos.. the first shot above was how they looked when they were just out of the oven. By the time I reached the last shot, they looked like this :
By the time I finished my last shot, Ugly Betty had just saved Daniel from the cult group and all was well. Only then,did I savour my first spoonful of the rushed effort. I suppose with bananas, chocolates and macadamia nuts it could never taste bad even if the souffle flops on you- it was awesome!
So, who is afraid of La Souffle??
Recipe
Meringue
Egg White 100g
Castor Sugar 40g
Base
Ripe Banana 300g
Chocolate Chips 20g
Macadamia 20g (chopped)
Method:
1. Peheat oven to 170C. Butter and sugar coat ramekins thoroughly.
2. Grate banana and set aside. (my banana actually ended looking more mashed than grated.)
3. Whisk egg white and castor sugar until stiff peaks are formed.
4. Fold bananas, chocolate chips and nuts into (3), working gently to avoid deflating the meringue.
5. Spoon or pipe (4) into ramekins. Using your thumb, go around the rim of the ramekin to clean up the edge of the ramekin.
6. Bake for 8-10mins until browned. (I baked for 15 mins)
Sunday, October 17, 2010
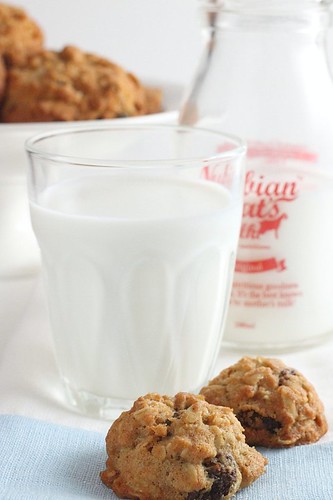
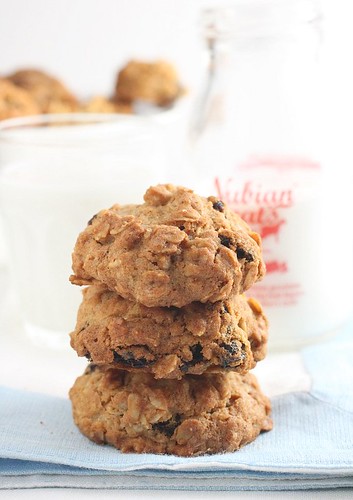
Oatmeal Raisin Cookies
Cable TV here is on a America's Next Top Model overload...for it appears, whenever I turn on the TV, they are screening some rerun from the past season. As I watch the pretty young girls pose, pout and bitch among themselves, I found an aspect of the show which strikes a chord in me.
Every week, the girls have to do a thematic photo shoot whereby the weakest performer at the shoot generally gets voted out of the competition. Some of the criticisms and comments made by the photographers sound oddly familiar...
1. they kept telling the girls to seek out the light, watch where the light is coming from and let it fall on their faces.
2. they get frustrated when the girls do not bring variation to their poses, branding them boring and listless.
3. they also get unimpressed when eventually only 1 to 2 frames are usable among the 50 odd frames each contestant is given to work with.
At times, when the judges are deliberating, I would imagine myself, holding my camera standing in front of the judging panel... listening to exactly the same comments which are all so applicable to the photos I have displayed here. Take today, for example, I must have shot some 100 frames and when I eventually sort through them in my computer, was dismayed to find most of them unusable. Lighting is always the main culprit followed by unimaginative composition that gets further restricted by the tripod mount. As a result of which, each frame only shows incremental differentiation from the previous one.
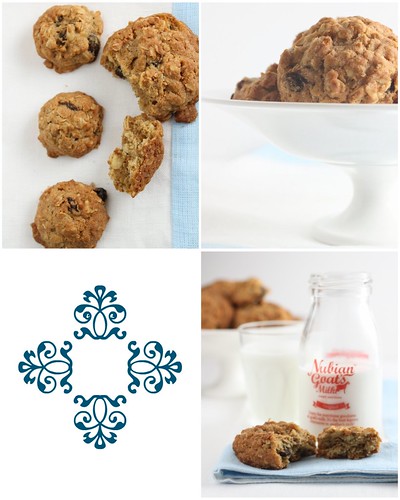
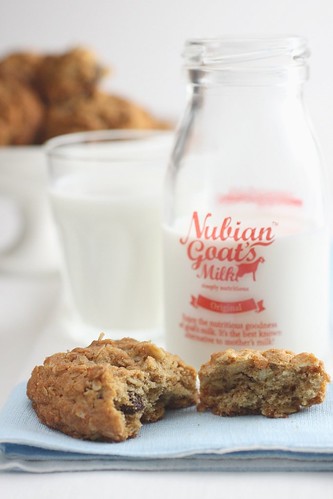
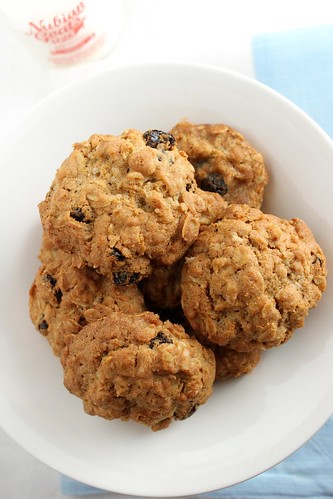
Luckily these Oatmeal Raisin Cookies are more pleasing. When I saw these at Edith's blog last week, I knew I had to bookmark this for trial. I had always wanted to bake a cookie with rolled oats. I modified the recipe a little and replaced plain flour with a mixture of wholemeal and corn flour. I was hoping to get a more crunchy cookie but I guess the modification calls for more than a dash of corn flour. Nevertheless, this soft cookie is still delicious and more importantly, I am now more inspired to make more cookies soon.
Recipe (adapted from Precious Moments)
226g Unsalted Butter
180g Light Brown Sugar
2 Large eggs
1tsp Vanilla Extract
185g Wholemeal flour
10g Corn Flour
1 tsp Baking Soda
1 tsp Salt
1 tsp Ground Cinnamon
260g Rolled oats
140g Raisin
Method :
1. Preheat oven to 175C
2. Cream butter and sugar till creammy and smooth
3. Add in Vanilla Extract
4. Sift flour , baking soda, salt and cinnamon together.
5. Add (4) into butter & egg mixture.
6. Stir in oats and raisins.
7. Use an ice cream scoop to portion batter onto baking sheet.
8. Bake for 15 mins or until golden brown.
9. Cool down completely on cooling rack and store in air tight container.
Wednesday, October 13, 2010
More Inspiration From Donna Hay - Blue Cupcakes
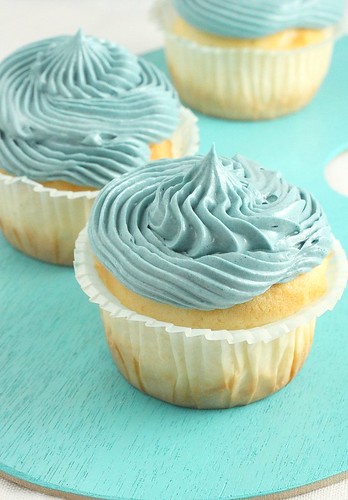
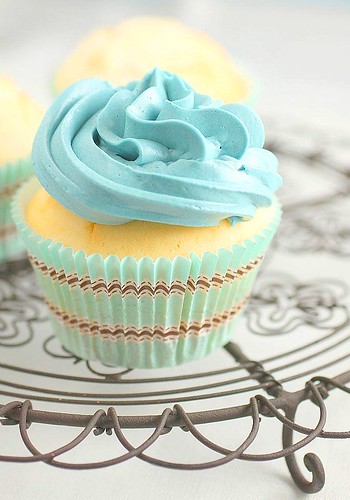
There is something rather magical about the soft teal blue colour... For generations,Tiffany's little blue box has set every girls' heart aflutter. Then there is Homemaking Guru, Martha Stewart's signature blue logo and blue packaging which renders everything more pristine and perfect. Donna Hay, Australia's own accomplished food stylist, cookbook and magazine editor, too chooses to work with the soft powdery blue as one of her dominant trademark colour. I am guessing that somehow, the Tiffany Blue (that's what I like to call it) hue has the magical ability to conjure up an impression of the demure, well bred and... blue bloodedness. That rank within the social hierarchy that very few belong to but many are fascinated by... and some quietly covet at....
No, I am no Bree Van de Kamp or Charlotte York... I am most likely their anti-thesis. However, I do admire and appreciate polish, perfection and beauty... and if by adding a dash of Tiffany Blue to my photos can afford me a few short lived illusional moments of grace and polish, I would gladly do it.
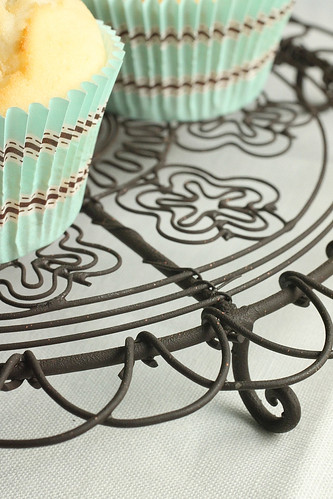
I know I am a quirky free spirit by nature and therefore to help distract from my shoddiness, are pretty white pleated paper cups from Donna Hay, the blue cupcake liners that came in the same collection as the pink ones I used earlier and my favourite purchase from the store.... the ornate wire cooling rack. (I still have a stash of goodies from the store... but it wouldn't be tasteful to jam pack everything into the same photo....:) )
The cupcake recipe I have chosen here is one from Martha Stewart's Cupcakes. Swiss Meringue buttercream paired with a rather unusual white cupcake.... not my favourite cupcake recipe, I have to admit. This tastes a little like a dense egg sponge. I prefer my cupcakes to be moist and fine crumbed... a blondie or a basic yellow pound would be my choice if I were to do this over again.
Recipe
White Cupcake from Martha Stewart's Cupcakes
3 1/4 cups Sifted cake flour
1 1/2 tsp Baking powder
1/4 tsp Salt
1 tbsp Vanilla extract
1 cup plus 2 tbsp Milk
1 3/4 sticks Butter, softened at room temperature
1 3/4 cup Sugar
5 Large egg whites
Method :
1. Preheat oven to 180C
2. Cream butter with sugar together until pale. Add Vanilla extract.
3. Add dry ingredients (flour, salt, baking powder) in 3 batches, alternating with 2 additions of milk.
4. In another mixing bowl beat egg whites until firm peaks are formed.
5. Mix 1/3 of meringue with (3). Fold in rest of meringue gently in 2 additions.
6.Spoon batter into cupcake liners until 3/4 filled.
7. Bake in oven for 18 -20 mins.
8. Cool down on wire rack for 10 mins. Turn out cupcakes onto wire rack to cool completely.
9. Frost with blue swiss meringue butter cream.
Swiss Meringue butter cream recipe here. (tint with blue colour gel)
Monday, October 11, 2010
Chestnut Rice - My Version Of The Kurigohan
In perennial sunny Singapore,we don't get to witness the wonders of changing seasons. We miss out the thrills of watching leaves budding from bare branches, the harvesting of raspberries followed by strawberries and blueberries(not sure if I get the sequence right)in spring, the abundance of stone fruits and grapes in summer and the dawning of figs,chestnuts and clementines in winter... As I do get to travel quite extensively for work all over Asia, I have become quite accustomed to ask my colleagues 'what is in season now?'. As such, I have programmed at the back of my mind... to look out for Alfonso Mangoes in India in April- May, Strawberries in Japan/Korea in January, Peaches and grapes in Japan/Korea in August.
Then of course, we are lucky to be in the 'middle' of the globe - hence when the northern hemisphere starts to bundle up for winter, Australia and New Zealand wake up to pour in their vibrant spring/summer crop for us to enjoy... So now, it is Strawberries bumper time, thanks to imports from Australia!
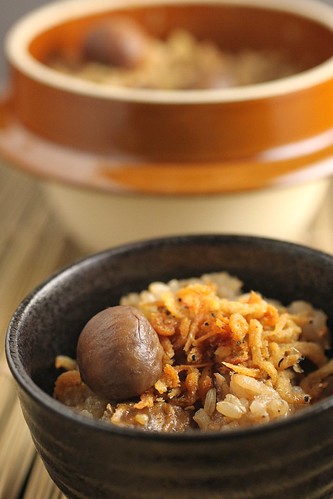
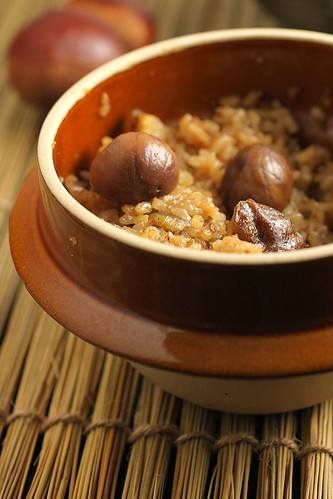
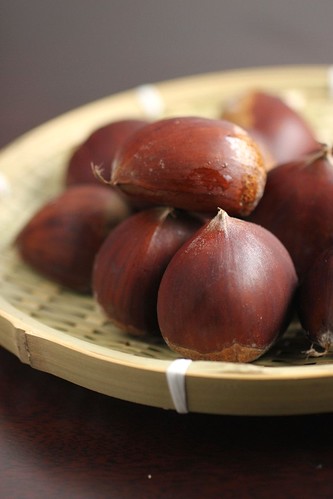
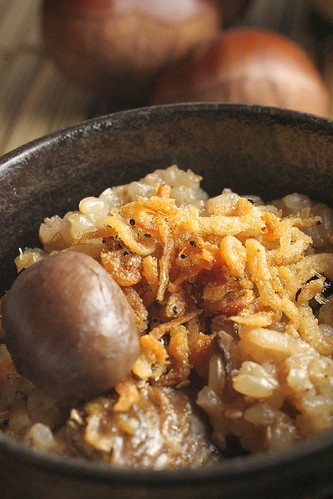
It was more than a week ago before I left for Sydney that I spotted these plump and beautiful chestnuts from Japan. They have been left in the fridge all this while and I knew that I cannot afford to dither any longer, lest they all start to perish away. I chose to use them for a basic dish that I felt would least alter the taste of the chestnuts. Kurigohan or Chestnut rice is a simple Japanese rice dish that is simply seasoned and cooked with chestnut. I had wanted this to be a simple one pot dish for dinner and decided to add a little more flavour to it by mixing in some deep fried silver fish.
My Japanese friends would probably reprimand me for contaminating the simple sweet taste of the Kurigohan with shots of strong flavour from the silver fish but for my Singaporean taste buds, the combination worked out well and I thoroughly enjoyed my dinner...
(Roasting chestnuts though, was not fun. I did not know when to take the chestnut out of the oven and once it was out, I burnt my fingers trying to peel off the shell.... I would just use ready cooked chestnuts when I cook this next time...)
Recipe :
Silver Fish 100g (Deep fried in oil until golden brown.Drain)
Chestnut 300g
Japanese short grain rice 320g(I used short-grained brown rice)
Short grain glutinous rice 150g (soaked in water overnight)
Dark Soy Sauce 2 Tbsp
Salt 1/2 tsp
Mirin 2 Tbsp
Dashi Stock 500ml
Preparation :
1. Use a knife, etch a cross on the flat portion of the chestnut.Roast chestnut in oven at 220C for 20 mins with etched face up. When roasted, the etched lines will split and 'flower'.
Peel off the shell while the chestnuts are still hot.
2. Wash short grained rice and glutinous rice over running water. Place rice in a rice cooker. Add dashi,soya sauce,salt and mirin. Add roasted chestnut and cook in rice cooker until done.
3. Before serving, sprinkle with sesame seeds (typically, black sesame seeds are used, I used white sesame seeds).
4. Serve with a spoonful of crispy silver fish.
Friday, October 8, 2010
Sydney Inspiration - Donna Hay's Double Chocolate Cake
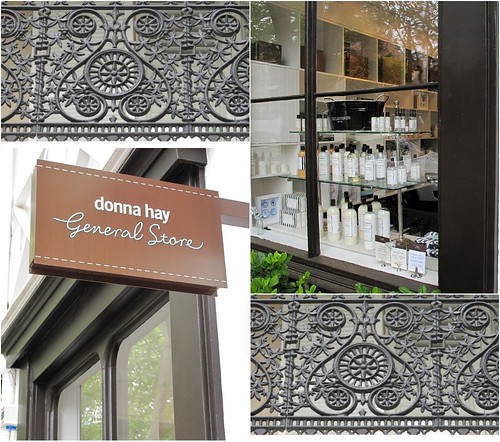
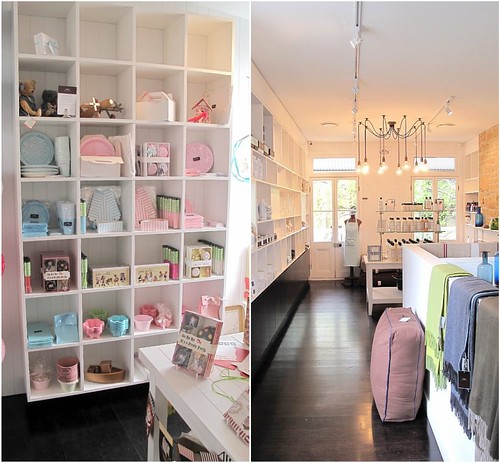
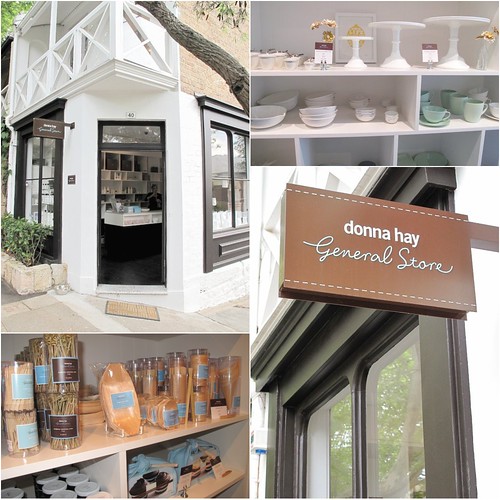
I don't normally travel down under for work but last week, a rare issue came up and I had to make my first ever trip to Sydney. It was a 2 day work trip but I took the opportunity to stay on for 2 more days on my own. As for most trips I make nowadays, I have ceased to be ambitious and stopped bothering with pre-trip research. There was only one thing I knew I wanted to do and that was visiting the Donna Hay general store. I had first read about it at Not Quite Nigella's blog and had been quite fascinated by it ever since... and who wouldn't? Having been captivated month after month by the bright and breezy pages of the Donna Hay magazines,I knew I simply couldn't miss the one and only Donna Hay General Store on this planet.
Nestled in a trendy residential district, it is definitely outside the main tourist belt. I took more than an hour getting there from City Center by train,bus and alot of walking. However, I really didn't mind, I loved wondering in the suburbs,feeling the local pulse. Situated away even from the main commercial section of the suburb, this was an unlikely location for a store which in my opinion,makes this boutique store even more charming.
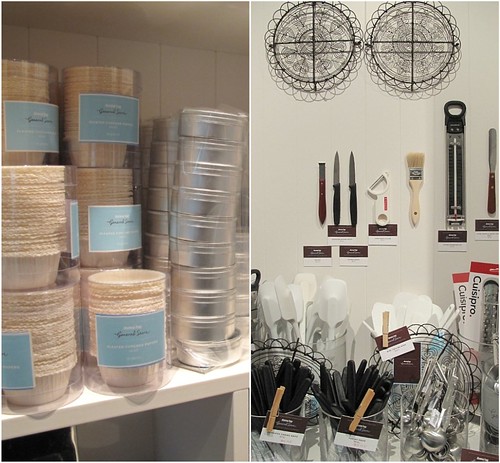
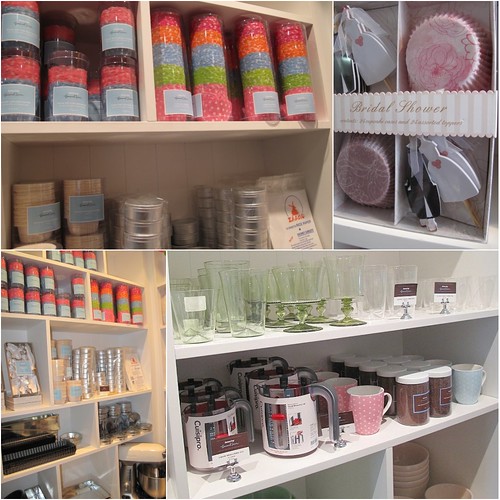
I was able to recognise styling props used in Donna Hay's beautiful photos among the merchandises. It wasn't a big store and the price tag was not exactly pocket-friendly but still that didn't stop me for lingering there for over an hour and leaving with a bunch of merchandises. The biggest draw has to be the chic and colourful cupcake/muffin liners. Unique in design, these are more expensive than your usual liners but not unreasonably exorbitant.
Then there were the ceramics and cake stands that came with clean lines and neutral pastel colours that are so Donna Hay.
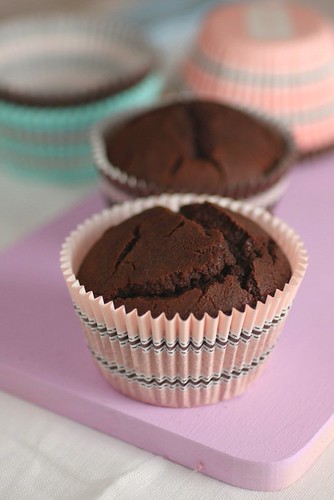
To celebrate my purchase at Donna Hay, I decided to make the Donna Hay Double Chocolate Cake which I had first seen at Evan's blog. I had dreamt of creating the photos with the same fresh and luminous aura that is the signature of Donna Hay's magazines but shooting the cupcakes at night was tricky and I would have to admit that I haven't done justice to Donna Hay's beautiful cupcake liners.
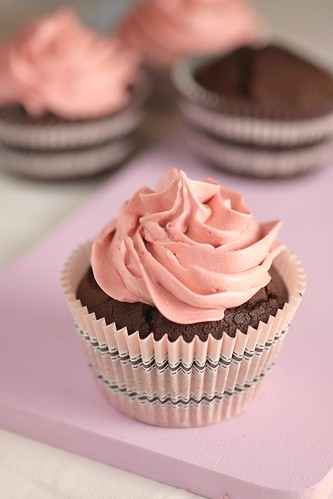
The cake is absolutely delicious - fiercely chocolatey without being overly rich. It went really well with the fluffy Swiss Meringue Butter cream frosting- This is definitely a cake that does not require fancy liners to shine, I hope you get to try it too.
Recipe :
Cupcake
125g unsalted butter, softened
1 cup plain flour
3/4 cup sugar
1/4 cup cocoa powder
1.5 tsp double acting baking powder
2 eggs
1/2 cup milk
1 tbsp vanilla extract
150g dark chocolate, melted
For Frosting
227 g unsalted butter, slightly softened
3 egg whites
1/2 cup sugar
1 tsp vanilla extract
Cupcake
1. In a bowl, sift flour, cocoa powder and baking powder together
2. In a mixing bowl, beat butter with sugar until pale and creamy.
3. Add egg one at a time and continue to mix until homogenous.
4. Add Vanilla extract.
5. Add flour and . Alternate with milk addition. Drizzle in melted chocolate and mix well.
6. Scoop into paper liners and bake in a 160C pre-heated oven and bake for 20mins.
7. Cool down cupcakes completely and frost the cupcake using butter cream below.
Swiss Meringue Butter Cream:
1. Place egg white and sugar in a mixing bowl. Place this over a simmering water bath and whisk with a hand whisk until sugar dissolves.
2. Transfer egg white into a mixing bowl and whisk with a bubble whisk , until peaks are firm but fluffy.
Add butter, one spoonful at a time. Change over to a paddle fixture and contiue to beat the butter cream to remove bubbles. At this point, you can add your flavourings or colours. For this, I added a few drops of pink colouring.
Monday, October 4, 2010
Char Grilled Calamari - Inspiration From F.I.S.H
This is a long overdue post... a restuarant review post which I should have posted weeks ago before I had to go to Korea,India and Sydney...In fact, 3 hours before my departure for Sydney last week, I was still taking photos of the grilled calamari which I had been inspired to cook from my lunch at F.I.S.H.
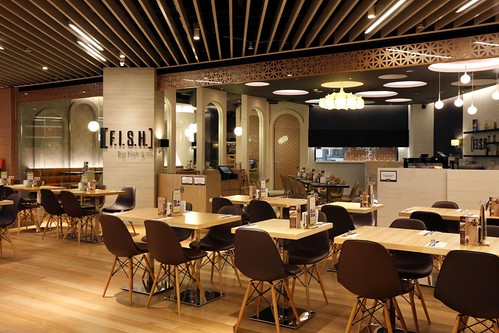
I am suspecting that people staying at the East side of Singapore may be more familiar with this innovative dining option offered by Fish & Co. Group. First opened at Tampines One, F.I.S.H offers a more eclectic selection of western cuisine originally targeted at their usual Fish&Co clientele base. Though why would they continue to target at their Fish & Co Clientele base was quite beyond me but sometimes, market forces take one by suprise and in this case, I believe it has turned out to be a pleasant suprise for Fish & Co.
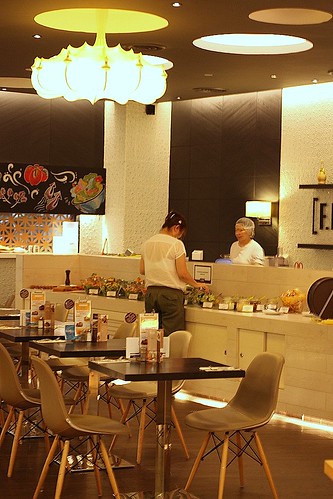
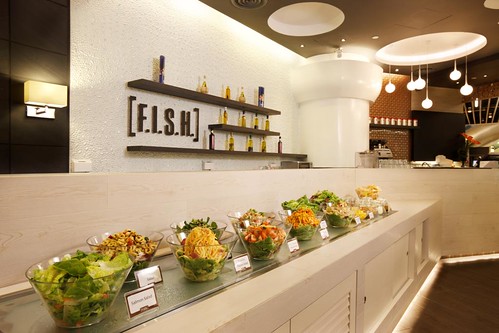
Unwittingly, the F.I.S.H dining concept,that includes the exotic mediterranean fusion flavours ,the fresh quality produce at their salad bar and the trendy chic decor, has a unique appeal for the young trendy working crowd. F.I.S.H's latest and 2nd outlet opened at 313@Somerset - my favourite establishment among the slew of new retail malls that has dotted the shiny new Orchard Road.
Unlike Fish&Co which serves only seafood, F.I.S.H's more expansive menu allows room for more in the way of steak and poultry. Positioning itself in between tacky family restaurants and more upmarket CBD style bistros, F.I.S.H offers very good value for money. They buy good ingredients,prepare them with interesting flavours and present them with few other things on the plate. The few brilliant elements for me are :
1. The salad bar;
2. The tasty starters;
3. The desserts air flown from US.
The cosy salad bar has quickly become one of F.I.S.H's signature feature. When you see well manicured baby spinach leaves sitting resplendently in a salad bowl all by itself, you know you will be eating well. Apart from the standard greens,the Salad Buffet bar also offers other more sophisticated prepared salads such as Garden Tomatoes with Basil, Prawns Pineapple Mint, Chilli Crab Salad and Shitake & Enoki Mushroom Salad. The spread varies everyday. On its own, it costs $12.90++ but can be added on to any main course for $5.90++. Most of the main courses that comes with the salad buffet will not cost more than $20++ anyway.
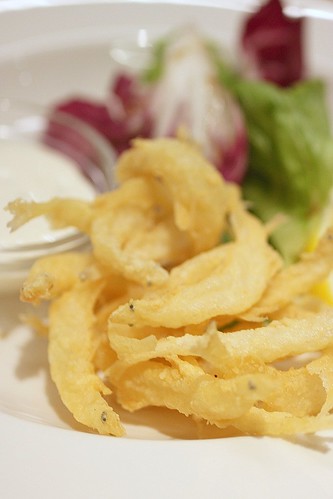
We all loved the starters. We cannot imagine anyone not liking the crispy Silver Fish. Batter coated and fried to a savoury crisp, this is one dish that would go well with a cold cold beer.
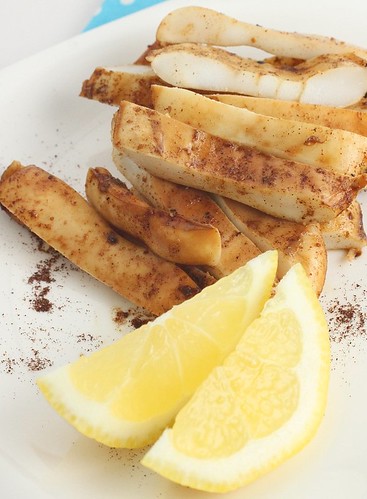
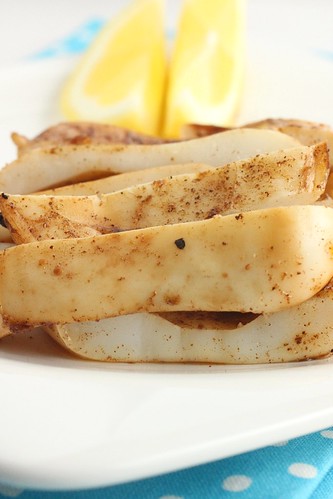
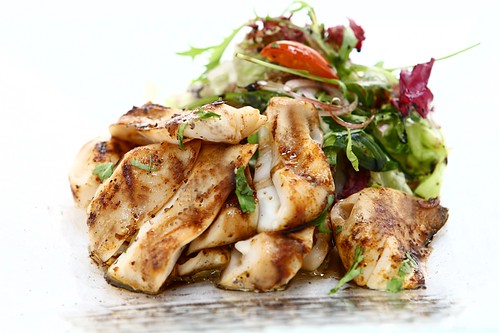
The char grilled peri peri squid is my favourite. Seasoned simply with various paprika and chilli spices, this was char grilled to a perfect smoky flavour without turning it into rubber bands. And yes, for those of us who love to cook, you would bookmark it immediately to duplicate at home... So there you have it, a side by side comparison of my version and F.I.S.H's version... taste is definitely different but when you don't have the chef's recipe, you will just have to improvise on your own... I will probably get closer if I return to F.I.S.H and make a few more orders of the Char Grilled Peri Peri Squid!
Before I proceed to talk about their air flown desserts,I should follow the dining sequence and talk about our main-dish experience.
Apart from the Hei Bee Hiam Spaghetti, we were not disappointed with the main courses but neither were we blown away.
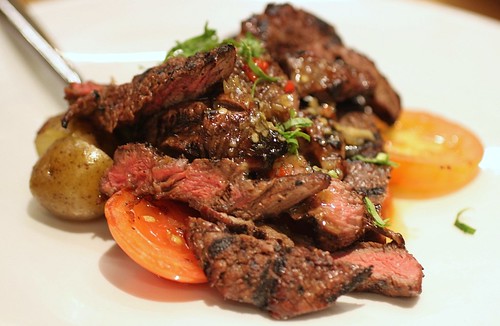
The Terriyaki Ribeye Steak(S$16.90++) was tender and juicy.However, we struggled to identify the Terriyaki flavour - The beef appeared to be slightly char grilled(which was great) and we wondered if it was due to that that the Terriayki sauce had morphed to resemble a satay sauce...Tasty dish and we were happy with the flavours.
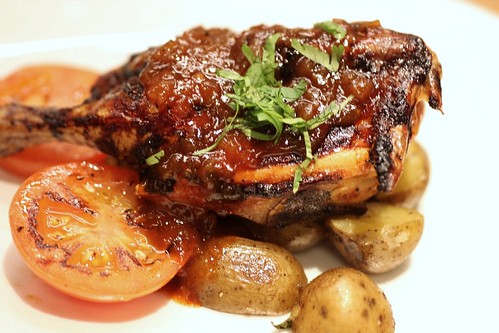
The Grilled Monzambique Spring Chicken ($16.80++ with Salad)is supposedly one of F.I.S.H's signature main courses. An exotic burst of sweet,sour and spicy flavours greet you at first bite. Flavourful and appetizing,no doubt but it did not leave a lasting impression with me.
You can't go wrong with The Fried Mediterranean Fish ($14.80++ with Salad). The battered fried fish is Fish&Co's forte and we knew it was a safe choice when we ordered this. Coated with a light, thin, cripy batter, this was truly delicious and I could now understand why Fish&Co got so popular.
We ordered the Hay Bee Hiam(spicy Fried dried prawns) Spaghetti with alot of anticipation, curious to see how the chef would merge a fiercely local flavour with the pasta. It turned out to be the biggest disappointment of our meal. Apart from being greasy and bland,the kick of the spicy crispy Hay Bee Hiam was missing. We all felt that this was quite a shame,for if done correctly, this could be the IT dish for F.I.S.H - something different that people would think of coming back for more ...
Up to that point, we had not found a single main course dish that had cast an impression compelling enough to draw us back again.
Then came the desserts.
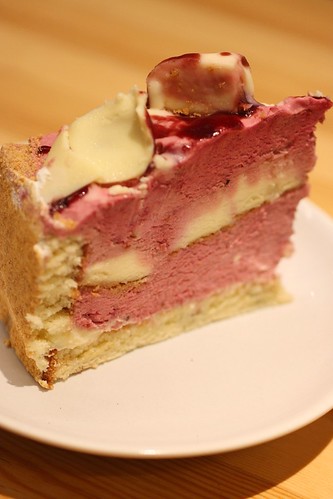
Both the Raspberry Eruption Cheesecake ($6.95++) and the Chocolate Pecan Cluster($6.95++) were brilliant. Air Flown from US, these are rich, glorious and indulgent with a cup of Illy's coffee.(yes, they serve Illy's coffee) My colleague was a happy lady when she dug into these and gaily declared that she would come back just for cake and coffee anytime.
I have no doubt that F.I.S.H will catch on with the local diners here. Priced lower than Fish&Co, offering great quality Halal food, it probably already has carved out a market position for itself. When I went for my lunch during the Ramadan Fasting month, things were quiet but when I returned one evening 2 weeks ago, the place was jam packed and bustling.
For those who are not going any time soon, you can try to fool around with my grilled calamari recipe first. You will learn to appreciate the Char Grilled Peri Peri Squid better when you finally get to it... :)
F.I.S.H
313@Somerset
313 Orchard Road #B3-37/38
Singapore 238895
(65) 6634 0478
(A big thanks to Sharon Poh of Fish & Co., for sponsoring the lunch.)
Recipe
500g Squid
2 tsp Smoked Paprika
1 tsp Ground Cumin
Pinch Cayenne
1/2 tsp each Salt and Pepper
1 clove Garlic, Minced
1 lemon
1/4 cup Olive Oil
Method :
1. In a zip lock bag, mix smoked paprika, cumin, salt,pepper,Cayenne and garlic together.
2. Add Olive oil to (1) and mix until a paste is formed.
3. Scoop out 2 tbsp of the paste and place in a bowl, add lemon juice, and stir to combine.
4. Add squid to the remaining paste in the zip lock bag. Marinate for 1 hour.
5. Heat up a grill pan. Grill the squid and cook for 2-3mins per side until charred. Remove from heat and drizzle with reserved marinate from (3)
Subscribe to:
Posts (Atom)