Announcement

This site will be migrating to a new address.
Please visit me at @Køkken and change your subscription to this blog to my RSS Feed

You Will Be Redirected!

Please do not leave any more messages on this blog. I will not be publishing or responding to any more comments left here. You will be automatically redirected to http://www.atkokken.com All posts have been migrated. You will be able to locate any posts by performing a quick search at my new site. Thank you.

Saturday, December 31, 2011

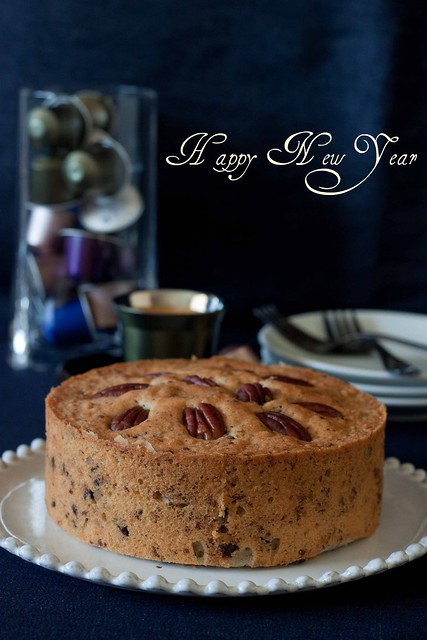
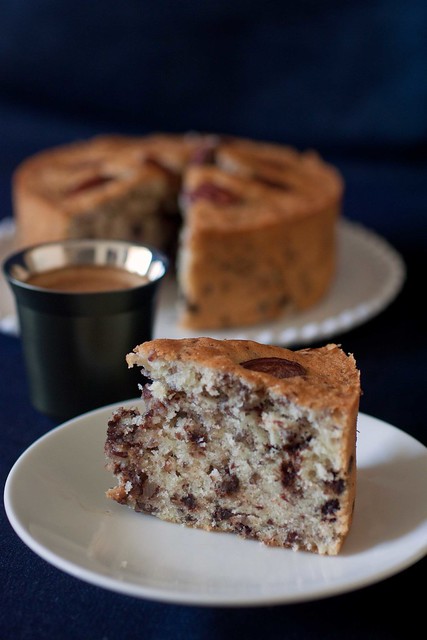
Pecan Cake & Best Wishes!

Pecan 2

Pecan Cake7

Pecan Cake11

2011 would not have been the same for me without Køkken69 and all the lovely acquaintances and friends I have met here.

Despite my crazy travel work schedule, I am suprised that I have pressed on and this space has sustained.
Looking back, I want to believe that I have continued to improve in what I am doing here and am thankful for all the silent and not-so silent visitors who continue to grace this space.

Thank you for visiting.
Thank you for commenting.
Thank you for trying out the recipes published here. The greatest joy I derive out of this space is when I receive excited feeedback for the recipes. Knowing that my posts managed to inspire is priceless!

I leave you with this very humble and down to earth Pecan Cake adapted from Alex Goh's Walnut Cake Recipe in Creative Making Of Cakes.  Happy New Year and may we all have many many reasons to rejoice and celebrate in the new year!

Pin It  

Pecan Cake10(250)
Pecan Cake
Recipe :
(A)
250g                Butter
20g                  Sugar
(B)
7                      Egg Yolks
(C)
7                      Egg Whites
170g                Sugar

(D)
190g                Plain flour
1/2 tsp             Baking powder
1/2 tbsp           Milk Powder (I omitted this as I ran out of milk powder)

(E)
160g               Chopped Pecans (You can replace this with other nuts such as Walnut)
100g               Chocolate Chips

Method :
1. Preheat oven to 180C. Cream (A) together
2. Add (B) to (A) and mix until light and smooth.
3. In a separate clean mixing bowl, whip (C) until stiff peaks are formed.
4. Fold meringue into butter and egg yolk mixture (2) until well combined.
5. Sift (D) into batter and fold until well combined. Add (E) and mix until well incorporated.
6. Pour batter into lined baking tin and sprinkle with some pecan nuts on top for decoration. Bake cake at 180C for 50mins or test until skewer comes out clean.

Wednesday, December 28, 2011

Summer Sangria

Sangria1

Sangria3

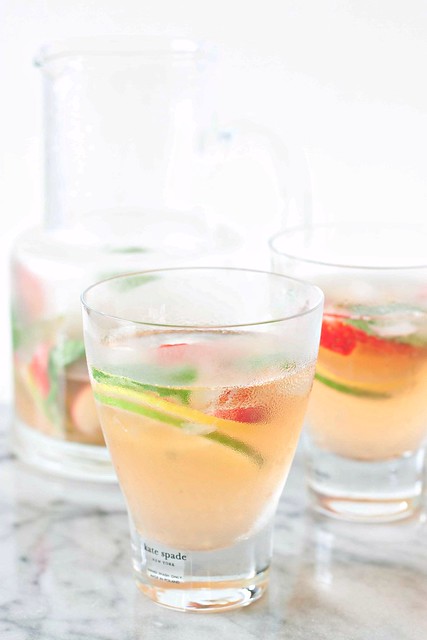
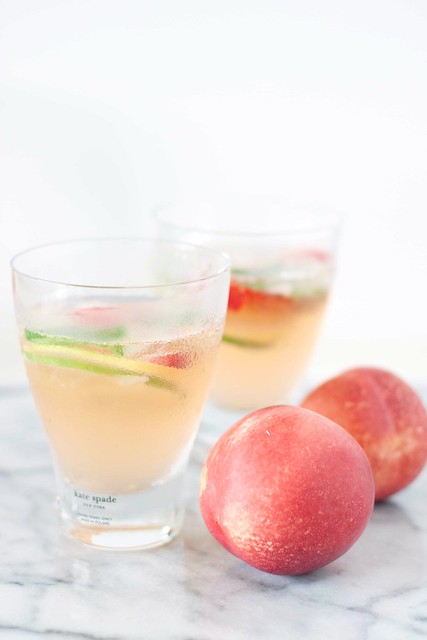
A party is not complete without booze. I still remember the drink I prepared for my first house warming party was a Bellini,  prepared with peach puree and champagne. I was not totally into cooking then but still managed to wow my guests with curry chicken and beef rendang prepared with Prima pre-mixed paste.... it wasn't difficult because most of my friends and colleagues do not cook so any sort of reasonably decent culinary effort was sufficient to impress. As the years went by and as I started to dig deeper into recipes, premixes started to feel like a cheating easy way out... the party dinner preparations became more frentic and tedious as I insisted on making everything from scratch. Drinks took a backseat over the last few years. Most of the time, we would just open up bottles of wine as we ate. This year, in addition to the 6 dishes I prepared, I decided to make 2 drinks to go with them. The non-alcoholic drink is a Lemon Grass/ Pandan drink that is exotic and refreshing. For the booze, I settled on this Summer Sangria taken from an old issue of Donna Hay magazine.

A spin on the traditional sangria, this tastes lighter and fresher. Prepared with a dry white wine and perked up with a splash of homemade lemonade, summery stone fruits and cooling mint, this bright and cheery concoction evokes memories of balmy beaches.... perfect for putting everyone at the party in a happy mood.

Pin   

Sangria3(250)
Summer Sangria
Recipe :

Combine 1x750ml bottle dry white wine, 60ml Contreau, 250ml of lemonade in a pitcher or jug. Add sliced lemons and limes, nectarines, strawberries and mint leaves and stir to combine.
Add crushed ice to serve.

Note: an aromatic white wine such as riesling or sauvignon blanc would be great for this sangria.

Tuesday, December 27, 2011

Lemon Souffle Pancakes

Pancake3

Pancake 8

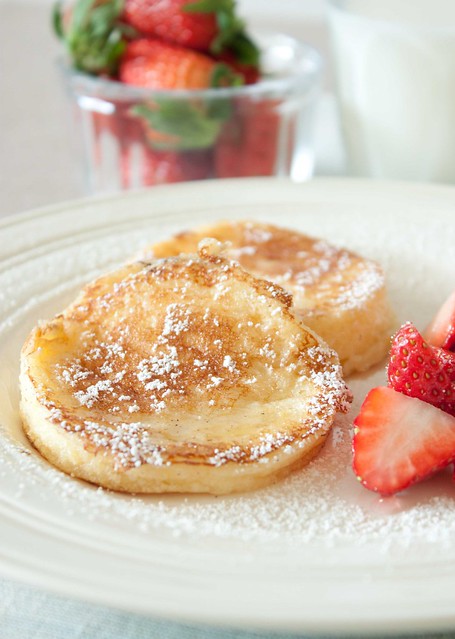
Post Christmas, for me, is a time to chill, to lounge around the couch watching TV and contemplating when is a good time to check out the post Christmas sales in town.... Heaven forbid that I should have to mess up my kitchen again with ambitious cooking... I am still reeling from the Christmas Day dinner I hosted. It was literally Masterchef Challenge mode the whole day, prepping and cooking one dish after another... all the while consciously trying to keep things neat in the kitchen while I worked... I almost succeeded until guests decided to saunter into the kitchen to 'help' and I had to cook while 'baby sitting'  them.... It had just dawned on me that I am truly the mistress of my kitchen. Only I know how to groove around my kitchen, how to put things away, where to reach for my tools....

So after a feast of Laksa, Ayam Goreng, Tauhu Tek, Morimoto Tuna pizza, Hawaiian Pizza( for the kids)  and Ondeh Ondeh... post Christmas breakfast is best kept light and simple. These feather-light, citrus flavoured pancakes from Bill Granger's Bills Sydney Food are just the perfect way to greet a cool breezy morning. Paired with strawberries left over from Christmas Day's Summer Sangria, I am almost tempted to embark on a low fat detox program... maybe after New Year...or more realistically, after Chinese New Year... :)

Hail The Holidays! Enjoy!
Pin It  
Pancake5 (250)
Lemon Souffle Panckes
Recipe :
3/4 cup                   Buttermilk (I used normal milk)
2                             Egg yolks
3 tsp                       Grated Lemon zest
2 tbsp                     Lemon Juice
1 tsp                       Vanilla Extract
25g                         Butter (melted)
3/4 cup                   All purpose flour
1 tsp                       Baking powder
3 tbsp                     Castor sugar
A pinch                  Salt
2                            Egg whites

To serve
Strawberries, halved
1 tbsp            Honey
Icing sugar for dusting

Method :

1. Mix egg yolks, milk, vanilla essence, lemon juice and lemon zest together in a bowl. Add melted butter and mix well.

2. Sift flour, baking powder, caster sugar and salt into a large bowl. Make a well in the center of the  flour mixture and pour in (1) gradually and mix flour with milk mixture until the dry ingredients are moistened. Be careful not to overmix.

3. Place egg white in a clean bowl and beat until soft peaks are formed.  Fold in egg white into (2).

4. Melt a small portion of butter in a heated non-stick frying pan.  Place 2 tbsp of the batter from (3) into the pan. Cook until the cake turns golden brown on the underside and looking dry on the edges. Flip over and continue to cook the other side.  transfer to a plate and keep warm while cooking remaining batter.

5. Toss fresh strawberries with honey and a light dusting of icing sugar.  Dust pancakes with icing sugar and serve immediately.


Sunday, December 18, 2011

Christmas Spritz Cookies

Spritz Cookies5

Spritz Cookies6

Spritz Cookies9

Christmas is a season of gifting and for some amateur bakers, like myself, who have the audacity and hubris to believe that our wares can be as good as those bought from the stores, it is also a time of happy frenzy as we pot around in our kitchen, churning out batches after batches of cookies and other sweet treats for friends and dear ones. For me, at least, the festival offers a legitimate excuse for me to indulge in my culinary expressions...  L has commented that I would be making many people happy with my Christmas giveaways. I replied with my usual pragmatism, "I am not sure if I will be making them happy but at least I get to bake to my heart's content and not have to eat them up by myself..."  So, not quite the right attitude to embrace the season's spirit but I swear, I try, I do....  at least I make the effort to conceptualise about what would delight others.

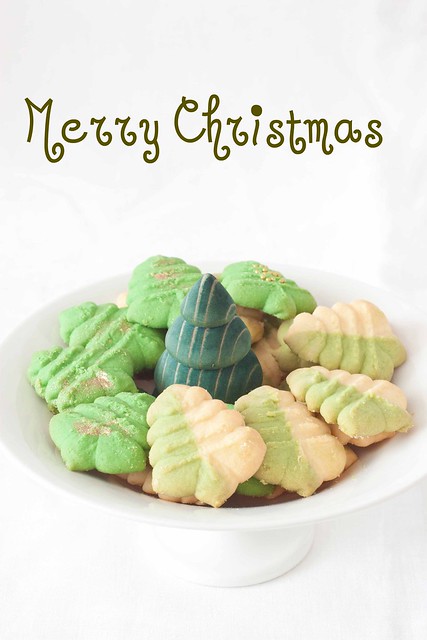
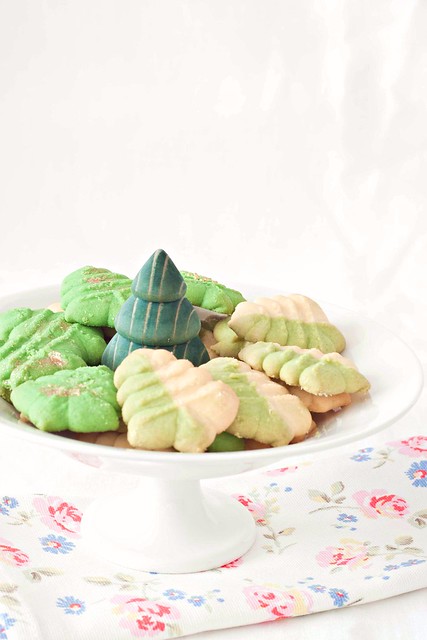
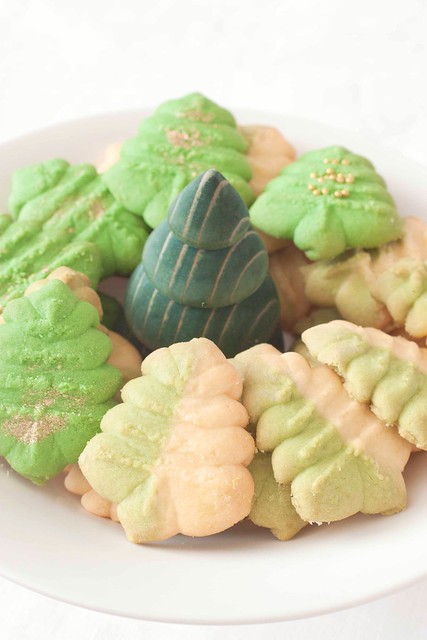
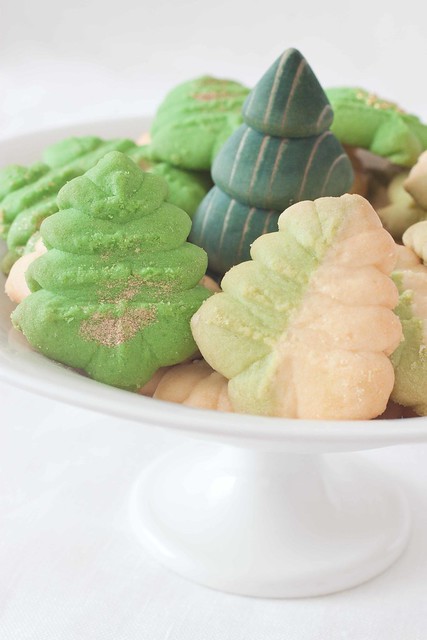
Last year, I gave away boxes of Hershey's Peanut Butter Blossoms.  This year, the inspiration came from  RasaMalaysia, Bee's Spritz Cookies Post. Her post reminded me of a similar cookie press which I had bought almost a year ago when I was traveling in the US. That and of course, Bee's ravings about the recipe made it difficult for me to resist baking this.  It was an easy recipe and the cookie press effortlessly lends a cuteness to the cookies which I believe would be well received by all. The vision of a green Christmas Tree immediately had me reach for my new tub of Pistachio Paste. The first time I worked with the pistachio paste was with these financiers... The impression of those jade green crumbs remains vivid.
Spritz Cookies7

The full green pistachio spritz cookies were delicious with the sweet nuttiness from the pistachio. Embellished with a whisper of gold dust or a sprinkle of gold sprinkler beads completed the festive picture. Deciding to experiment a little more with my cookie press, I then dreamt up a dual flavour concoction by combining 2 strips of dough, one pistachio and one vanilla side by side and extruding them through the press. The result was delightful and I was really thrilled.

So, if you too, happen to have a cookie press lying somewhere in your cabinet, I urge you to rummage for it and give this a try. The fundamental recipe, as promised by Bee is wonderful and you can jazz it up with a little creativity. Happy Baking! Pin It

I will be submitting this post to Aspiring Bakers #14: Creative Christmas Bakes (December 2011).


Spritz Cookies7(250)
Recipe : (Adapted from RasaMalaysia's Spritz Cookies)


Ingredients:
280g (260g for pistachio dough)  unsalted butter, room temperature
85g powdered sugar+15g sugar1/4 teaspoon salt
20g Pistachio paste (for pistachio dough)
310g all-purpose flour
110g corn starch
3 tablespoons milk powder
2 tablespoons full cream milk/whole milk ( I omitted this for the pistachio dough)
1/2 teaspoon vanilla extract

Method :

Cream the butter with sugar and salt until fluffy. Add in egg yolk and vanilla extract and mix until well incorporated. 
Add in pistachio paste (for pistachio dough) and mix until well incorporated.
Add in the milk powder,milk, and mix well.
Fold in the all-purpose flour and corn starch. Mix until the dough becomes soft and not stick to hands.
Preheat the oven to 350 degree Fahrenheit. Line two baking sheets with parchment paper or silplat.  Transfer the cookie dough into the cookie press with your desired pattern. Ratchet the dough out onto the baking sheets. Make sure to leave some space in between the cookies. Top the cookies with some sprinkles and place the baking sheets in the refrigerator for about 15 minutes. This will firm up the dough so the cookies will maintain their shape when baked. (For dual flavour cookies, form 1 strip of pistachio dough and 1 strip of vanilla dough. Combine them side by side along the length. Insert the combined dough into the cookie press and ratchet the dough as above) 
Bake for about 13-14 minutes, or until cookies are completely cooked through inside or turn slightly brown. Cool on rack.

Wednesday, December 14, 2011

Vegetarian Curry Laksa - Guest Post @ Notabilia

Laksa07

Laksa10

Laksa11

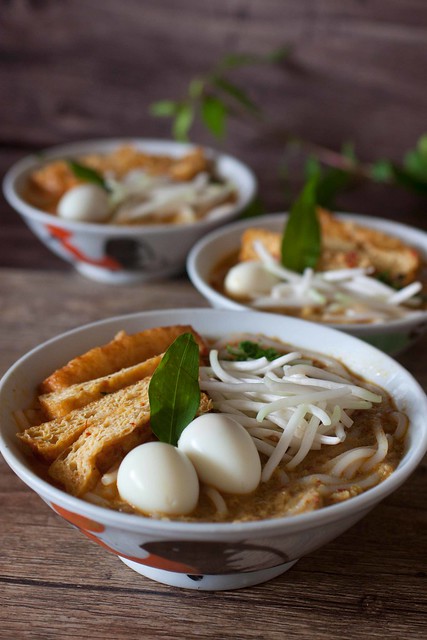
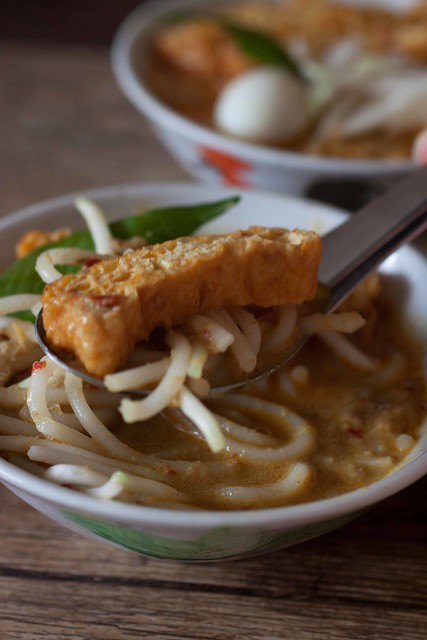
Those who have been reading my blog may be aware that I have a sister who decided to become a vegetarian when she came back from her first trip to India some 10 years ago. The family was initially shocked by her sudden conversion and I admit at one point, I had wondered if she had been hypnotised and  brain washed by some religious cult group in India.... As time went by, she continued to stick to her conviction and we came to accept her choice and stopped questioning her. Although, at times, I have to admit she still gets on my nerves when she righteously suggests that I should do all my baking with molasses and wholewheat flour... Anyway... so when Pooja of Notabilia contacted me to ask if I could do a local vegetarian dish for her blog, I was not altogether at a loss because eating out with my vegetarian sister has exposed me to a myriad of local dishes from vegetarian indian 'mutton' dum briyani to vegetarian 'minced meat' noodles to vegetarian curry 'fish head'... yes, it is definitely much more interesting to be a vegetarian here in Singapore.

Laksa is easily my favourite local dish. Filled with rich, beautiful spices and spiked with coconut milk, this curry laksa (to differentiate it more the more tangy Penang Assam Laksa) , has remained the favourite noodle dish of many here. Hop over to Notabilia to find out how my vegetarian version turns out. 

Tuesday, December 13, 2011

Le Creuset Mini Cocotte Giveaway Update

Mac&Cheese3

The winner of this giveaway is Jaclyn of cookingclassy.blogspot.com. Please get in touch with me as soon as possible. Congratulations!

Thursday, December 8, 2011

Chocolate Rum Balls

Rumball8

Rumball2

Rumball9

First, a shout out for my giveaway of 4 Le Creuset Mini Cocottes. If you have not entered, please check this out.

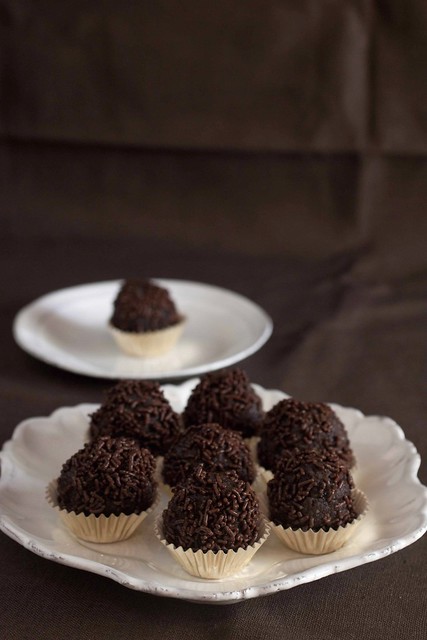
Rum balls may be a popular Christmas confection but to me, they are one of my favourite childhood treats. They used to be the most coveted item in the my childhood neighbourhood bakery. Dense and sweet, rich and chocolatey, they were possibly the closest to a real chocolate truffle I had ever tasted when I was a child.
Strangely though, they are not such a common sight in bakeries anymore. Well, time changes, it is what it is... the younger generation today will probably grow up reminiscing about Barcook's Cranberry Cream Cheese buns and Bakerzin's macarons (?)......

Rumball6
The traditional rum balls were made with crushed wafer biscuits and nuts but the version I grew up with in Singapore is more cake like and coated with the signature chocolate rice. As I searched through the internet for a recipe, this one, shared by Rima of Bisous A Toi appears to be the closest to what I used to eat as a child.

A no-bake confection, this is totally achievable if you have some left over chocolate cake. I had some left over chocolate pound cake in my fridge and their buttery and rich texture is absolutely perfect for this.
So there you have it, a childhood and festive favourite that can be whipped up easily even by a non-baker. Life seldom comes so easy :)

'Like' me on my new Facebook Page to get new posting updates...

Rumball6(250)
Recipe :  (Adapted From Bisous A Toi )

50g           Chopped raisins
60ml         Dark Rum
65g           Desiccated coconut
300g         Chocolate cake crumbs
60ml         Sweetened condense milk
Chocolate rice sprinkles

Method :
1. Place chopped raisins and 1 tbsp dark rum in a small pot and heat gently to simmer.
2. Turn off heat and let raisins macerate for 5 mins.
3. In a mixing bowl, mix together cake crumbs, rest of rum, dessicated coconut, condensed milk and rasins. Mix well until the cake crumbs are combined together.
4. Use a small ice cream scoop, portion out the cake dough, shape and coat with Chocolate rice sprinkles.
5. To store, keep the rum balls in air tight box in the refrigerator.

Sunday, December 4, 2011

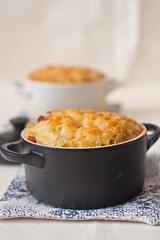
Beaufort Mac And Cheese & A Le Creuset Giveaway

Mac&Cheese3

Le Creuset2

Mac&Cheese 4

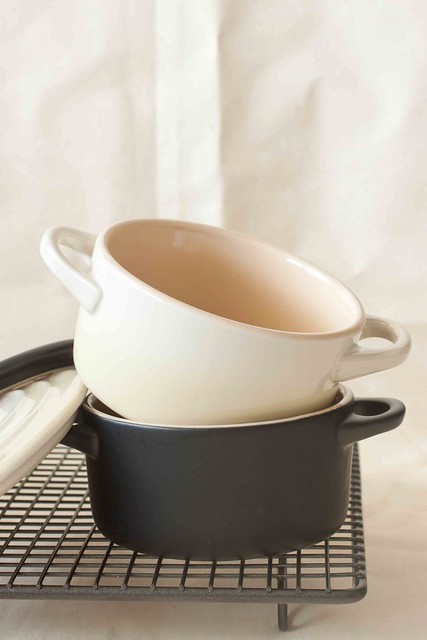
When the team from the newly branded Wayfair on-line store (previously CSN) offered to do a giveaway collaboration, it was easy for me to decide on the Le Creuset mini cocottes. For those who are not familiar, Wayfair is possibly one of the largest home-stuff on-line store that sells everything from Toy Boxes to furniture to kitchen ware.

Some of you may already know about my weakness for Le Creuset cocottes. I first fell in love with Le Creuset 2 years ago when I was taking a short break in Paris. Since then, I have already accumulated 10 cocottes (my last count :) ) of various sizes in my kitchen. Apart from their outstanding functionality, their seasonal colour collections also have the ability to make me irrational at the store.

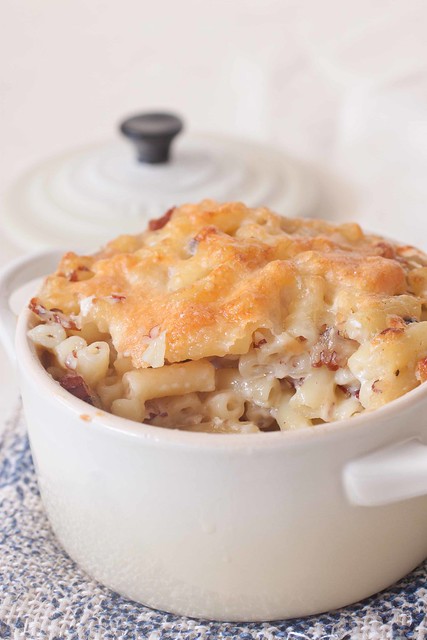
These stone ware mini cocottes are easier to store and are great for serving and baking. Giving pizazz to the everyday Mac and Cheese is easy by baking them in these individual portion cocottes.
Of course, Mac and Cheese, as the name implies is all about the cheese. I further glam'd up the dish by working with some French Beaufort cheese. The Beaufort is a sharp flavour cheese that is similar to the Gruyere. Produced in the Beaufort region in the French Alps, I was first introduced to its distinctive flavours in Europe a few years ago. It melts easily and blends well with the Mascarpone and heavy cream that I used for this recipe.
Mac&Cheese 7
If you are not able to get Beaufort, fret not, replace with Gruyere or your favourite cheese. Le Creuset's Mini Cocotte cookbook recommends the use of equal parts of Gorgonzola, Fontina and Parmesan.
Totally easy to prepare and quite easily the favourite household comfort food for the cold/cool season.

Wayfair will be giving away 4 mini stoneware cocottes at Køkken. (Closed on 11th December 2011)
To be eligible for the giveaway, please ensure you do the following : (Giveaway is opened to US and Canada residents only)

1. Leave a comment on this post. (make sure your contact can be traced from the comment)

Add extra comments to improve your chances of winning by doing the following : 

1. Like Køkken on Facebook and come back to this post to leave an extra comment to inform that you have done so.
2. Like Wayfair on Facebook and come back to this post to leave an extra comment to inform that you have done so.
3. Follow @Køkken69 on Twitter and tweet the following message. Come back to this post to leave an extra comment to inform that you have done so.
I just entered to win a set of 4 mini @LeCreuset cocottes hosted by @Kokken69!  Enter here : bit.ly/teUhSW lockerz.com/s/161922307
The Giveaway will end on 11th Dec 11:59pm  EST and results will be announced on 13th Dec. Good luck! 


Mac&Cheese 4(250)
Recipe : (adapted from Le Creuset's Mini Cocotte)
450g/4 cups                 Macaroni
20g  /1/2 stick              Butter
150g/1/2 cupe              Heavy whipping cream
150g/ 6oz                    Beaufort Cheese (you can replace with 50g/2oz each of Gorgonzola, Fontina and    
                                    Paremsan)
100g/ 1/2cup               Mascarpone Cheese
50g / 2oz                     Chopped Walnuts
Salt & Pepper    


Method :
1. Preheat oven to 220C/ 430F.
2. Lightly butter the 4 mini cocottes
3. Part cook the macaroni in salted boiling water for 3-4mins. Do not cook through. Pass the pasta under cold running water to stop them from further cooking. Add a few drops of oil to prevent them from sticking together.
4. Melt the butter in a small heavy saucepan. Add the cream and all the cheese. Stir until all the cheese has melted. Add salt and pepper to season. Add the chopped walnuts. 
5. Add the cooked macaroni into the cheese sauce and divide into the 4 mini cocottes. Sprinkle with some Beaufor/ Parmesan cheese. Bake for 10 to 15 mins until the tops are golden brown and a crust forms. Take the cocottes out of the oven and let them rest for 5 mins before serving.

Thursday, December 1, 2011

Seafood and Asparagus Risotto

I have finally jumped on the FaceBook bandwagon... Follow me at FB...

Risotto1


Rice1

Risotto2

I had some vague idea about Risotto. Somewhere in the back of my mind is a dusty impression of some recipe I had read somewhere... an impression that involves the cook standing over the stove stirring non-stop and at some point, adding white wine. Then came Hell's Kitchen's superimposing impression of Gordon Ramsay sending back plates of sub-par risottos cooked by the contestants...

When I came across Bill Granger's Crab and Asparagus Risotto in his bright and breezy Bills Food, I decided it is time for me to cook my first Risotto. This recipe does not call for white wine and works with a simple list of ingredients. In retrospect, if this is a representative recipe of Risotto, then, it is actually quite simple to prepare - all one needs is alot of patience.

Throughout the preparation, I was able to keep my work bench quite bare and clutter free... the first sign of a simple recipe. If you have 30 mins to stand in front of the stove and stir patiently, you will be rewarded with a wholesome, tasty one dish meal.

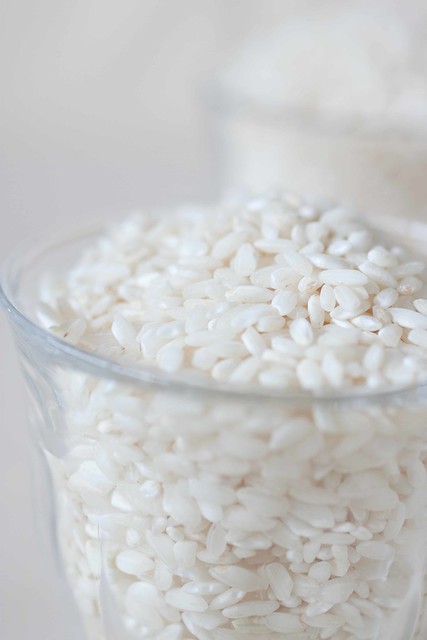
I used Canaroli Rice which absorbed the stock well to yield a nice creamy risotto.  In addition to the crab meat, I had also added in some fresh scallops and dried scallops to intensify the flavour.
More hands-on in its preparation than the Chinese congee/rice porridge, the risotto tastes richer and more creamy than the former. Just like the Chinese congee, this is best served while it is hot. By the time I finished photographing the plated portion, it had cooled down and turned somewhat cakey. (kuih like) I had to add more stock and heat it up again.

With a whole kilo worth of Canaroli Rice sitting in my pantry now, this will not be the last time you see a Risotto recipe on this blog...:)


Sunday, November 27, 2011

Martha Stewart's Peanut Butter Jelly Cupcake


PBJ Cupcake4

PBJ Cupcake8

PBJ Cupcake7

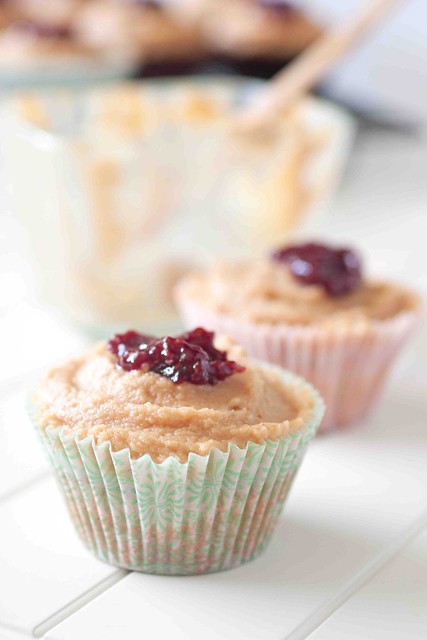
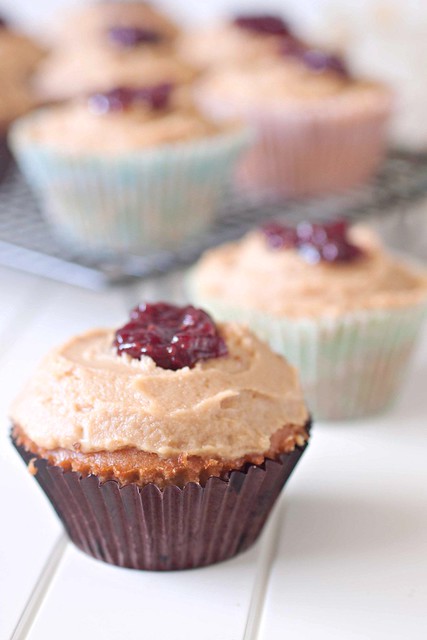
If you've always loved a good peanut butter jelly sandwich and if you are not averse to a luxuriously rich buttery cake, I suggest you bookmark this and bake it at the first opportunity you have. This cupcake is gloriously addictive and beats Magnolia Bakery's Cupcake hands down effortlessly!

So far, I've had pretty good results with the recipes from Martha Stewart's Cupcakes. I only wish I have the time to bake every single one of them. (See here , here and here for the recipes I have tried...)
The recipes are in general not too sweet though I normally still try to tune down the amount of sugar used. I like it that Martha Stewart's book features a good collection of more adult and classic cupcake flavours and design.

PBJ Cupcake1
This cupcake is moist and delicious enough to eat on its own. The incorporation of coarsely chopped roasted salted peanuts adds lovely texture to every bite but the creamy peanut butter frosting is one icing on the cake that takes you to the realm of cake-bliss. I would gladly lick the frosting from a spoon.

However, be warned, the deliciousness is the result of copious use of sour cream, thick cream,cream cheese and of course, creamy peanut butter! However, your inhibition gets lost at first bite. So enjoy and worry later!

I am  submitting this post to Aspiring Bakers #13: Enjoy Cupcakes! (November 2011) hosted by Min of Min's Blog. Please do take time to check out the event here


PBJ Cupcake2(250)
Recipe : (Adapted from Martha Stewart's Cupcake with minor adjustment)

1 3/4 cups              all purpose flour
1/4 tsp                    baking soda
3/4 tsp                    baking powder
1/2 tsp                    salt
3/4 cup /136g         unsalted butter
1 cup                      sugar
2/3 cup                   creamy peanut butter (I used 100g)
3                             large eggs
1/2 tsp                    vanilla extract
1/2 cup                   sour cream
3/4 cup                   coarsely chopped roasted salted peanuts
Creamy Peanut Butter Frosting
1/2 cup                    strawberry jelly or jam

Creamy Peanut Butter Frosting
6oz (170g)              Cream cheese @ room temperature
1/3 cup (40g)          Confectioner's / icing sugar
1 cup (200g)           Creamy peanut butter
1/2 tsp                     Vanilla extract
1/2 cup                    Heavy cream (whipping type)

Method :
Cupcake 
1. Preheat oven to 190C (375C). Line standard muffin tin with paper liners. Sift flour, baking soda, baking powder and salt.

2. In a mixing bowl, cream butter and sugar until pale and fluffy. Reduce speed to low. Mix in peanut butter, add eggs one at a time, beating until each is incorporated, scraping down sides of bowl as needed.
Mix in vanilla extract. Add flour mixture gradually and mix well to incorporate. Mix in sour cream and peanuts.

3. Divide batter evenly among lined cups, filling each 3/4 full. Bake at 190C for 20 min until a cake tester inserted in centers comes out clean.

4. Cool down cupcake completely and frost with creamy peanut butter frosting. Leave a small well in the middle of the cupcake. Add a dollop of strawberry jam into each well.

Creamy Peanut Butter Frosting

1. Cream cream cheese and sugar together until pale and fluffy.

2. Add peanut butter and vanilla extract and mix until well blended.

3. In a separate bowl, whip heavy cream until medium / stiff peaks are formed.

4. Fold the whipped cream into the cream cheese mixture.


Friday, November 25, 2011

Cranberry Cream Cheese Buns - More Experiments


Cranberry3

Cranberry1

Cranberry6

This is a very quick post to report back on my experiment on the Cranberry Cream Cheese Buns.

The last time I made these, I did not succeed in getting sufficient cream cheese filling into the buns. I repeated the last recipe and went for a simpler cream cheese filling formula. Chilled to get a firmer texture, I was able to portion a generous amount of cream cheese filling with an ice cream scoop. However, after baking, what started out to be a silky smooth cream cheese, took on a split and curdled appearance.

The buns were tasty though, especially when it is still warm from the oven. However, in terms of replicating Barcook's creamy cheese filling, this is not a success. It is baffling how Barcook's filling remains so smooth and silky even after baking... it is almost as if they injected the filling after the bread was baked. Most dairy products, may it be cream cheese or butter tend to curdle a little after baking. I tried a few different combinations of cream cheese / cream cheese spread/ mascarpone - all did not retain the silky creamy texture. After the last trial , I simply decided that the bakery must have used some form of processed cheese which is not available to us.

If you choose to use my last recipe for the sweet buns, the result of the buns will be similar to the bakery's - very soft, very easily squashed to yield a wrinkly appearance. (above photos)
If you prefer a bread with more structure, you can try the following sweet buns recipe and it will give you more structure. (See photo below)

Cheesebun1

Anyway, I think I've had enough of cream cheese buns for now and am satisfied enough as far as a home baked cream cheese bun is concerned.
For those who love this enough to experiment further, please keep me posted... :)

Cheesebun2(250)
Recipe : (adapted from 65C Tangzhong Bread)

A. Water Roux
Bread flour           100g
Water                    500g

B.
Bread flour            228g
Plain flour             60g
Dried Yeast          6g
Castor sugar         30g
Salt                       3g

C.
Milk                     120g
Egg                      30g
A (Water Roux)   72g

D.
Unsalted butter     30g

E.
Dried Cranberry   50g ( I ran out of this so I omitted the berries for this exercise)

Method :
A. Water Roux
1. Mix flour and water in a saucepan and stir well with a whisk. Heat up the mixture in the saucepan gradually until temperature reaches 65 C , stirring all the time.
2. Remove the mixture from heat and continue stirring until water roux thicken. Stirring lines should be visible in the water roux.

Bread :
1. In a mixing bowl, mix B (except for salt) and C (except for water roux) and mix with a dough hook until the dough gathers to form a ball.

2. Add Water Roux from C. Continue mixing until dough gathers together. Add the salt from B.

3. Add butter and continue kneading for 15-20 mins on medium speed. The dough should no longer stick onto the wall of the mixing bowl. It should not be tacky when you tap on it with your fingers. Window pane test can be performed now by stretching the dough to form a thin pane. The stretched pane should not break. Add in cranberries at this stage.

4. Gather the dough and roll it into a ball and let it proof in a lightly oiled bowl for 40mins at room temperature.

5. Knead the dough slightly on a lightly floured board. Portion the dough into 40g portions. Roll each portion into a small ball and let it proof for 10mins.

6. Flatten each dough and scoop about 20-25g of cream cheese filling and seal the dough to form a round bun.

7. Place (6) on a lined baking pan and place another baking sheet over it. Proof the dough for 30mins.

8. Bake (6) together with baking sheet on top at 170C for 20mins. Cool down.

Cream Cheese Filling :

1. Cream 200g  of cream cheese with 50g of powdered sugar, 18g whipped cream and 1 tsp of vanilla extract until smooth.
2. Chill until firm before use.


Sunday, November 20, 2011

XO Sauce Stir Fried Loh Shu Fun / Mee Tai Mak

MeeTaiMak9

MeeTaiMak2

MeeTaiMak6

MeeTaiMak10

Mee Tai Mak/ Bee Tai Mak is one of the many forms of rice noodles that we eat in Asia. Very much like a shorter and more wriggly cousin of the Japanese Udon, the cantonese name of this noodle (Loh Shu Fun) literally translates to mean Rat's Noodle. Not too difficult to understand for the tapering shape of the noodle does somewhat reminds one of the wriggly tip of a rat's tail...

Interestingly though, I had always referred to the noodle as Mee Tai Mak/ Bee Tai Mak when I was growing up. It was only until when I was much older , a widely reported outbreak of food poisoning in Malaysia exposed me to the more colourful ratty term. The food poisoning was traced back to a batch of contaminated Mee Tai Mak. The papers were rife with reports and stories of how people would fall sick after they ate Lou Shu Fun..( the pronounciation of the term can also be interpreted as  rat's powder / rat's poison). I was dumbfounded when I read the reports and started to ask my friends why on earth would those people in Malaysia want to eat Rat Poison??  Only then, did I learn that the Rat Poison was actually Mee Tai Mak...

I was invited to join a bloggers' gathering last weekend. Initiated by ZY of Baking Library, it was a small gathering among some of the Singapore food bloggers whom I have come to know over the last 2 years. I knew I had to bring a savoury dish for the event (I brought Mee Rebus for our first gathering last year) as most of the others I knew would be bringing sweet treats.

MeeTaiMak7
Fried with XO sauce and prawns, this is a relatively easy dish to prepare. However, dishes like these (as is true for most Chinese dishes) would taste best when cooked over strong heat. The Mee Tai Mak especially needs to be tossed very quickly over high heat to prevent it from turning soggy and mushy over prolong stir frying. Hence what I did was, I first poached the noodles in boiling water for 5 seconds before frying them quickly in small batches over very high heat in my wok. As a result, I had to divide and fry my potluck portion into 3 lots.
If you are only cooking for a small family at home, this is definitely more manageable - just make sure the wok is very hot.

Overall, I think my efforts were met with reasonable success... good enough to open shop? Maybe but I am still not consistent from batch to batch and I wouldn't want to stand in front of a blasting hot wok the whole day... :)

MeeTaiMak9(250)
Recipe :

Mee Tai Mak               200g  (enough for 2)

Prawns                        6 -8 medium to large size prawns, shelled and deveined.
Spring Onion              4 stalks, chopped
Chili Padi                    Chopped finely. (you can also replace with sambal chili paste)
Bean Sprouts              50g (poached for 10 seconds in boiling water. For this post, I ran out of bean
                                   sprouts, so I omitted them)

Eggs                           2, beaten
Oil                              1 tbsp

Seasoning
XO Sauce                   1 tbsp
Oyster Sauce              1 tbsp
Sugar                          1/2 tbsp
Light Soya Sauce       1 tbsp
Dark Soya Sauce        1/2 tsp
Sesame Oil                  1/2 tsp
White Pepper               Dash
(For those who prefer a stronger taste, the seasoning portion can be increased in proportion)

Method :

1. Poach Mee Tai Mak in boiling water for 5 seconds, remove from water with a slotted spoon and set aside. (do not over cook Mee Tai Mak)

2. Heat up the wok until smoking. Add 1 tbsp oil and add beaten eggs. When eggs just begin to set, scramble with frying ladle and add Mee Tai Mak, Prawns, Spring Onion, Bean sprouts and seasoning.

3. Fry until prawns are cooked. (turns pink)

4. Dish out the noodles and garnish with more chopped spring onions and sesame seed (optional). Serve immediately while hot.

LinkWithin

Related Posts with Thumbnails