Announcement

This site will be migrating to a new address.
Please visit me at @Køkken and change your subscription to this blog to my RSS Feed

You Will Be Redirected!

Please do not leave any more messages on this blog. I will not be publishing or responding to any more comments left here. You will be automatically redirected to http://www.atkokken.com All posts have been migrated. You will be able to locate any posts by performing a quick search at my new site. Thank you.

Monday, September 28, 2009

Tuna Cream Puff - Choux Pastry Part 1

Tuna Choux Puff3

Tuna Choux Puff 2

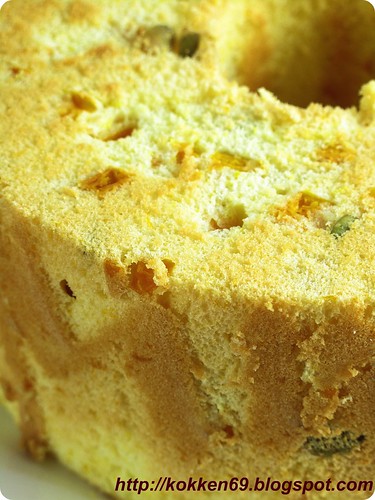
Choux Pastry, like the Genoise Sponge or the Sweet Crust Pastry (and quite a few more others) is one of those fundamental recipes that every self respecting baker needs to know. These, I believe would be the first lessons in a proper baking school. However, few of us will have the patience to work on these seemingly plain recipes. I remember when I first started baking, I had wanted so desperately to create something that is visually pretty e.g. cupcakes or something that is rich in taste like muffins that melt in your mouth or anything that is richly chocolatey chocolate. It was much later, after many overdoses of sugary sweetness and buttery richness that I found repreive in the lightness of Chiffon cakes.
I only remember making choux pastry once long time ago. It was done half heartedly out of curiosity.

During my last trip to Taipei a week ago, I spent my whole evening after work happily buried in the recipe book collection at the hip and famous Eslite Bookstore(诚品书店) . I came back with a luggage that weighed a ton. Among the books I bought, this one titled I (heart) Puff is a Chinese translated Japanese cookbook dedicated entirely to choux puff pastry. It is so detailed and so complete that I have decided that my next few postings will be on puff pastry.

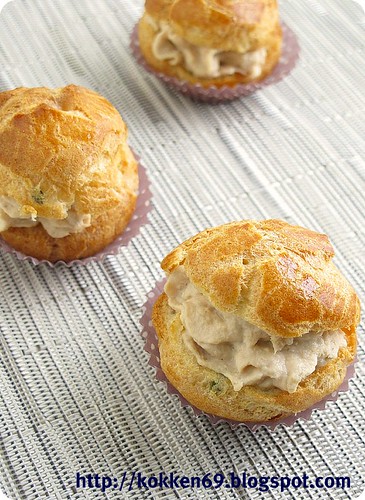
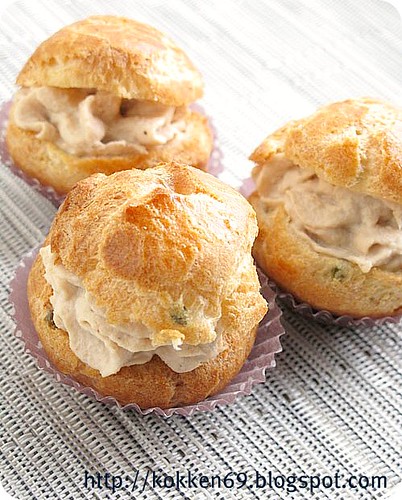
This first Choux Pastry posting is modified from the basic choux pastry,replacing butter with Canola oil. As a result, the puff turns out light and fluffy, it stays soft and does not harden in the fridge. I also chose to work with a savoury filling instead of the classic creame patissierie.

Overall, a relatively easy pastry to make but it can still impress with the many variations of fillings that one can work with.
Tuna Choux Puff 1


Recipe :

Choux Pastry
All purpose flour 30g
Bread flour(high protein) 30g
Canola Oil 40g
Water 50ml
Milk 50ml
Sugar 2g
Salt 1g
Eggs 2 beaten

Tuna Cream
Canned Tuna(in water) 160g
Mayonnaise 60g
Salt, pepper to taste

Method
1.In a heavy saucepan, please water, sugar, salt, milk and canola oil(choux pastry) and bring to boil.
2.Remove the saucepan from heat and add all the flour and stir briskly with a spatula.
3.The flour will 'soak' up the the liquid and oil to form a dough. Return the saucepan with the sticky dough onto the heat source. Over gentle heat, continue to stir and cook the dough until dough develops a tackiness and leaves a thin sticky film at the bottom of the saucepan.
4. Remove dough into a blending bowl. Add beaten egg a little at a time and stir well. You will know the right consistency is achieved when the scooped batter, falls off the spatula gradually and leaves a triangle trail drooping from the spatula. (To take the guessing out of this, I used 2 60g eggs(with shell) and get what I feel is the right consistency)
5. Transfer the batter into a piping bag fitted with a 1cm plain piping tip.
6. Pipe the 4cm rounds onto a baking tray laid with baking paper, leaving a 3cm gap in between each round of piped batter.
7. Bake the pastry in a 200C preheated oven for 20mins-30mins.
8. Cool the choux puffs completely. Split the puff with a serrated knif.
9. To make the Tuna Cream filling, put all ingredients in a blender and blend until smooth and creamy. Using a star tip, pipe the tuna cream onto the bottom half of the split puff and place the top half over the piped cream.

Wednesday, September 23, 2009

Apricot Chocolate Tart - Another One For The Petit Fours Collection

Apricot Chocolate Tart3

Apricot11
Apricot Chocolate Tart4
This is another tartlet recipe from Desserts By Pierre Herme and I couldn't agree more with Dorie Greenspan's warning - this is DANGEROUS. Enjoy this with a very conscious restrain.
The apricot, steeped in lemon juice,honey and a dash of pepper(so clever) is plump with a refreshing sweetness. When these are used to pack the tart, the cool fruitiness neutralises the richness of the chocolate ganache so well that you throw caution to the wind and start to believe that it is actually almost guilt free...Sigh.

This is actually not a difficult dessert to make. When one has access to quality ingredients, in this case, choosing a good dried apricot (plump and moist) and using chocolate from Valrhona, success is guaranteed. It really doesn't take alot of skill and talent to reproduce this recipe to impress guests at a private party - that is if you are not finicky about pipping the perfect chocolate swirl on the tart.

However, before we start to naively believe that this recipe is nothing more than just good quality ingredients, I would like to highlight the cleverness of the recipe.

When I first read through the preparation of the Apricots, I couldn't understand the significance of adding pepper to the boiling mixture of water, lemon juice and honey. However, when the solution started to boil and fill the whole kitchen with the sweet aroma of honey, it became obvious. The pepper, though present in a small pinch, spiced up the honey/lemon solution. Through its subtle presence, the coyness of honey became more exotic. For a while, I almost felt like I was transported to Turkey in my own kitchen.

I always tell people, Valrhona chocolate is idiot proof. It would be very difficult to get a bad tasting dessert with Valrhona chocolate. However, it takes a master like Pierre Herme to envision which level of bitterness would pair well with his clever use of passion fruit juice in the ganache. The master specified Valrhona Noir Gastronomie but I worked with Valrhona Tainori 64% which has a hint of acidic citrus and a slightly nutty aroma.

This then brings us to the next brilliant element in the recipe. The master chose to combine passion fruit with the dark chocolate. The ganache, with its generous amount of chocolate,heavy cream and butter is super super rich however, the clever combination of tart passion fruit juice counters the heaviness of the chocolate and makes it deceptively refreshing and tangy on the palate.

The brilliance of a master like Pierre Herme lies in their ability to envision how flavours can be paired to complement each other in a harmonious manner. I practically worship PH for pairing Rose with Raspberry and Rose with Lychee. It may seem quite obvious now how these flavours go together and I wish I had thought of it first.... and in my world, that is the difference between a scientist and a chemist.
Apricot Chocolate Tart1
I share with you the following recipe, adapted from Desserts by PH.
Recipe :
The Apricots
10 Dried Apricots
1/2 cup water
3 Tbsp squeezed lemon juice
1 Teaspoon Manuka honey
Dash of Black Pepper
Chocolate Ganache
150g Dark Chocolate
70g Heavy Cream
70g Passion Fruit Juice
30g Unsalted Butter
Tart
Sweet Tart Dough, please refer to recipe in my Orange Tartlet Post.
Method :
1. Cut apricots into small pieces and place them in a a heavy saucepan with all the other ingredients for Apricots. Heat the mixture to boiling. Lower the heat and simmer the mixture for 10mins. Cool down mixture and steep the apricots in the syrup for 24 hours.
2. Place dark chocolate in a bowl. In a saucepan, boil heavy cream until just boiling. Remove from heat and add a little at a time to chocolate. Stir chocolate gently until fully melted.
3.Boil passion fruit juice until just boiling. Add Passion Fruit juice to (2).
4.Add softned butter to (3). Cool ganache in refrigerator until firm enough to pipe.
5. Pack pieces of steepd apricots into bottom of baked tart case. Using a star piping tip, pipe chocolate ganache over apricots in tart case. Garnish with a slice of steeped apricot.

Saturday, September 12, 2009

Pumpkin Ang Ku ... Traditional Chinese Glutinous Cake

PUmpkin Ang Ku Kueh

PUmpkin Ang Ku Kueh
When I first learnt about the LiveStrong With A Taste Of Yellow event at Tartelettes' website, I knew I had to be part of it - for a couple of reasons. I had always wanted to participate in an on-line baking/cooking event, to spike up the fun of potting around in my kitchen and to connect to a greater community of like minded people. The Taste Of Yellow event organised by Barbara of Winosandfoodies appealed to me for a different reason because I have started to enjoy biking around Singapore about one year ago after I had bought my first Cannondale bike.

9FSW7_pnk

And yes, my bike comes with exactly the same powdery pink frame as shown in the picture. It wasn't the colour of my choice but it was the only bike available at that point that was within my budget. Since then, I had taken it out to the first Bicycle Race Event in Singapore, peddling it with friends during our own overnight cycling event... and yes, the bike has been quite a head turner. Hence, when I read about Barbara's event in support of the Lance Armstrong Foundation, I immediately felt an affinity to it.

This is my first experience to participate in a mass food blogging event, having started blogging just about a month ago. I am still trying to figure out how things work in the blogosphere but in the mean time am deriving alot of joy taking pictures of my food and posting them on-line. I have chosen to work with Pumpkin for this event and have deliberately selected to work with something a little more exotic than what I usually bake.

This bite size snack, known as Ang Ku, is a traditional Chinese cake made with glutinous flour. Filled with either a peanut or mung bean paste, it is cast out of a traditional Ang Ku mold. Ang Ku literally translates from Chinese to mean 'Red Tortoise'. It gets its name from the shape of the mold which looks like the shell of the tortoise. Traditionally, the cake is coloured an intense red to signify prosperity. The common chinese character engraved in the mold means Longevity. Hence, this is a cake that is often served at auspicious events celebrating the arrival of a new born, significant birthday milestones e.g. 60 years old celebration of senior folks - celebrating life.

Pumpkin Ang Ku Kueh 5

Pumpkin Ang Ku Kueh 1

To qualify this for the Taste Of Yellow event, I had tried to modify the traditional recipe by incorporating pumpkin paste with the glutinous flour for the skin of the Ang Ku. In addition,I had also tried to blend pumpkin paste with ground peanut for the filling. The natural sweetness of the pumpkin allows me to reduce the amount of sugar that would usually be used to prepare the peanut paste.

In celebration and appreciation of Life, I present the Pumpkin Ang Ku. May all LiveStrong and eat well.
Pumpkin Ang Ku Kueh2

Recipe:
Skin
Glutinous Rice Flour 150g
Mashed pumpkin 75g
Sugar 3/4 tbsp
Cream 1 tbsp
Corn Oil 1 tbsp
Hot Water 125g
Orange colouring 3 drops

Filling
Ground Peanut 100g
Mashed pumpkin 50g
Sugar 30g
Warm water A little - enough to bind the above ingredient into a dry paste.

Method :

1. To prepare mash pumpkin, steam coarsely diced pumpkin over boiling water for 10mins until softened. Alternatively, microwave coarsely diced pumpkin at 600W for 10 mins. Mash the cooked pumpkin with a fork.

2. To prepare the skin, sift glutinous rice flour into a mixing bowl. Form a well with the glutinous rice flour. Into the center of the well, place, mashed pumpkin, sugar,coconut cream and oil. Add the water slowly while kneading the flour mixture by hand. Knead until the dough is pliable and forms a ball without sticking to the wall. You may need less or more water to get the right pliable consistency.

3. To prepare the filling, mix all dry ingredients together and add a little water, just enough to bind the dry ingredients into a dry paste. The drier the paste, the easier it will be to do the wrapping later.

4. Divide the skin dough into 30g portions. Roll each portion between the palms of your hand to form a small round ball. Flatten the ball and wrap a ball (about 10g) of filling with the dough. Seal the edges of the dough over the filling and roll it between palms again to form a nice smooth ball.

Place the ball in a lightly floured Ang Ku mold. Flatten the ball over the cavity with a flat cake scraper. Turn the mold over and knock it firmly against the table to release the cake. Place the cake on a small piece of banana leaf(brushing the leaf with a little oil will prevent the cake from sticking to it, making it easier to eat later).

5. Steam the cake over boiling water for 5 mins. Cool the cake down and brush a little corn oil over cake to prevent them from sticking to each other during serving/packing. The recipe makes about 8 cakes.

Monday, September 7, 2009

Pumpkin Chiffon Cake - Another Wholesome Variation To The Chiffon Recipe

Pumpkin Chiffon5

Pumpkin Chiffon 2

The closest I have ever worked with pumpkin was a couple of years back when I was hosting a Christmas party. I had seen Jamie Oliver's program during my flight to the US. He was using butternut squash to make a soup. Worried that I would not be able to find butternut squash in Singapore, I had actually lugged 2 butternut squash all the way back from US.

I am seriously considering to work with pumpkin for the Taste Of Yellow Livestrong Event hosted by Winosandfoodies. There are a couple of recipes which I can work with and I decided to expriment with the Chiffon.

I am pretty adept at baking the chiffon cake but I have only started to get fancy lately. By fancy I mean adding solid 'particles' like fruit and vegetable bits into the cake. I failed a couple of times when I was working with peaches. From those failures, I learnt that the moisture in the succulent fruits such as peaches and blueberries can play havoc with the meringue rich batter when not careful. I took extra care to cut the pumpkin into tiny cubes and dust the diced pumpkin with flour.

The cake turned out pretty decent. I try not to be too fixated with the uniformity of the cell structures in the cake but inspecting the cross-section of the cake, I think pre-steaming the pumpkin to soften it would probably produce a more uniform cell structure.

Pumpkin Chiffon 1

For those who enjoys a moist and silky softness in their cake. This recipe will not disappoint.

I am not sure if I would submit this for the Taste of Yellow event. I have a couple other recipes I want to experiment with before I decide. Dateline's a week away, so I will have to work fast...


Pumpkin Chiffon 4
Recipe :
Meringue
Egg White 110g
Sugar 55g
Corn Startch 5g

Egg Yolk Base
Egg Yolk 40g
Milk 24g
Canola Oil 36g
Mashed Pumpkin* 24g
Flour 55g
Sugar 10g
Diced Pumpkin 80g
Pumpkin Seeds 1Tbsp

* Cut pumpkin into course chunks and steam for 15mins to soften. Mash with a fork. I would also suggest steaming the diced pumpkin in the same way. I was lazy and used the pumpkin raw. I believe steaming the diced pumpkin will result in a finer cell structure - similar to my murasaki imo chiffon.

Method :
1. Preheat oven to 160C.

2.In a mixing bowl, beat egg yolk with sugar(10g). Add milk, oil and mashed pumpkin and continue to mix with handmixer until well combined. Sift in flour and combine the flour thoroughly using the handmixer.

3. In a seperate mixing bowl, whip egg white until foamy. Add the sugar and cornstarch mixture in 3 additions. Whip egg white until firm but not stiff. I generally whip the egg white until the tip of the foam would still droop a little. The foam should be able to support the weight of your bubble whip.

4. Add roughly same amount of Meringue to the egg yolk base. Mix well with spatula.

5. Add in diced pumpkin and pumpkin seeds to (4). Stir in lightly.

6. Add half of remaining Meringue into (5). Fold in lightly with spatula.

7. Add all remaining Meringue into (6). Fold in lightly until well mixed.

8. Pour batter into 17cm chiffon pan. Bake at 160C for 30mins.

9. Remove cake from oven and immediately invert pan to cool.

LinkWithin

Related Posts with Thumbnails