Announcement

This site will be migrating to a new address.
Please visit me at @Køkken and change your subscription to this blog to my RSS Feed

You Will Be Redirected!

Please do not leave any more messages on this blog. I will not be publishing or responding to any more comments left here. You will be automatically redirected to http://www.atkokken.com All posts have been migrated. You will be able to locate any posts by performing a quick search at my new site. Thank you.

Friday, January 29, 2010

White Truffle Oil Infused Custard - Thomas Keller's The French Laundry Cookbook

Egg 109 copy

Egg Custad 107

Egg Collage

Egg Custard 102

Egg custard 103
I promise I promise, on my next trip to New York or better still, California, I have to, I have to eat at Thomas Keller's restaurant! I first learnt about Thomas Keller when I read Anthony Bourdain's A Cook's Tour almost 8 years ago. I was intrigued when Anthony Bourdain and 3 other guests went for a 20 course tasting menu at Thomas Keller's The French Laundry in Napa Valley. I hang on to every word in that chapter, gasping in amazement as I read about how every one of the 4 guests got a different dish for their tasting menu with only 2-3 common dishes. I smiled at the ingenuity when he had chosen to serve a Marlboro Infused Coffee Custard half way through the long drawn 6 hour meal, to Anthony Bourdain- who is quite the degenerate smoker. Subsequently, when I saw A Cook's Tour's screening on TV, I became even more fascinated.

I have been coveting at the The French Laundry Cookbook forever. A huge and beautiful book, it is also quite expensive(in Singapore). I had been browsing through it at the bookshop so many times, but have always been intimidated by it - Thomas Keller is highly refined, irrevocably impeccable and solemnly precise. It is beyond me....

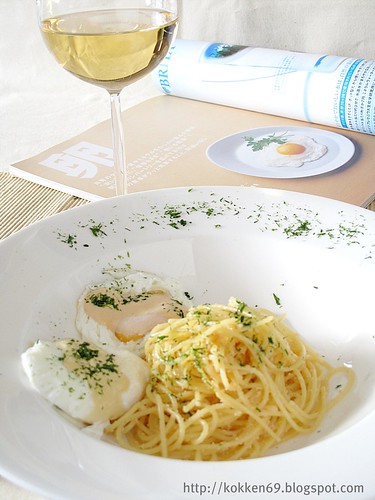
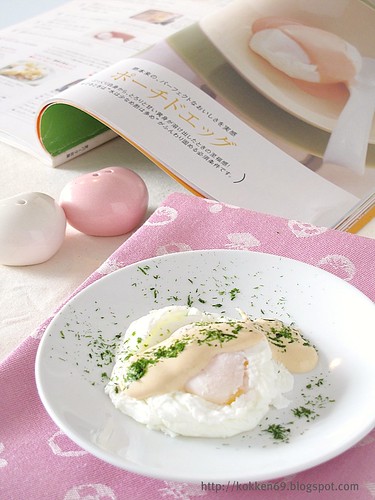
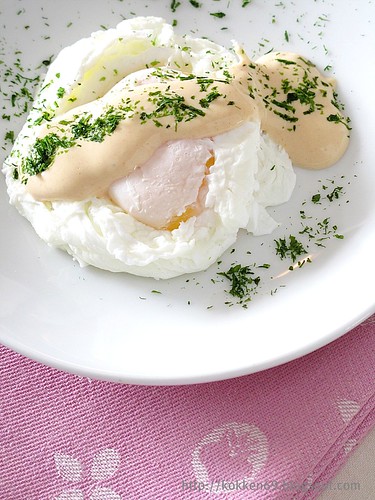
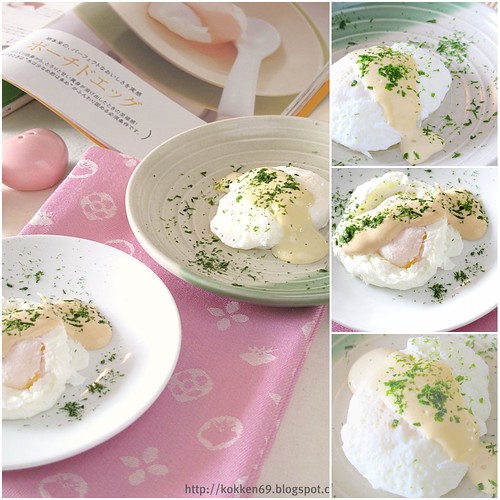
I still have not bought the book... yet. But I am lucky to be living in Singapore where the public library is easily accessible to everyone. The National Library of Singapore is another facility I would be proud to be associated with Singapore. When I first started revisiting the public library a few years back, I couldn't believe the amazing cook book collection they have. I went to the library 2 weeks ago because I had wanted to check out Michel Roux's Eggs - for his poach egg recipe. It was then that I saw not one but 3 copies of The French Laundry sitting on the shelf. I borrowed it and have been poring over it, determined to find something to try.

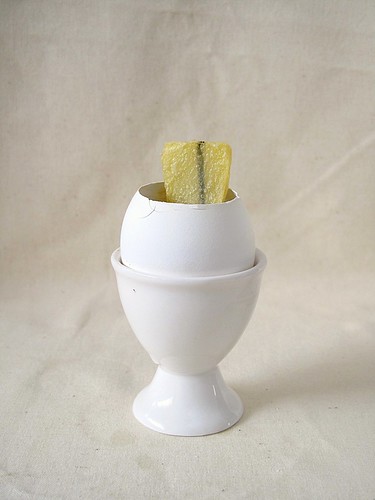
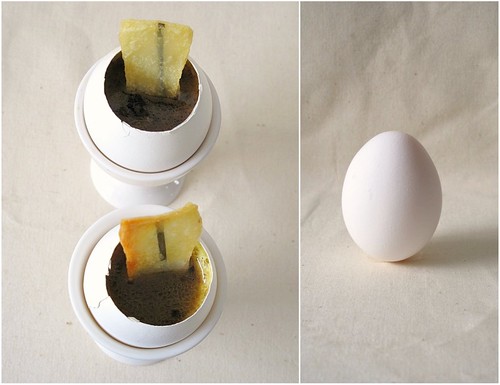
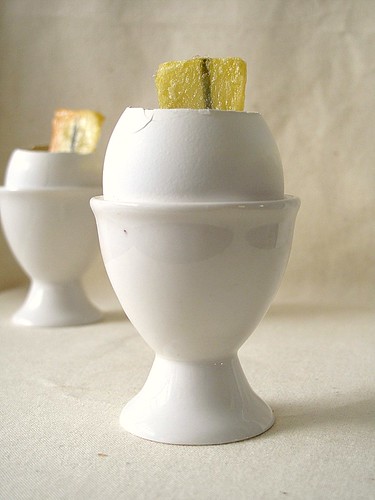
I picked the seemingly simple 'White Truffle Oil- Infused Custard with Black Truffle Ragout' for a couple of reasons : 

1. I like eggs.
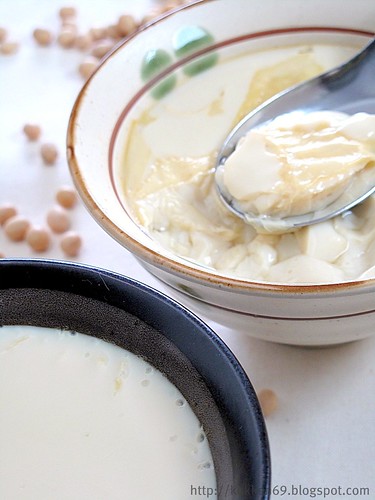
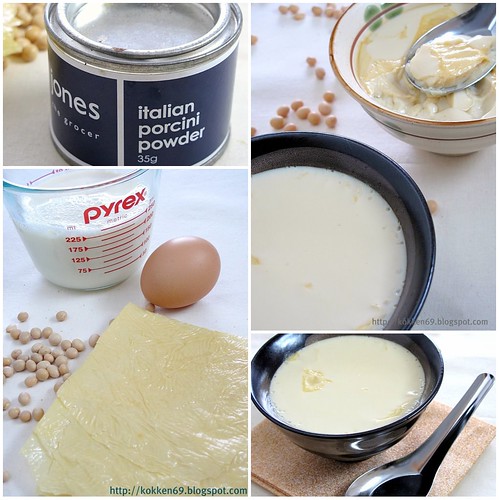
2. I have all the ingredients : (yes, I have the white truffle oil and the black truffles and veal stock in my freezer! At times I am really shocked at what I have accumulated.)

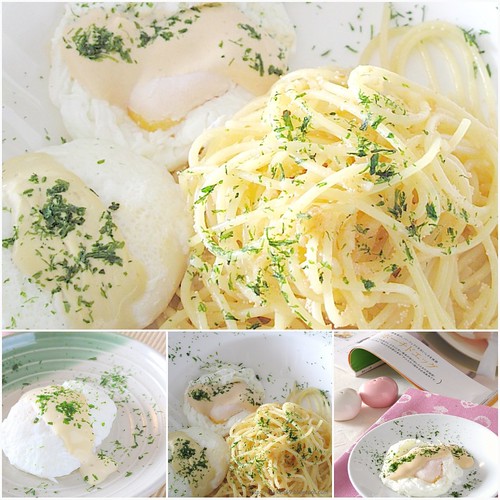
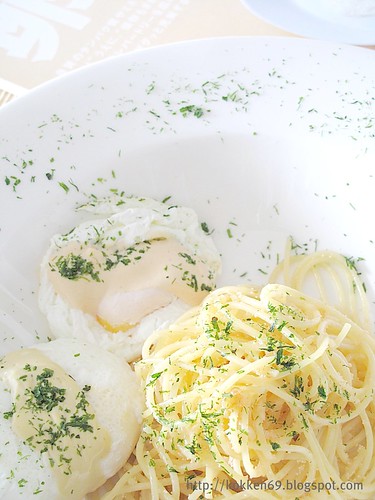
It looks deceptively simple... until I started working on it. Never have I felt so tired cooking eggs!
Thomas Keller has paired the steamed custard with chive chips. You will need to shave thin slices of potato...(peel the potato and use a paring knife to trim it into a Band-Aid shape approximately 4 inches long and 1 inch wide. Brush 2 silpats with Clarified butter and sprinkle each lightly with kosher salt. Place one silpat on a baking sheet. Using a mandoline, cut the potato lengthwise into paper-thin slices.....) Goodness, I am already feeling tired typing out his instructions... Anyway, one has to stack 2 slices of potato together, sandwiching a sliver of chive in between it. Then this has to be topped with a silpat mat and baked with another baking sheet pressing down on the potato chips...  Yes, I went through that, but I couldn't get my chips to be paper thin and by the time I was ready to garnish, the chips had lost its crisp.

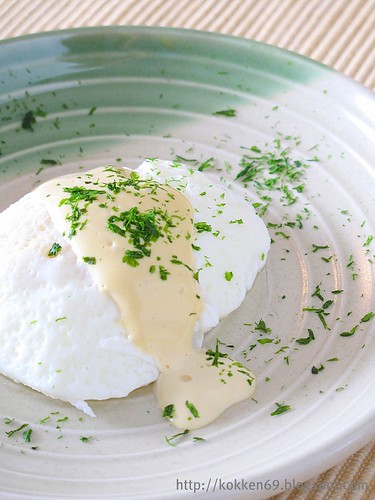
Then, one needs to prepare the custard by mixing boiled milk&cream with egg. Easy enough - until I tried to blend the hot milk/cream with the egg in the blender and the pressure from the hot milk catapulted the lid and the milk mixture all over my kitchen.!!! Now I smell like a baby has burped milk all over me!
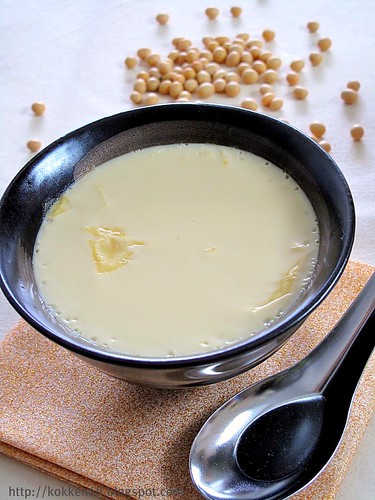
Anyway, I managed to clean things up and start over again. By the time I have got the custard in the oven, I was already bushed but the dish was not done yet. There is still the Truffle Ragout which involves simmering the truffle oil, minced truffle and butter in Veal stock. At this point, I was too weary to be precise - I just threw everything into the saucepan without weighing. End result was a cottony custard but I think my Truffle Ragout was a tad too strong in flavour. Neverthelss it was still reasonably delicious but I am sure it is way off from the great master's creation... I am so exhausted.

I do still have all the ingredients, perhaps I should try again. Sigh... my realisation - whatever Thomas Keller charges for his meal (US$100 up) I will gladly pay for it - it will be worth it! I know now!

P.S. : Pardon me but the recipe and instructions are too long to type out. I am exhausted....

Tuesday, January 26, 2010

Tandoori Chicken - Following Sanjeev Kapoor's Recipe

Tandoori Chicken 2

Sanjeev Kapoor 2


Picnik collage


I am sure it does not come as a suprise to most of my supportive bloggers that I would make time to comb through the cookery section of the nearest book shop when I was in India...and that I definitely did at the very first opportunity at the Bangalore Airport Crossword bookshop.I was prepared to find a dismal collection at the airport bookshop but what I wasn't prepared for was to find almost 90% of the cookbooks displayed on the 2 shelves by some guy called Sanjeev Kapoor. I was flummoxed by this Cookery Book Mafia King for his books come in all permutations - full A4 sized pictorial versions, smaller pocket sized condensed versions, compilations on Chicken, Vegetarian, Chinese(??), Cakes & Pastries... my head almost throbbed with disdain - for intuitive experience tells me that when something has attained such mammoth scale in commercialisation they usually lack sincerity or substance. The other well published author is a lady by the name of Tarla Dala but most of her publications appear to be mainly vegetarian recipes. Hence, as a result, despite my disdain, I still went ahead to purchase Sanjeev Kapoor's Tandoori Cooking @ Home.

I picked this because I have always liked food prepared the Tandoori way and also because during this trip, I have come to love assorted Tandoori vegetables - from mushrooms to cauliflower to potatoes...I have acquired the habit to order at least one tandoori vegetable dish at every meal and I really do want to learn how to do this. For those who are unfamiliar, Tandoori actually means well-marinated meat cooked over an intense open fire. Traditionally, burning coals are used to fire deeply-embedded clay Tandoors (ovens).These thickly insulated ovens only has one opening for heat to escape and hence are able to retain heat very well making them especially suitable for baking rotis, naan and parathas...

As I browsed through my newly acquired cook book, I wondered to what extent would I be able to replicate the taste of grilling in a coal fired Tandoor.

The first recipe I picked to experiment with is none other than the ubiquitous Tandoori Chicken. I had tried to make this before but because the instructions from the last recipe was vague, it did not turn out quite right. Hence, I am eager to give this a go to see if I would be more successful plus of course, I already have all the necessary spices.

I must say, the results are really pleasing. I was skeptical if I would be able to get some charring on my chicken but I did. I do not know if I should attribute this to the recipe or to my oven. (probably the latter) The taste was delicious and was not unlike the ones I had experienced at the restuarants. In addition, the chicken was tender - perhaps I could try to grill this longer in my oven the next time to toughen it a little more. I suspect the higher heat in the traditional Tandoor tends to cook the chicken through more easily.

Yes, I am pleased and I had to message L to tell him how GOOD it tasted. So I guess I was too quick to judge Sanjeev Kapoor... I will need to try a few more recipes to fully make sure that he is not just a gimmick...

Recipe (from Sanjeev Kapoor's Tandoori Cooking @ Home):
800g Chicken (I used Chicken Thigh meat.)
2 tsp Kashmiri chilli powder
3 tbsp Lemon juice
Salt to taste
1 cup Plain yogurt
2 tbsp ginger paste
2 tbsp garlic paste
1/2 tsp garam masala
2 tbsp Mustard oil
Melted Butter for basting
1/2 tsp chaat masala

Method :

1. Make incisions with a sharp knife on the chicken meat.
2. Rub the mixture of 1 tsp chilli powder, one tbsp lemon juice and salt
over the chicken and set aside for half an hour.
3. In a separate bowl add yogurt, remaining chilli powder, salt, ginger paste, garlic paste and remaining lemon juice, garam masala powder and mustard oil
4. Rub the yogurt mixture over the chicken and marinate for 3 to 4 hours in the refrigerator.
5. Preheat oven to 200C. I used the rotisserie setting on my oven and placed a open rack near the top of the oven. Grill the chicken for 12 mins. Bast the chicken with butter and continue to grill for another 6mins.
6. Sprinkle with chaat masala and serve with Onion rings and lemon wedges.

Monday, January 25, 2010

Tea At Kyani Mumbai : Of Bun Maska, Mawa Cake & Shrewsbury Cookies

Shrewsbury Cookie

Shrewsbury Cookies 2

Kyani Bakery

Kyani Butter Buns

My first visit to India took place almost 9 years ago. I still remember how well-intentioned friends and colleagues had tried to prepare me for my trip, loading me with advice and warnings derived from their own unpleasant experiences in India. I was told to always drink bottled water and even with that, one colleague would always drop a water purifying tablet into the bottle before drinking. Others told me how the prevalent evidence of poverty disturbed them and marred their impression of India. Whatever it was, I was too fiercely independent and rebellious to heed their advice. I went to India brimming with eager anticipation and wide-eyed curosity. I observed India like a football match spectator and went away energised and charmed by it. Subsequently, I had returned to India 4 or 5 more times and stopped when I was posted to take on a different business role.

My latest trip came almost 5 years after my last and boy, has India changed! The first sign of change is evident when I landed at the Mumbai Airport. Sparklingly new, the airport is bright, spacious and organised- this is 1000X better than the airport I remembered from 5 years ago. I breezed through immigration within 10mins and luggage came promptly. Of all the cities I had visited in India 5 years ago, Mumbai was my least favourite for with slump quarters everywhere, it was dirty, chaotic and I experienced harassment from beggars everywhere (child beggars, women beggars with babies and what my Indian colleagues called 'Eunachs' but are really transvestites) . This time, the cityscape has quietly revolutionized. I noted to myself that there are fewer slump quarters and fewer beggars would appear at traffic light junctions. I take this as a good sign of progress but I was told that the drive to clean up the city has also created different kind of problems- grave discussion topic for another day...

While I used to go wild shopping for Sari in the past, my shopping expedition this time is more restrained. I bought spices, cheap fabrics for my blog photos and Ayurvedic medication. Also thanks to my colleague R, I learnt a little bit more about Indian cooking and ingredients - she had also tirelessly took me bargain hunting for 12 hours! (10 am to 10pm!)  It was after we bought the Chaat Masala, Amchur (dried Mango Powder) and sookhi gulab patti (dried rose petal), R told me we would stop by one of the oldest cafe in Mumbai for tea and buns.

Kyani & Co., established in 1904 is one of the very few Irani Cafes that is still surviving in Mumbai. R told me it is famous for its Chai with Bun Maska  and Shrewsbury Cookies - I had no idea what these were but my eyes lighted up at the sight of the cafe - old and worn, this is one coffee shop that appears to have been trapped in a time warp. For those who are not familiar with Irani Cafes, these are cafes opened by Persian immigrants to India in the 19th century. There used to be numerous Irani Cafes around Mumbai - literally hundreds of them but now, probably only a handful remain.Sitting in the 100year old cafe, I waited in anticipation for the famous Chai with Bun Maska... When the waiter brought over my serving, I felt deflated by disappointment... It is a bun with a very anaemic spread of butter....I watched as R continue to gush about how good this is and urged me to dip the bun into the chai... 'the butter will melt with the heat of the chai'...  I tried as she suggested but felt no kick at all. The bun was soft but there was too little butter, in fact I thought it had tasted more like margarine than butter. I immediately longed for the Kaya Toast we have in Singapore where generous blocks of butter are sandwiched between crispy toasts with coconut jam (kaya). As R eagerly waited for my verdict, I just couldn't muster enough excitement to match hers... ( I am just not good at being patronising ) instead, I distracted her and asked to order a Mawa Cake, (mava cake) which is another house specialty. The Mawa Cake is a heavy sponge cake spiced delicately with Cardamon. It is heavier because of the use of Mawa(also called Khoya) which is solidified milk (some compares it to Ricotta cheese). The Mawa Cake at Kyani,served like a cupcake has a very delicate hint of Cardamon that I mistook for Rose - possibly because my senses were a little confused by the milk fragrance from the cake. The flavour was exotic but I felt it could be a little richer and more moist. Next on the must-try list is the Shrewsbury Cookies. This is the first time I have heard of Shrewsbury cookies. These are short butter cookies originally flavoured with lemon and caraway seeds. Apparently, they originated from England. The Shrewsbury cookies, fresh and buttery are delicious with tea and are my favourite at Kyani. They also offer different variation including one with cashew nuts.

Overall, I did not get the gastronomy experience I was anticipating but I believe the charm of these food lie in their ability to evoke lineage and certain fond memories. On their own, they are simple and common - not likely to blow any new visitor away with their taste - and to a very small extent, I think I can understand why many of these cafes have drawn their shutters. When the food has to draw on fond memories and is not sustained by efforts to constantly create new memories in newer and younger crowd, places like these will invariably get dusty and stagnant. Once again, I draw upon the parallel in our Kaya Toast experience - this has been revived very successfully over the last 10 years in Singapore. Although the old Kaya Joint in Singapore has become somewhat modernised and has lost its old, coffee shop feel, but the overall culture associated with the coffee and snack experience lives on. I hope Kyani & Co., too can continue to sustain these wonderful experiences as Mumbai continues to progress...

Sunday, January 17, 2010

Kinako Polvorones - Japanese Take On The Traditional Spanish Cookie

图片2

Soy Cookie

Picnik collage Soy Cookie 2


It has been a while since I last baked something. As Chinese New Year approaches, everyone gets ready to churn out the best house recipes. The staple Chinese New Year treats would include the Pineapple Tart - buttery short bread cookie base topped with moist,sweet delicious pineapple jam, the Love Letters,- a crispy paper thin coconut flavoured egg roll rolled into the shape of a cigar, the Kuih Bangkit-a small, dry cookie made with sago flour that neverthless still melts in the mouth to release an explosion of fragrant coconut. I will be tempted to try my hands at these traditional treats but deep down for most of us, we know that we will never dare to pitch these against e.g 3rd Aunty's eagerly awaited Love Letters or The Mother-In-Law's 'Le Pineapple Tart'. When you are up against these time tested family heirloom recipes, you adopt a low profile and let the Patriachs Of The Family Kitchen shine.

So what can we do to get that nod of approval? What can we bring to the table that is different and tasty enough to get people interested? For the ones who are bold enough to try new things, who are thick skinned enough to brace the shoot downs, there will always be options - limited only by one's ability to think out of the box.

I choose today to with work with a Polvorone recipe. A Polvorone is really a traditional Spanish cookie. Somewhat like a short bread but compared with the pineapple tart, it has very much less butter but supringsingly still melts beautifully in the mouth. Usually almond based, many variations have been produced using e.g. Cashew Nuts (somewhat of a specialty in the Philippinnes now) , Pecan nuts etc.

I found a nice recipe in Keiko Ishida's Okashi, yet again. My eyes lit up when I saw her recommendation to vary it with Kinako powder( Soya Bean powder). Though traditionally presented as a round ball or cut into discs using cookie cutter, I wanted to play with a set of  traditional wooden molds I bought in China for S$3. These work a little like the Ang Gu Kueh molds or to the people in the West, you can imagine it to be somewhat of a Springlere mold. With a mold with beautiful imprints like these, one needs to select the recipe carefully to ensure that the carved patterns stay clear and sharp. I needed to find a cookie recipe that will not spread too much in the oven, something that contains less fat and holds its shape. I did consider using a Springlere cookie recipe but that, I feel will not suit the palate expectation for this traditional Chinese festive season.

Picnik collage Soy Cookie

Soy Cookie2

Working with the mold, is quite exasperating, though. Some motives seem to work better with the recipe that the others. I had wanted to get more cookies in the 'bird' motive but it tends to break off very easily at the tail joint. It was relatively easier to knock the cookie dough out of the Lotus flower and the flower basket motive.I was happy that the imprints remained sharp and clear after baking.
The taste of the cookie is fragrant with the soya bean powder and I like the melt in the mouth texture. It reminds me a little of the Green Bean cake (绿豆糕)- not as dry and crunchy as the Macau Specialty and neither is it as soft and cake-like as the oilier Taiwanese version. I am now motivated to play with Sesame powder and ground cashew nuts.

IMG_0670

Recipe (adapted from Keiko Ishida's Okashi) :

110g               All purpose flour
100g               Unsalted butter
40g                 Icing sugar
70g                 Soy Bean Powder (Kinako)

Method:

1. Preheat oven to 150C.
2. Sift flour onto a parchment paper lined baking tray. Bake the flour at 150C for 25mins, stirring the flour a couple of times during the baking process.
3. Remove the flour from the oven and cool down to room temperature.
4. In a mixing bowl, beat butter and icing sugar with the paddle fixture until soft. Add  the soy bean powder and mix well.
5. Add the flour and mix well with a spatula.
6. On a lightly floured board, roll out dough to a thickness of 1cm. Cut with your favourtie cookie cutter.
(for me, I had rolled the dough into a ball, inserted it in the floured wooden mold before pressing it into the mold. The mold is then given a firm knock against the table and the cookie will drop out of the mold.)
7. Dust with a mixture of powder sugar and Kinako powder.

Friday, January 15, 2010

Poached Eggs With Pasta- My Twist To The Traditional Birthday Noodles

Birthday Noodles

Poached Eggs with Tomato Myonnaise12

Poached Egg with Tomato Mayonnaise

Poached Eggs Collage

Poached Eggs Collage 2

Poach Eggs With Spaghetti1


It is amazing how the birthdays of my dearest, my best friends, my family all seem to fall in the month of January and February. L, my sister and 2 of my close knit friends' birthdays fall in January. In Februray, including myself, there will be another 4 birthday girls within our close knit circle celebrating birthdays. I am not a person big on birthday celebrations. I am extremely bad at remembering birthdays and refrain from letting people know about mine.

I remember commenting on Zurin's blog once that age is getting increasingly irrelevant in today's world. I sometimes feel that we are entering an ageless era. One cannot avoid turning pages of any fashion magazine today without being besieged by youthful images of  men and women (especially women) in their fifties, sixties looking like some immortal sphinx!

Admittedly, science has played a big role in youth preservation, health enhancement and beyond.  Some of these solutions overwhelm our expectation and imagination while others yield reports to demonstrate efficacies of certain natural food families e.g. Royal Jelly, Pine Bark Extract, Mushroom Extract, Ginseng.
Whatever they are, the ultimate objectives underlying these solutions strive to achieve the common goal of prolonging live and extending youth.
A Korean colleague of mine once made a comment which floored me but at the same time set me thinking. We were talking about the benefits of taking Korean Ginseng extract - he takes them regularly for general well being - to enhance energy level, boost immunity - all to cope better with the highly demanding tasks we are engaging in both at the work front and family front. He then lapsed into a playfully pensive mood, lamenting that actually he preferred to be free from these 'super supplements' for he feared when it is time for him to go, his nutrient enforced cells will be resisting the siege and cause more suffering to those last few moments on the death bed.

Well, that was a little bit of food for thought. What I really want to post on this blog is actually a dish to celebrate the 2 birthday eventful months. One of the most traditional dishes presented during chinese birthdays would be noodles served with 2 hard boiled eggs. It is ceremonial to dye the shell of the hard boiled eggs in red. Everyone in the family will be expected to partake of one red egg while the birthday gal/guy will need to take 2 of them. As we get more and more exposed to the western world, these noodles and eggs gradually started to disappear during birthday celebrations. They are often deemed old fashioned and unhip. Replacing them are visually appealing western style birthday cakes.
As I was flipping through some old Japanese Food Periodicals a few days back, I saw a picture of poached eggs. Poached to take on the appearance of a snow white pouch, these are drizzled with a mayonnaise dressing. I have never made poached eggs before and all of a sudden I thought the poached eggs paired with the Mentaiko Angel Hair Pasta I made last week would offer a nice modern twist to the traditional birthday noodles and eggs.

Poaching eggs, for those who have never done it before - be warned! It is NOT EASY! I wasted 4 eggs before I got these 2 that look boderline decent. A few points which I will pay attention to when I do this again next time :
1. Water needs to be bubbling but not too vigorously.
2. Once the egg has been poured into the water, leave it - do not be tempted to poke at it, stir it etc.
3. I will use my soup ladle to cradle the egg instead of letting it float and swim in the bubbling water.

The dressings, so easy to make, pair brilliantly with the poached eggs.

Poached Egg with Worchester Mayo

Ingredients for Poached Eggs :

Eggs                Let there be extras...
Rice vinegar     2 % of the volume of water. (if you use 1l water, add 20ml)

Dressing:
Tomato Mayo
2 Tbsp        Mayonnaise
1 Tbsp        Tomato Ketchup
1 Tbsp        Milk

Worchester Mayo
2 Tbsp       Mayonnaise
1 Tbsp       Worchester sauce

Method :

1. For dressing, simply mix all ingredients together.
2. In a frying pan ( I started using a saucepan but changed to a more shallow wok) add enough water to give a height of 3-4cm of water.
3. Add 2% of vinegar and heat to low boiling.
4. Break an egg in a small bowl. Slowly ease this into soup ladle immersed in the boiling water.
5. Leave this to set and cook.
6. Once egg white is cooked, (yolk should still be liquid, if you prefer this to be harder, boil longer but egg white may become a little tough. I suppose you can reduce the amount vinegar if you prefer to cook the yolk longer but want to prevent the egg white from toughening) drain water carefully from ladle and transfer egg into a bowl of cold water.
7. Use your hand, gently scoop the poached egg from the cold water and pat dry with dish towel.

8. Top with Mayo dressing and garnish with Nori (seaweed powder) powder.

Please refer here for spaghetti recipe.

Wednesday, January 13, 2010

Bean Curd Chawan Mushi - Soy Steamed Egg

Yuba Chawan Mushi 1

Yuba Collage

Yuba Chawan Mushi

I tread perilously every time I get ready to photograph for my blog. Through trial and error, I have vaguely gotten the knack of capturing the right lighting in my kitchen. I have graduated from using craft paper as my background to fabric (table cloth, placement mat. dish towels...) which gives a softer finish and has a lesser tendency to bounce harsh lights around. However, photographing food for me now, can only, at best be considered a hit or miss exercise. I still get exasperated when the still shot ,which appears sharp and polished on the tiny camera display screen, turns drab and blah when projected on the computer screen.

Styling for me is especially challenging as I am not blessed with 'the eye'. I sometimes feel that the way I style my photos is quite similar to the way I dress - there are days where I can throw a few disparate pieces of clothing together and look good in them and others where my garbs selection just make me feel like an awkward duck. Today is one of those days when I am having a bad pictorial day - photo block, whatever you call it for I stood there staring for quite a long while at the 2 bowls of egg custard, not knowing what to do with them....

Consolation came after I put away my camera and started digging into the Chawan Mushi. It tasted simple, honest and totally unpretentious. I felt purged. I have always loved Tofu and have on a few occassions made egg tofu from scratch. This particular recipe was published in one of the old Japanese food periodicals I bought in Japan a few years back. This particular issue featured 100% on tofu. What got me excited is the idea of steaming dried bean curd skin ( Yuba, 湯葉、腐竹,Fuchock) in egg tofu. The egg tofu is made by mixing egg with soya bean milk. The stock used can be kept light with a Kombu Dashi, Mushroom stock or for those who prefer a stronger flavour, chicken stock. The tender bite from the bean curd skin provides a textural contrast to the soft, custardy tofu. A very pleasant, serene experience.... unfortunately, this did not come through in the photos.

P.S. : I made the mistake of adding the bean curd skin into the egg/soy liquid. This actually displaced air in the liquid and resulted in bubbles. I would try to place the bean curd skin in the bowl next time before gradually pouring in the egg/ soy  mixture.
Recipe :

1            egg
1/3 cup   mushroom dashi stock ( I used the porcini mushroom powder to make the stock.)
1/2 cup   unsweetened soya bean milk

10g         dried bean curd skin (use the thin version commonly used for chinese desserts)

1/4 tsp     Soya sauce
1/4 tsp     Salt

Method :

1. Soak dried bean curd skin in water for 3 mins to soften. Drain water.
2. In a bowl, beat egg very lightly to avoid creating too many bubbles.
3. Add the soya sauce and salt into dashi stock.
4. Add (3) into (2)
5. Add Soya bean milk and mix well.
6. Use a fine mesh, filter the egg mixture into 2 small bowls. Add softened bean curd skin.
7. Steam (6) over strong boiling water for 1.5mins. Reduce heat to low boiling and continue to steam for 8 mins.  Insert bamboo skewer into tofu. When cooked, you should not see any milky liquid surface.

Tuesday, January 12, 2010

Strawberry Rose Lassi

Strawberry Lassi 3

Strawberry Lassi

Strawberry Lassi Collage

At the recommendation of my vegetarian sister, I have recently started to consult an Indian Ayurvedic doctor for recommendations and remedies to achieve overall general well being. I have always been interested in approaches to attain better health albeit I am not ready to give up meat yet. Since my younger days, I had been exposed to anti oxidants like pine bark extract and evening primrose oil. I confess I used to be somewhat of a supplement junkie but have toned down tremendously over the years. My first introduction to Ayurvedic treatments took place when these weren't even in fashion.  I remember my first experience in doing the Shirodhara treatment almost 20 years ago. They were dripping warm sesame oil on my temple - it was as can be imagined, a greasy, gooey experience - you end up with a whole head of oily hair - but interestingly, the process must have stimulated the right glands somewhere, for my face took on a healthy glow for days after that.

This time, I went into consultation primarily to see if there is anything that can be done to improve my health in a natural manner- I know this is madness - it makes me look like a hypochondriac or a modern day Emperor Qin trying to seek some elixir to longevity or something. Anyway, I do have digestive problem. After taking my pulse, the doctor explained that I have wind problem (which is very true) , categorising my body type as a Vata-Pita combination. (VATA - wind, Pita- fire) I was asked to take some Ayurvedic herbal powder every evening after meals (tastes awful) and was asked to boil water with coriander seed, cumin and caraway seed to drink everyday.... I haven't boiled the seeds in water yet but have been taking the yukky powder every evening. So far, it has been helping in my digestion and I am envisioning myself moving to the realm of higher well being... Oohmmm...

Anyway, instead of boiling water with the spices, I thought I would try to incoporate them into a more palatable drink. Lassi, as most would know is actually a yogurt based drink made with fruits and a variety of spices. I still have some Strawberries left over from my Lollies experiment so I decided to use that for my lassi preparation.  For a little elegance, I added a few drops of Rose Water.

I drank most of it but still managed to pour some of the left over lassi into my lollie molds to make lollies for my neighbour's little girl. For the lollies, I had added additional sugar and honey to sweeten it. The feedback for my previous batch of lollies was that they were not sweet enough for the children. (it was sugar free and 100% fruits) In fact, for this batch, I had to add quite a bit of sugar to sweeten the lollies - I was quite disturbed - it goes to show how much processed sugar the kids are putting into their system nowadays.

Recipe :

400g              Strawberries
300g              Natural unflavoured yogurt
25g                Soft brown sugar
300g              Ice water
A few drops   Rose Water
Dash              Mixed spices (I ground a mixture of coriander, cumin and caraway seeds, you can just add
                      freshly ground pepper if you want this to be easy)

Method:

1. Hull strawberries and cut them up coarsely. Blend this with 150g ice water until smooth.
2. Add yogurt, sugar, Rose water and rest of water to blend until smooth.
3. Pour into chilled glasses and add ground spices.

Monday, January 11, 2010

Korean Bibimbap

Picnik collage

IMG_0498

Bimbimbam

I am gripped by a scary sense of frenzy - I am finding myself blogging frenetically - trying to make full use of every little bit of time available to put up posts before I leave for my business trip to India next week. It is perturbing to realise that once the momentum to post has been set rolling, it can become quite a formidable force - aided by encouragements from fellow bloggers.  I find myself constantly thinking about what to cook next... what boundaries to push, what interesting things to experiment. Some may have noticed, I have started to blog more on savory dishes recently where in the past, I would usually do sweets... for a very simple reason - I have to eat lunch and dinner every day. Cakes and sweets, on the other hand are too dangerous to partake of on a daily basis. So, the good thing that emerge from this almost helpless frenzy is that I get to eat better - LOL.

I have never made anything Korean before. I got piqued into doing this after watching an episode of a Taiwanese Variety show, 女人我最大 (WQueen). This is primarily a girly informatic variety show targeted at women of all ages, touching on topics ranging from the latest trends in Skincare, Makeup, Staying Fit, Eating Right, Hair Styling and Fashion. It runs 5 days a week and each day focuses on a different topic. My Taiwanese colleague had told me this is  a powerful program that has many Taiwanese women (and beyond)  hanging onto every advice/recommendation dished out in the program.

Anyway, one of the feature last week saw the program pitching 2 guests against each other to cook a healthy meal with left over rice. One of the guests demonstrated cooking Bimbimbap with the left over rice and it looked so good, I decided to do a little research and give it a go.

A quick trip to the local Korean grocery supply store equipped me with the required Korean Hot Bean Paste (gochujang) and... I just couldn't leave without getting one of those stone bowls!!!

It was relatively easy to put together. Although the recipe I found called for more garnishing vegetables, I worked with what I have in the fridge and am quite pleased with the end result. I got the required burnt rice crust (锅巴). To me, this is the definitive element of the dish, the result of cooking the rice in the hot stone bowl. One should be able to get the crust using normal claypot as well. There is no need to go rushing out to buy a stone bowl, I was just being vain and spendthrift!

Here's a close up of the burnt rice crust.
bimbimbam 2


Recipe :

80g                    Minced Beef ( I used sliced beef because this is what I have in my fridge)
1                        Small sized onion.
1 tsp                  Chopped ginger
1 tsp                  Light Soya Sauce
1                        Small carrot cut into matchsticks (I used a shredder and cut it to shreds)
1                        Small Japanese cucumber cut into matchsticks (I didn't have this but I substituted with some
                          kimchi)
1                        Fresh shitake mushroom (I didn't have this as well)
30g                    Bean sprouts (blanched quickly in water to remove rawness)
1                        Egg
1                        Bowl of cooked rice
1 tsp                  Korean hot bean paste (I think I went too generous with this)

Method:

1. Pour 2 tsp of Sesame oil into hot bowl or claypot.
2. Put rice into the bowl and pack it well.
3. In a saucepan heat up 1 tbsp of oil and saute cut onions and ginger until fragrant.
4. Add in beef and soya sauce and fry until beef is just browned.
5. In the stone bowl, arrange carrot sticks, cucumber sticks, bean sprouts and mushroom and beef on top of the rice. Cover the bowl/ claypot and apply medium heat. I heated this for 10mins until the smell wafted out of the bowl and I could hear a   sizzling sound.

6. At this point, crack an egg over the rice, cover and remove from heat. Before serving ,spoon  bean paste on top. Mix well before eating.              

Sunday, January 10, 2010

Strawberry, Mango & Orange Lollies

Ice Lollies 2

Ice Lollies 5

Lollies Collage

I fall prey to all fancy gadgets easily...especially the ones that reside in the kitchen. I have only moved into my flat 5 years ago and I had already changed my built in oven and my washing machine 2 years ago. Wretched! I am currently enamoured of my 2 new toys - my Blackberry Bold 9700 and my new Braun Juicer.
Well, the first one doesn't strictly count because the company decided to switch to the BB platform for push mail hence I was automatically converted - albeit grudgingly.I had held out for almost 2 years, refusing to change to a push mail phone because I did not want to be held by the electronic leash... Suprisingly, it has been most liberating. The best part of it is L had, unknown to me,also bought a new BB 2 months ago. Ever since then, we had been waiting for my phone to arrive (it was out of stock for quite a while) so that we can BB each other using some of the coolest functions available. Now, we can message and send photos to each other on BB messenger for free! Definitely saving us lots on phone bill and it has also given us versatility over Skype which tends to confine one to the computer. For my blog, I get instant reminders when someone leaves a comment on my blog and I can moderate and pulish the comment real time using my phone! How tragically cool is that?

My next new toy is a very modest Braun Juicer. I had chosen this very basic model over the bigger and more fancy ones for one reason - size. I wouldn't have any more space on my table top for anything bigger. I had BB'd L after I got my juicer and he came back with a response that was so typical of men - 'Why do every woman I know feel compelled to buy a juicer, use it for a few times and never ever to see it again.'.

His sentiments is not unique - actually when I was contemplating to buy the juicer, I had also worried that it would end up as a white elephant in my kitchen. That's why I had chosen to spend minimum money on it and made sure that I get something which is small enough to sit on my table top. As of now, I have my cake mixer, my blender, my coffee machine and now my juicer on my table top. And because they are all sitting there, I make use of them very regularly.My experience tells me that if your gadget has to be put away in a cabinet after use, the tendency for it to turn into a white elephant is extremely high.  (I love my India made Preethi blender to death! I use it for my rempah, purees etc.. )I've had my juicer for almost a week now, and I have used it on the average, twice a day - not bad for a start.

And I have just found a new use for it in this 100% fruit juice lollies treat! - Easypeasy, absolutely no skills required!

Recipe :

125g           Fresh Strawberries
1 small        Mango
300ml         Fresh orange juice

Method:

1. I used my juicer to get the 300ml orange juice.
2. I blend all three ingredients in my Preethi blender until I get  smooth paste.
3. Pour the smoothie into lolly molds and freeze.

Saturday, January 9, 2010

Sakura Ebi Mentaiko Pasta

Sakura Ebi Pasta2

Sakura Ebi Pasta 4

Mentaiko Collage

Mentaiko Collage2

Sakura Ebi Pasta 3

While preparing for my last post on Sakura Ebi Fried Rice, I had tried to google about Sakura Ebi and found a whole avalanche of interesting recipes using Sakura Ebi (Cherry Blossom Dried Shrimps). The Japanese sites were especially inspiring and one that stood out was a simple yet what appeared to be a universally embraced recipe : The Sakura Ebi Pasta. This is one of those recipes that is exotic east meets west - where the Japanese takes Wafu(和風)flavours and incorporates it with western cuisine and ...lo & behold... there has been no looking back since. This is especially true when the pasta sauce is based on a Mentaiko butter sauce which is easily the favourite Wafu spaghetti recipe in Japan and beyond.

For those who are not familiar with the Mentaiko (明太子), these are actually spicy pollock roe. They are also sometimes referred to as spicy cod roe. The mentaiko has a salty and spicy taste - as a result of the marinating and light fermenting process in chilli, sake and konbu. It is actually very flavourful. One can buy these at the supermarkets over the sushi / sashimi counter. Bought over the sashimi counter, they would still be in their own membrane/ sac. These will need to be slit open with a knife and the delicious roe can then be scraped out.

These are mixed with butter, lemon juice, a little Japanese mayonaise and a little Olive oil. I did not use up all the Mentaiko butter and had wrapped the remaining butter using cling wrap into a log (like a susage) and stashed it away in the freezer.

Topped with the Sakura Ebi which were lightly pan fried to a fragrant crunchiness, this pasta dish is actually very very good. What would I do differently next time? - Add some fried onions and sprinkle some seaweed dust.

Sakura Ebi Pasta 1

Recipe :

1-2 sacs                    Sashimi grade Mentaiko
1 tbsp                       Unsalted butter
1/2bsp                      Japanese Mayonnaise
1 tsp                         Olive oil
1 tsp                         Lemon juice

1 portion                   Spaghetti
Handful                     Sakura Ebi

Salt & Pepper           To taste

Method:

1. Slit open the Mentaiko sac and remove egg roe. Mix softened butter, mayo, olive oil and lemon juice in a bowl. Add in egg roe and mix well to get a smooth creamy sauce.

2. In a shallow frying pan, add a few drops of olive oil. Add Sakura Ebi and toast fry until it is fragrant and crispy.

3. Prepare spaghetti as directed on packaging.

4. Toss drained spaghetti in a dollop of Mentaiko butter sauce.

5. Top with Crispy Sakura Ebi.

Tuesday, January 5, 2010

Sakura Ebi Fried Rice

Sakura Ebi Fried Rice

Fried Rice Collage 2

Fried Rice Collage1

Sakura Ebi

Sakura Ebi Fried Rice 2

The easiest way that we commonly use to polish off left over white rice is to turn them into fried rice. Simple as it may sound, it is not easy to churn out a good dish of fried rice. I have heard more than once that one of the ways to gauge the standard of a Chinese Restuarant is to check out their fried rice. A colleague of mine (he doesn't cook) used to test our culilnary knowledge by asking us if we knew the procedure to fry rice. He used to tell us with an obvious smugness that one should fry the egg separately before frying the rice because the egg would get cooked too much if we were to fry them together. I didn't believe him and just rolled my eyes...

I have concluded, after reading many recipes, watching numerous cooking programs and eating even more numerous plates of fried rice, that a good plate of fried rice for me,should encompass the following characteristics :

1. Rice should be loose and  well separated - grain by grain. It should not be clumped together.
2. I like my fried rice to be evenly coated with the egg. What the Chinese like to call 'wrapping silver with gold' - the gold being the eggs and the silver refers to the white rice grains.
3. That elusive 'Wok Hei' - the fragrance of the Wok - really separates the good from the celestial.

I decided to pack fried rice for lunch today. The ingredients I have in the fridge include bacon bits (left over from Christmas) and I have stashed away, 2 packets of Japanese Sakura Ebi (Dried Sakura shrimps). 

I had first tasted Sakura Shrimps a few years back when it was in season in Taiwan. The Japanese restaurant was serving fried rice in a heated stone bowl. The Sakura Ebi, something of a delicacy was mixed at the table and stirred quickly in the stone bowl. It was simple but amazingly delicious.

For those who are new to the Sakura Ebi, these are very small shrimps that are caught twice a year in Shizuoka Prefecture in Japan. However, these are also now bred in Taiwan. These little crustaceans are really crunchy and fragrant, perfect as a garnish, in flour battered fritters and as the Japanese vendor told me, best in チャハン (chahan : Fried Rice).

Here's my version of Sakura Ebi Fried Rice.

Recipe :

1 bowl          White Rice (Thai Jasmine Rice)
2 stocks        Green Spring Onions diced.
2 Tbsp          Bacon bits
1/2 bowl       Dried Sakura Ebi
2                  Eggs, beaten
2 cloves       Garlic, smashed with the back of a knife
generous dash  pepper
Salt to taste
1/2 tsp         Light soya sauce

Method:

1. Heat the wok to very hot. Add 2 tsp of oil. Stir fry spring onions and Sakura Ebi quickly and dish out.
2. In the same wok, add 1tbsp of oil, heat to smoking hot. Add smashed garlic and fry quickly to bring out garlic fragrance. Remove garlic cloves from wok. Add bacon bits and stir fry quickly to prevent burning.

3. Add beaten egg and rice. Stir fry rice quickly to coat rice grain with egg. You should fry with a very hot wok, so that the cooking time is kept very short. Add light soya sauce and a very generous dash of pepper. Add salt to taste. Add in (1) and fry quickly. Turn off fire.

Sunday, January 3, 2010

Matcha Castella - Japanese Sponge Cake

Matcha Castella 4

Castella Collage

Matcha Castella 7

Matcha Castella

I have to admit that I am not a big fan of the Castella Cake but I have been really inspired by Ju's (Little Teochew) pictures that I decided to give this a try.

I had eaten the Castella a few times more than 10 years ago. I can no longer remember the taste nor the texture of the cake possibly because I was not really partial towards it. I vaguely remember that it was too sweet for my liking. In fact, when I was in Tokyo in Feb last year, I had contemplated whether to buy some home ( they do look really elegant) but decided against it for I was afraid of the sweetness. I am very mindful about the level of sweetness in the cakes and cookies I bake because my family generally do not take well to sweets. My mum is diabetic and my vegetarian sister, who would talk to me about biodynamic food, continues to pester me to use wholemeal flour and eliminate sugar altogether.   Duh (She just does not understand that cooking is Science, you just can't eliminate certain ingredients without affecting the stability, texture and taste of the final product!)

I made 2 attempts at baking the castella with Makiko San's recipe posted in Just Hungry. My first attempt used her exact recipe with Honey, which is the traditional Castella flavour. I took the cake out of the oven 20 mins too early. The positive part about this was, it yielded a very soft and moist texture but the surface layer was somewhat soggy especially after I had brushed the honey water syrup over it. And... it was too sweet for my taste.

In my second attempt, I decided to modify Makiko's recipe by cutting the sugar by 30% and adding matcha powder to it. Hence, by doing this, I was actually eliminating 30% of the sweetness from the sugar and the sweetness from the honey as well. This time, I also made sure that I baked the cake for 50mins as recommended by Maki.

The end result is a fragrant sponge cake which is not too sweet but I think if I were to repeat this again, I would bake the cake for 40mins to get a more tender texture. My matcha castella tastes suspiciously like steamed egg sponge. (鸡蛋糕) I wonder if the texture will become finer if I were to use a mixture of bread flour and plain four. I feel there is too much 'gluteny' feel to the cake. Also as I scrutinised Castella maker, Fukusaya's website (link kindly provided by Ju), I noted that their process called for beating the egg white and egg yolk separately.

A note of appreciation - both Ju and Maki's emphasis on being patient and diligent cannot be overstressed. I never liked to work with whole egg sponge because when I tried to do these in the past, the texture would invariably end up coarse and dry. For the Castella, I had deliberately willed myself to be patient (no credit to being diligent. My stand alone mixer did all the whisking for me) and whisked the egg and sugar at low speed until a firm foam is achieved. I am really pleased with the texture of the cake. I am already contemplating about baking my next swiss roll using the same method.

I guess, what remains now is for me to get a block of Castella during my next trip to Japan in order to understand how it should really taste like.

I am posting my modified recipe here. But I would strongly recommend anyone interested in giving this a go to refer to Maki's detailed instructions. Of course, Ju's lovely pictures will provide the extra motivation should you choose to dither...:-)

Recipe :
(I halved the recipe featured in Maki's blog)

4        eggs
100g  brown sugar ( original recipe featured 150g of cane sugar)
50ml  milk

100g  bread flour
10g    green tea powder

For detailed baking instructions, please refer to Just Hungry's blog.

LinkWithin

Related Posts with Thumbnails