Announcement

This site will be migrating to a new address.
Please visit me at @Køkken and change your subscription to this blog to my RSS Feed

You Will Be Redirected!

Please do not leave any more messages on this blog. I will not be publishing or responding to any more comments left here. You will be automatically redirected to http://www.atkokken.com All posts have been migrated. You will be able to locate any posts by performing a quick search at my new site. Thank you.

Saturday, February 25, 2012

Coffee Swiss Roll

Coffee Roll4
Pin It
Coffee Roll2
Pin It
Coffee Roll3
Pin It
Coffee Roll8
Pin It


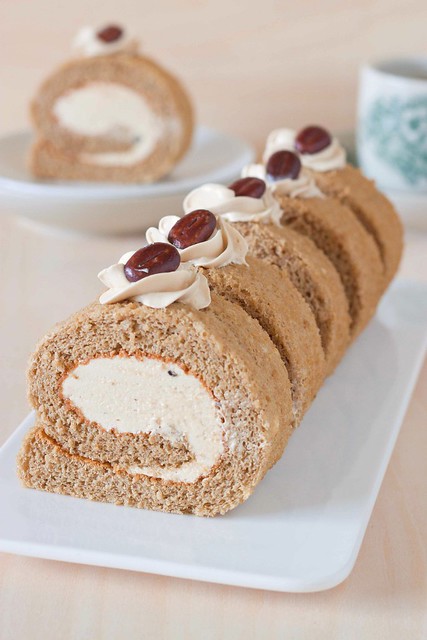
The swiss roll, I believe, is one cake that will never cease to intimidate me. At one point, I used to bake this everyday, just so that I could get enough practice to get it right. There are 3 components to the process of baking a Swiss Roll- getting the sponge base to behave; preparing the filling and rolling the cake to achieve a neat pinwheel roll.

I have struggled many times with the sponge base. As basic as it may be, the sponge is possibly the least attempted cake genre in my baking repertoire. Butter cake, pound cake and even chiffon had often claimed preference over the humble sponge. In particular, I am absolutely terrified of the Genoise sponge - often the very first lesson in any baking course. I recall a basic genoise sponge baking class where we were required to hand whisk the eggs (no kitchenaid!) to ribbon stage. My cake turned out dry, coarse and crumbly. Subsquent attempts on the Genoise did not yield any spectacular results... dryness and coarseness are the usual issues. Subsequently, I avoided the Genoise totally and worked only with the souffle sponge (where egg yolks and whites are whisked separately).

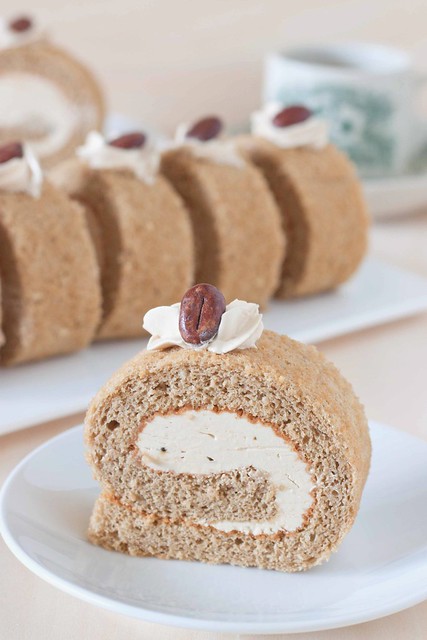
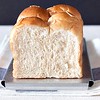
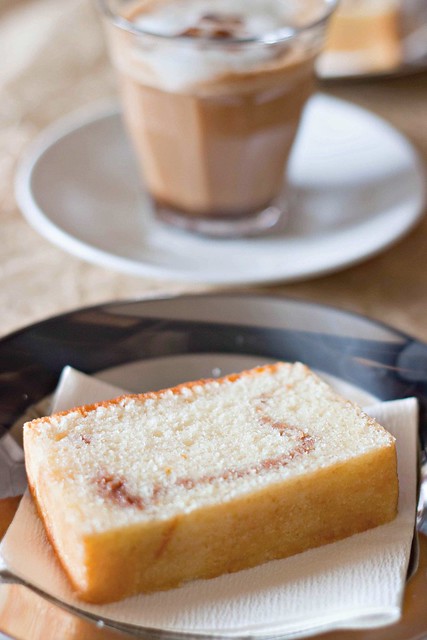
So why have I returned to the genoise for this recipe? Laziness, plain old laziness. The genoise sponge uses a simpler process which does not require the eggs to be beaten separately. I felt this time, my eggs were whisked almost just right. The air cells of the cake, as expected is not as fine as the souffle sponge but at least this time, the texture remained soft and tender. It did not dry out on me even without the use of syrup - which is important- for a dried out sponge will be impossible to roll up.
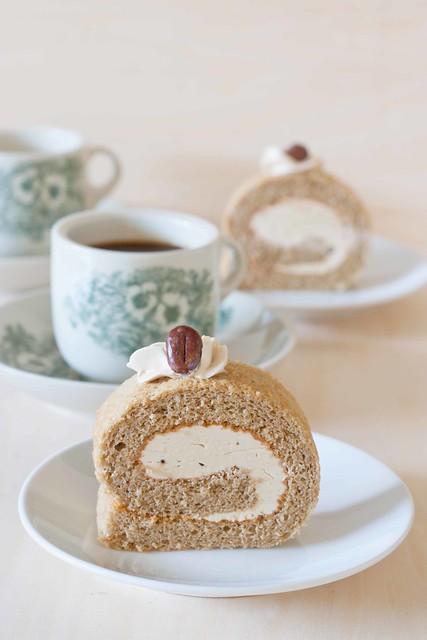
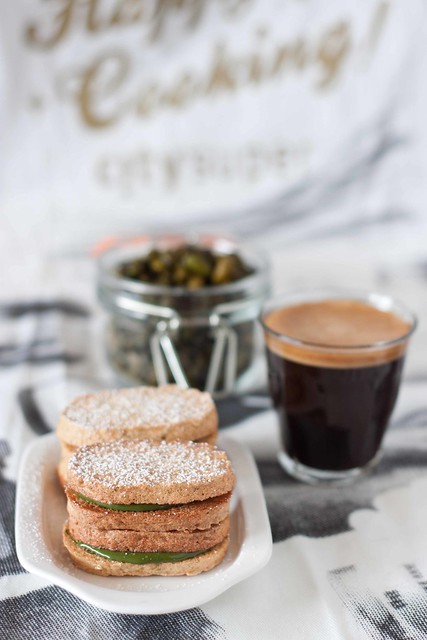
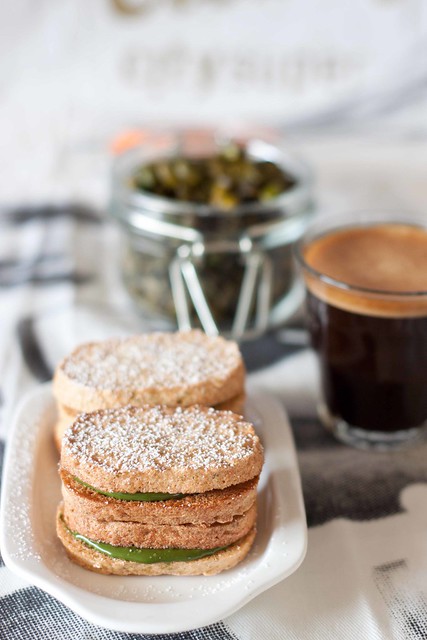
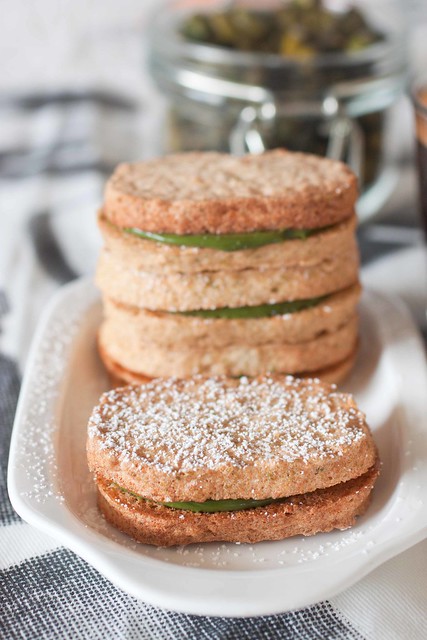
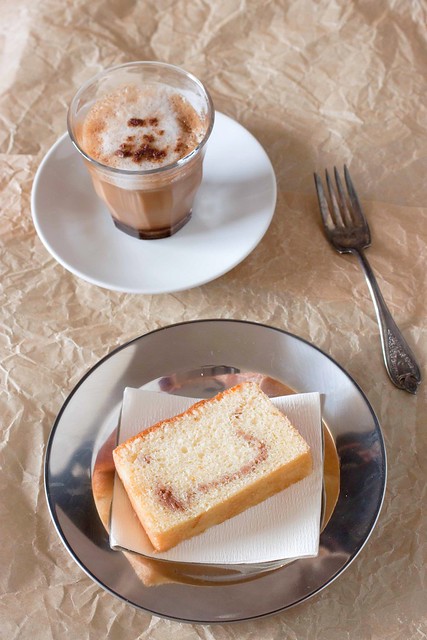
When paired with the coffee flavoured Swiss Meringue buttercream, this cake was not shabby at all.
What I would do to improve this next time? Whisk the eggs at a lower speed to minimise the air cells in the cake.... and then, maybe I can claim victory over the Genoise sponge and move on to Lesson 2 in baking class... :)

Coffee Roll4(250)
Coffee Swiss Roll
Recipe : (Adapted from Kuru kuru Roll Cake)
Sponge
3               Whole eggs
1                Egg yolk
80g            Castor sugar
80g            All purpose flour

20g            Butter melted
30ml          Milk
1tbsp         Instant coffee powder

Butter Cream

75g            Egg white
70g            Castor sugar
Pinch         Salt

225g          Unsalted butter
1tsp            Vanilla Extract
2tsp            Instant Expresso powder

Method :
Sponge:
1. Line a 30cmx30cm cake pan with parchment paper. Preheat oven to 200C.
2. Place eggs and egg yolk in a bowl with sugar and whisk over a water bath until sugar is completely dissolved and eggs become foamy. Remove from heat. (Take care not to rest the bowl on the boiling water)
3. Continue whisking the egg yolks using a stand mixer at medium speed until ribbon stage is reached. (at this point, when a figure 8 is drawn with the egg foam, it should clearly retain its mark and not disappear into the batter)
4. Sieve flour over the egg batter and fold with a spatula to incorporate.
5. Mix butter, milk and coffee powder together and add to (4). (warming the liquid mixture will make it easier to incorporate with the batter)
6. Fold carefully from bottom up to incorporate liquid with batter.
7. Pour batter into lined baking tray. Spread out batter evenly with a scraper.
8. Gently tap the baking tray a few times to release trapped big bubbles.
9. Bake at 200C for 12mins.
10. Remove tray from oven and lift cake from baking tray onto a wire rack. Place the whole cake on the rack into a big plastic bag to cool. (This will help to prevent cake from drying out)

Swiss Meringue Butter Cream
1. Place egg whites, sugar and salt in a mixing bowl. Whisk egg whites over a water bath until sugar and salt completely dissolves.
2. Remove from heat and continue whisking the egg whites using a stand mixer.
3. Whisk at low speed and gradually increase speed. Whisk the egg whites until glossy and firm peaks are formed. (The meringue should cool down by then)
4. Lower mixing speed and add butter in spoonfuls until smooth and fluffy.
5. Mix coffee powder with vanilla extract and add to (4).
6. Change balloon whisk to paddle and continue mixing for another 10mins at low speed to deaerate the cream.

Assembly :
1. Remove liner paper on sponge cake.
2. Place sponge sheet on a sheet of parchment paper with the baked face facing upwards. Spread/pipe butter cream over sponge sheet and roll the cake up like a sushi roll, tucking in the ends with a ruler.
With the cake still wrapped in parchment paper, chill until cake form is firmed up.
3. Slice and serve. 

Thursday, February 23, 2012

Steamed Prawns With Egg White and Chinese Wine

Steamed Prawns2
Pin It
Steamed Prawns4
Pin It

Steamed Prawns3
Pin It

This is my second attempt to deplete the egg whites left over from my Lapis cake. Baking 6 Pistachio Dacquoise cookies did not quite help to make a dent in my bowl of egg whites and I desperately want to move away from sweets and butter for a short while.

This is a very handy recipe for seafood preparation at home.  The original recipe which I referred to featured steamed crabs instead of prawns but prawns work just as well and is more accessible for every day family meals.

The last prawn dish I cooked was a crispy golden fried prawns which is well received by all young and old. However, I have been brought up to remember that the best way to cook fresh seafood like fish, prawns and even crabs would be to steam them to retain as much of the original goodness of the ingredient as possible. Hence one of the most popular dishes served in seafood restaurants here is still steamed prawns or white water poached prawns in their shell.

What I like about this recipe is how the flavours of ginger, sesame oil and Chinese wine - each distinct enough on its own- meld together to result in a well balanced subtlety that is at the same time refined yet comforting.

I don't think this turned out quite right. I believe I did not control the heat well enough... having done which, I believe would result in a tofu like smoothness in the egg white. Well, I have no trouble at all repeating this again the next time I buy a batch of fresh prawns at the wet market...

Steamed Prawns3(250)
Steamed Prawns With Egg White & Chinese Wine
Reciepe (Adapted from Home Cooking With Sam&Forest)

300g            Fresh Prawns
5cm knob    Ginger, finely sliced.
Dash           Chinese cooking wine

Seasoning
1 (40g)        Egg White
4 tbsp (40g)Chicken stock
Pinch          Salt
Pinch          Sugar
Dash           Sesame oil

Garnish
Coriander leaves

Method :
1. Shell prawns to leave only the tail end intact. Devein and wash.
2. Lay prawns on a steaming plate.
3. Pour seasoning over prawns and sprinkle ginger over the prawns.
4. Set up steamer and wait until water is boiling. Place prawns in a steamer and steam over medium to high heat for 10mins until prawns are cooked.
5. Pour Chinese wine over prawns, garnish with coriander leaves and serve immediately while hot.

Saturday, February 18, 2012

Pistachio Dacquoise

Dacqois4
Pin It
Dacquois6
Pin It
Dacquois10
Pin It
If you are, like me, still staring at that container load of egg whites in the fridge, left over from all the Pineapple Tarts and Kueh Lapis CNY baking frenzy, then this is one recipe you will appreciate.
Less temperamental and with a simpler process than the macarons, these little cookies are every bit as French as their priMA donna cousins. I made these quite some time ago here after I acquired my dacquoise mold from Japan. Since then, the mold had sat in the cabinet, forlorn and neglected. So I am glad that this stood out as a reminder as I flipped through Pierre Herme's Le Livre des Fours Secs et Moelleux - another cookbook which I have had success with several times.

If you do not have a Dacquoise mold, you can still pipe these out round like macarons. They will still look super cute like little rustic looking burger cookies.

I decided to experiment a little with the recipe using Pistachio. Instead of the usual ground almond or hazelnut, I used a blend of ground pistachio and ground almonds with a white chocolate pistachio filling.    Pistachio cream, in my opinion, always have the ability to refine the taste of any pastry, elevating blandness to elegance.

I however, made a mistake when I made these. It is standard to dust the meringue generously with icing sugar before baking. The sugary surface will take on a crystalline crispy finish in the oven. I totally overlooked that and only realised my mistake when the dacquoises were baking away in the oven.
Nevertheless, I thought the cookies still look presentable and am happy with my simple experiment.

So, what else are you making with the left over egg whites? I still have a load of them.... (hopefully any suggested recipes would not require me to break any more eggs for yolks! :D )

Dacquois5(250)
Pistachio Dacquoise
Recipe: (this is a very small recipe that bakes only 6 cookies)
80g                     Egg white
25g                     Castor sugar
2g                       Dried powder egg white

25g                     Ground pistachio
25g                     Ground almond
50g                     Icing sugar
10g                     All purpose flour
Icing sugar for dusting

Filling :
40g                     White chocolate
40g                     Pistachio paste

Method :
1. Sift the ground pistachio, almond, icing sugar and flour together and set aside.
2. Preheat oven to 170C.
3. In a clean and dry mixing bowl, whisk egg white and dried egg white powder together until foamy. Add castor sugar in 3 additions and continue whisking until stiff peaks are formed.
4. Fold in sifted dry ingredients from (1), taking care not to deflate the meringue.
5. If you are using the Dacquoise mold, mist the mold with water and lay it on a baking sheet/ silpat sheet.
6. Pipe (4) into each cavity of the dacquoise mold and scrape to level meringue.  (if you are not using the mold, simply pipe rounds on to the baking sheet. I particularly like to finish the rounds with a pointy tip)
7. Lift the dacquoise mold and dust the meringue with icing sugar. Once the icing sugar has melted into the meringue, dust one more time with icing sugar.
8. Bake at 170C for 20mins.
9. Cool down completely before removing the dacquoise from the baking sheet.
10. Our climate is humid. The cookies will soften if not stored in an air tight container hence I would advice to keep them in air tight containers and store in the fridge.
11. For the white chocolate pistachio filling, melt white chocolate over a bain marie. Mix in pistachio paste.
12. Pipe or apply filling on to dacquoise with a offset spatula. Sandwich with another cookie. 

Monday, February 13, 2012

Bourke Street Bakery's Dark Chocolate & Raspberry Muffins

Chocolate Muffin11
Pin It
Chocolate Muffin2
Pin It
Chocolate Muffin6
Pin It


Left with half a quart of Buttermilk from the last buttermilk pound cake, I had to quickly identify another recipe to deplete the not so cheap diary ingredient before it turns rancid. Also with the extended Christmas to Chinese New Year holiday mood over, it is time for me to dive into my full time job - yes, the one that pays for my bread and butter.. literally! Hence I desperately can only afford to spend time on a quick and easy recipe that hopefully still tastes good enough to be shared.

To my rescue is Bourke Street Bakery's Ultimate Baking Companion. Apart from Tish Boyle's Cookbooks, this is another one of the few cookbooks that I trust whole heartedly with my eyes closed.
Touted as the most popular muffins sold at Bourke Street Bakery, this is an easy, no-Kitchenaid-mixer-required kind of recipe. The down to earth simplicity brought me back to those early formative years when I did not own even a handheld mixer. It was really after I had a few easy successes with muffins that I was motivated to get a Kitchenaid mixer... from then onwards, I graduated to frosted cupcakes and had never looked back since.

Unfortunately, in the pursuit of more fancy baked goods, I had turned somewhat snooty at the humble muffins - dismissing them as too easy for 'my developed skill sets'.... yes, we can lose ourselves amidst fluffy clouds of meringue and silky smooth butter cream... The best way to be brought back to the earthiness of being would be to keep companions like Tish Boyle and Bourke Street close to you. Life can be simple and great ...and at most times, simplicity is enough.

Utterly moist and tender, this muffin achieves its lovely texture through the generous incorporation of butter, buttermilk and fresh succulent raspberries. I could literally feel a gush of hot steam rushing out of the oven when I opened the oven door.
The generous amount of dark chocolate used in the recipe would also delight chocolate lovers.

My Australian colleague had told me that their mixed berry muffins were outstanding but I bet he had not yet tasted these Dark Chocolate Raspberry muffins.

Chocolate Muffin11(250)
Dark Chocolate & Raspberry Muffins (From Bourke Street Bakery)

Ingredients:
400g (2 2/3 cups)           All purpose flour
2 tsp                               Baking powder
300g (10.5oz)                Caster sugar
310g (11oz)                   Unsalted butter
480ml (16 3/4 fl oz)       Butter milk
3                                    Eggs
225g (8oz)                     Dark chocolate (55% cocoa) roughly chopped
225g (8oz)                     Raspberries
55g (1/4 cup)                 Raw Demerara sugar
Icing sugar for dusting

Method :
1. Preheat oven to 190C (375F) . Line 2 large 6-hole muffin tins with liners.
2. Sift flour and baking powder into a bowl and add sugar. Mix well to combine.
3. Melt butter in a saucepan over low heat, then remove from the heat and stir in the butter milk.
Add in eggs one at a time to combine.
4. Pour (3) over the flour. Whisk to combine. Fold in chocolates and raspberries.
5. Spoon the batter into the muffin liners.
6. Sprinkle the top with raw sugar. Reduce the oven to 180C (350F) and bake for 25-30mins.
7. Remove from oven and allow to cool in the tins for 10mins before eating. Dust with icing sugar to serve.


Tuesday, February 7, 2012

Coffee Bread Loaf

Coffeebread2
Pin It
Coffeebread5
Pin It
Coffeebread6
Pin It
Coffeebread8

Thanks to the water roux technique, I am now feeling quite comfortable baking bread. For some reason, I find that the sense of accomplishment in churning out a soft, well formed bread is immensely greater than for example, turning out a batch of macarons.
I have never quite feared the macarons but for the longest time, I had been afraid to bake bread. My bread making adventure debuted with the sweet soft buns. Working with a smaller format is more manageable and helps to build up experience and confidence. When my first sandwich loaf, the Hokkaido Bread came out well, I knew I am hooked.

I have bookmarked so many bread loaves to bake and can't wait to get through them one by one!  This is supposed to be a Coffee Loaf but unfortunately, since I do not drink instant coffee, I tried to substitute the instant coffee granules with my machine brewed Expresso. The colour is pale and the flavour is weak... I shall remember to stash away some instant coffee packs from the office next time to repeat this again. Nevertheless, the texture is wonderfully soft and when paired with the Chocolate Honey glaze left over from the baby donuts, this makes one of the best breakfast treat ever! The Chocolate Honey glaze is 100x better than Nutella!

So if you have yet to try hands at bread making, follow my foot steps... using a tacky tagline- if I can do it, you most definitely can too!

Coffeebread2(250)
Coffee Bread Loaf (Adapted from 65C Tangzhong Bread
Recipe 
(A)
190g              Bread flour
44g                Castor sugar
2g                  Salt
4g                  Instant yeast

(B)
20g                Egg (beaten)
50g                Milk
12g                Instant coffee granule (I used 12g of Expresso coffee instead)
60g                Water Roux dough (tangzhong)

(C)
20g                Unsalted butter

Almond flakes for garnish

(D)
Tangzhong (Water roux)
Bread flour          50g
Water                  250g


Method :
1. Prepare Tangzhong (Water Roux) 1 day before.  Mix (D) together and cook over low heat until 65C - stirring all the time while cooking. When it is cooked, the mixture should look like starchy glue and you should be able to see the stirring lines in the dough. Remove from heat and cool down at room temperature. Store it in the refrigerator for 12 hours.
2. Mix (A) together in a mixing bowl with (B) (take care to separate salt from yeast). Using a dough hook mix at medium speed until the dough comes together to form a ball. 
3. Add in softened butter and continue kneading with dough hook for 20 mins until window pane stage. 
4. Gather the dough from the mixing bowl and knead for 2-3 mins by hand on a lightly floured table top. 
5. Form the dough into a round ball and place it in a lightly oiled bowl and cover with plastic wrap. Allow to proof at room temperature (28C) for 40mins.
6. Turn the dough out onto a lightly floured table top and knead quickly by hand. (2mins) Divide the dough into 10 equal portions of 36g each. 
7. Rest the divided dough for 10mins. Place the 12 dough portions in a loaf pan in a 5X2 configuration. 
Allow the dough to proof to fill up almost 90% of your loaf pan. (I just rested it for 60mins)
8. In the mean time, preheat oven to 170C fan mode. 
9. Brush (7) with egg wash and sprinkle almond flakes. (I forgot to brush the bread with egg wash, hence my almond flakes did not stick well to the bread) 
10. Bake for 20mins. 
11. Cool down completely before slicing. 


Saturday, February 4, 2012

Tish Boyle's Cinnamon Swirl ButterMilk Pound Cake

PoundCake6
Pin It
PoundCake15
Pin It

Pound8
Pin It
I can hear you YAWN..... yes, yet another one of Tish Boyle's pound cake. Pound cakes are hopelessly boring to bake (translated to mean EASY!) achingly uninspiring to photograph... but always satisfying to eat.... After trying out her Luxe Pound Cake and Plainly Perfect Pound Cake, Tish Boyle beckons once more with her claim that this is a 'sure fire bake sale hit' . Are you going to ignore that claim?? Not me!

Thanks to the ButterMilk, this is more moist than the Plainly Perfect Pound Cake. The little citrus hint from the orange zest took backstage to the crumbly cinnamon flavoured streusel that is swirled throughout the cake - great flavour and texture to the otherwise, plain pound cake.

PoundCake18
I gave out 4 thick slices of these to my neighbour. They came back within 10mins, all wide eyed to tell me that the cake was VERY NICE! So, I guess, Tish Boyle wasn't exaggerating when she said that these are 'sure fire bake sale hit'.

If I were to bake this again, I would most likely use a bundt pan and give the streusal a more energetic swirl to create a more distinct pattern. Otherwise, there is very little else I could ask from this recipe. It is honestly, plainly outstanding. Book mark this for your next bake-sale event!

PoundCake6(250)
Cinnamon Swirl Buttermilk Pound Cake 
Recipe : (From Tish Boyle's The Cake Book)

Cinnamon Streusel Swirl
1/2 cup (60g)             All purpose flour
1/3 cup (72g)             Firmly packed light brown sugar
1/4 tsp                        Ground Cinnamon
Pinch of sale
3 tbsp(42g)                Unsalted butter melted

Buttermilk Pound Cake
2 cups (242g)            All purpose flour
1/2 cup (57g)            Cake flour
1 tsp                          Baking powder
1/4tsp                        Baking soda
1/4 tsp                       Salt
1/8 tsp                       Ground cardamom
1cup (227g)              Unsalted butter, softened
2 cups (400g)            Castor sugar (I used 340g)
3 large                       Eggs
2 tsp                          Vanilla Extract
1 tsp                          Finely grated orange zest
1cup (240ml)            Butter Milk

Method :

1. Preheat oven to 170C / 325F. If using a bundt pan, grease the inside of a 10inch bundt pan with butter  and dust it with flour. I used a loaf pan and lined it with baking paper.

2. In a small bowl, whisk together the dry ingredients of the Cinnamon swirl. Add the melted butter and stir until blended and crumbly.

3. Sift together the flours, baking powder, baking soda, salt and cardamom into a medium bowl. Whisk to combine and set aside.

4. Using a paddle attachment, cream butter for 2 mins at medium speed in a mixer until very creamy. (2mins) Gradually add in the sugar and continue beating at medium high speed until pale and light. (4mins)

5. At medium speed, add in eggs one at a time and mix to incorporate eggs well.

6. Add vanilla extract and orange zest. Add in the flour in 3 portions, alternating it with milk (2 additions). Mix until just combined.

7. Scrape half of the batter into the prepared pan and smooth it into an even layer. Sprinkle the streusel mixture evenly over the batter. Scrape the remaining batter on top and smooth it into an even layer.

8. Bake the cake for 65 to 75mins, until the cake tester inserted into the center comes out clean.

9. Cool the cake for 15 mins before turing out the cake to cool completely.


LinkWithin

Related Posts with Thumbnails