Announcement

This site will be migrating to a new address.
Please visit me at @Køkken and change your subscription to this blog to my RSS Feed

You Will Be Redirected!

Please do not leave any more messages on this blog. I will not be publishing or responding to any more comments left here. You will be automatically redirected to http://www.atkokken.com All posts have been migrated. You will be able to locate any posts by performing a quick search at my new site. Thank you.

Monday, June 27, 2011

Hong Kong Style Egg Tarts - Nostalgic Saint Honore Egg Tarts


Egg Tart 11

Egg Tart 13


Egg Tart 12

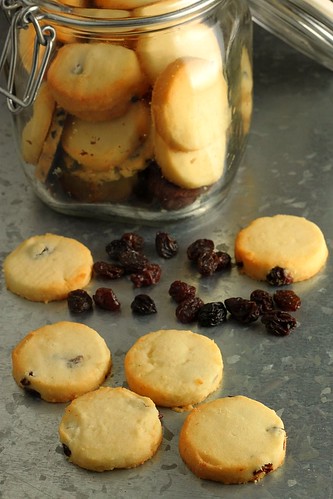
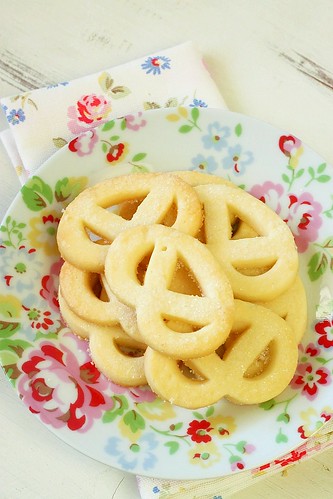
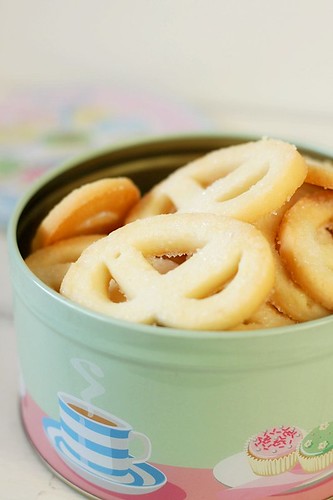
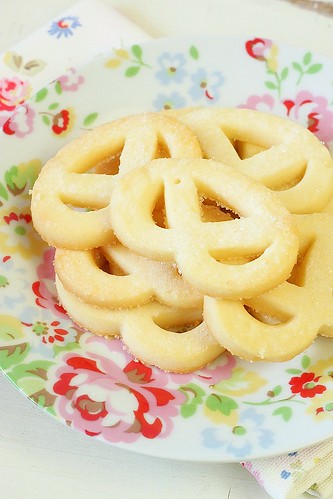
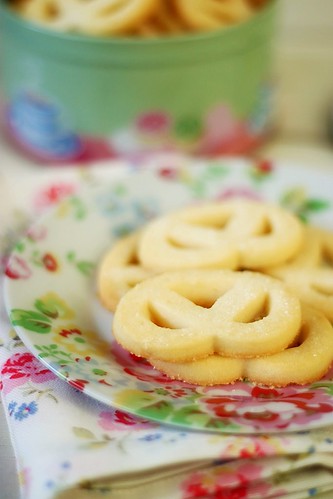
I didn't quite expect the kind of positive response for my Danish Butter Cookies when I posted them. Interestingly among the comments for the posts, almost all of them alluded to nostalgia of some form or other... key buzz words included : Nostalgic, Memories, Childhood, Reminisce...  Yes, nostalgia is a powerful ingredient as is eloquently captured in Joycelyne Shu's new book. If you have been a fan of her blog, Kuidaore, then you will enjoy her book. Filled with great nostalgic treats, most of them entrenched in a deeper and more passionate sense of history and root that are keenly appreciated through her own personal experiences....

For me, I have come to conclude that Nostalgia,as a flavour, is like a good wine that needs aging and maturing. The older you get, the fonder and the more potent it becomes... as in, for example, there is more nostalgic punch when a 50 year old reminisces about something he or she has eaten at the age of 10 vs a 20 year old dreaming about a taste he/she had when he/she was 10.

Do not over think when you are dealing with flavour elements that has strong lineage to memories and childhood. Very often than not, you will find yourself working against the usual theory and definition of good flavours. The dish can be crude and unpalatable to others but douse it in a coat of warm fuzzy nostalgia, they can beat Pierre Herme's Macarons anytime! Such is the liberating power of Nostalgia. To question or doubt Nostalgia only suggests that subject is frigid and uptight.

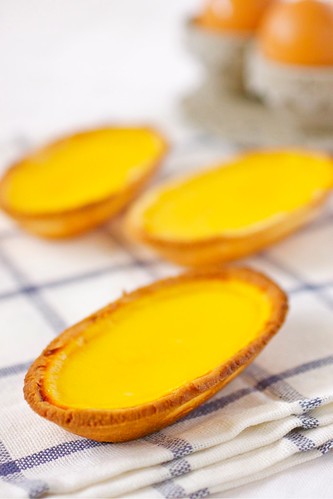
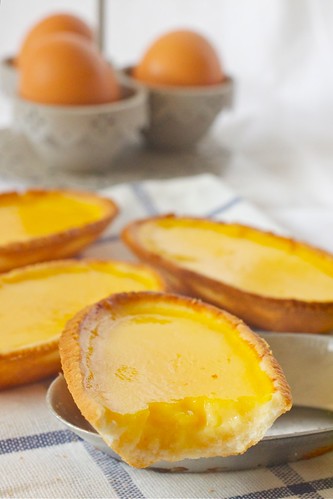
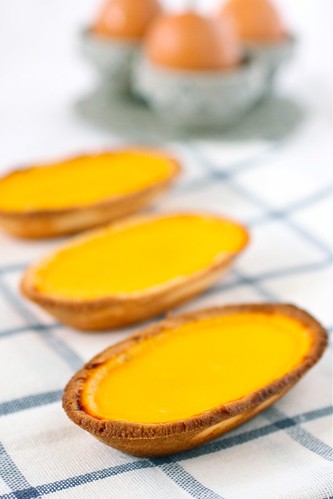
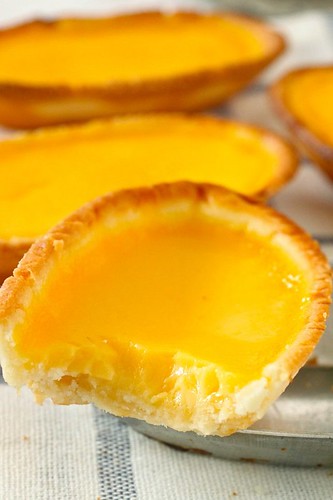
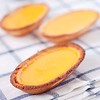
I was in Hong Kong 2 weeks ago wandering along the famous Shanghai Street. It was there that I spotted these oval shaped tart molds. The first imagery that came into my mind was Saint Honore Cake Shop's oval egg tart.  For those who are old enough to remember, Saint Honore Cake Shop from Hong Kong, made a brief but illustrious appearance in our local bakery scene here in the eighties. They opened their first shop at Marina Bay and aggressively advertised about their oval shaped egg tarts. I recall queuing for their tarts during their first few opening weeks....and the shop assistants' sing-song Hong Kong English accent. Simple fare that caught on like wild fire.  I know I was besotted. Their egg custard was smooth and shiny, tender and wobbly....the pastry crumbly and thin.
Egg Tart 10

I also couldn't understand how a popular shop like theirs did not survive in Singapore. Did they not expand fast enough or was the market too immature for slightly more sophisticated pastry back then? I have no idea but Saint Honore is still operating its pastry chains in Hong Kong today and till date, their oval shaped egg tarts remain on of their perennial favourites....

When I decided to recreate the egg tart with these molds,  there were a couple of elements which I knew I had to nail : a thin short crust pastry shell that would hold its form and a tender, silken tofu like egg custard. Googling over internet, I found a couple of forums discussing about this but it was at this site that I found something comprehensive and promising.... I am very pleased with the results and I suspect if you were to try it, you would be too.

Egg Tart 1(250)


Recipe :

Pastry
90g              Unsalted butter
40g              Powdered sugar
12g              Egg
170g            Plain flour
8g                Evaporated Milk

Custard
160g            Eggs
80g              Castor Sugar
50g              Evaporated milk
210g            Water

Method:
1. Cream softened butter with sugar until white and creamy.
2. Add egg (12g) and mix until well incorporated.
3. Add evaporated milk (8g) to (2) and mix until well incorporated.
4. Add in flour and mix well.
5. Chill the dough in the fridge for an hour before dividing the dough into 10 portions. Press the dough into a tart mold and press well to line the tart mold. Chill the lined tart molds for 15 mins. In the mean time, prepare custard.
6. Prepare custard by mixing all ingredients for custard together.
7. Pour custard mixture into tart casings.
8. Bake at 250C for 10 mins until custard sets.

Wednesday, June 22, 2011

Radish Cake with Seafood and XO Sauce

Radish Cake 5

Radish Cake 3

XO Sauce 1

Collage

It took my 2 weeks' business travel to pry me away from my cookies. Taking a break sometimes, opens up the mind for new stimulation. The stimuli for this post came in the form of an amazing XO Sauce I found in Taiwan. Unlike the supermarket versions that we get here, this is chock full of precious flavourful ingredients such as dried whole baby scallops (not the shreds we normally get), dried whole shrimps garlic and chilli . The bottles of XO sauce we normally get in Singapore are expensive and for most of them, the solids would only constitute 50% of the bottle, the rest being made up of a mild chilli oil. With this Taiwanese XO sauce, the hefty bottle was packed almost to the brim with the precious ingredients. Sold at 250NT (about US$8) for a substantial 500g bottle, this is what I would consider great value for money!  This would definitely be on my replenish list when I return to Taiwan next time.
For those who do not have access to this, fret not, head over to Trissa's or Pickyin's blog to learn how to make this sauce from scratch.

There are a million ways to use the XO sauce. It is completely addictive when eaten on its own with steamed white rice, brown rice or glutinous rice. When you are in a hurry, it can be used to toss with noodles or spaghetti. It is also a great stir fry seasoning for vegetables or meat.

Here, I have chosen to use the sauce with the very tasty Hong Kong style Radish Cake. Commonly offered at Yum Cha (dim sum), the Hong Kong style Radish Cake is a steamed rice cake filled with bits of chinese sausage, dried shrimps and shitake mushroom. This can be eaten on its own or more commonly, pan fried to crisp up the skin. In the recent years, restaurants here have started to stir fry these with XO sauce, seafood and bean sprouts... a la Chai Tau Kuey.

Radish Cake 1
I got the recipe from Celebrity Chef Sam Leong's 'A Taste Of Home' . However, I do suspect that there is a typo in the recipe. Instead of Rice flour, the book had asked for Glutinous rice flour. I had to throw out a batch and replace the glutinous flour with Rice flour. Also, whenever I steam rice cakes at home, I make sure that I 'pre-cook' my flour prior to steaming the liquid batter. This can either be done by mixing very hot water into the flour mixture or stirring the flour batter over low heat to thicken it up before steaming. Most recipes may just call for steaming the liquid batter directly over boiling water but I find this impractical for house cooks like us. Our stoves will never be able to generate the kind of heat intensity to cook the rice cake through.


So, if you've enjoyed this dish at Dim Sum restaurants, you can now replicate this at home now.... and eat to your heart's content!
Radish Cake 5(250)
Recipe : (Adapted from Sam Leong's A Taste Of Home)

Prawns                 8 medium, peeled
Cooking Oil          1 Tbsp
Bean Sprouts        100g, Blanched. (don't need to be too precise, I think I only used 50g)
Chinese Chives      100g (Kuchai, I used a few sprigs.Add according to your liking)
Spring Onions        100g (same as above)
Eggs                       2 Beaten

Radish Cake
Cooking Oil           1 tbsp
Dried prawns         1 tbsp (soaked in water for 10mins, then minced)
Chinese Sausage    20g     (minced)
Dried Shitake Mushroom   2 pieces (soaked in water for 10mins, then minced)
Water                    500ml
Rice Flour              75g
Potato Starch         20g
Corn Starch           20g
White Radish         100g (shredded and squeezed dry)
Sugar                     1/2 Tbsp
Salt                        1/2 tsp

Seasoning
Water                   4 tbsp
XO Sauce            1 Tbsp
Oyster Sauce        1/2 tsp
Sugar                    1/8 tsp
Dark soy sauce      a dash
Sesame Oil            a dash
Chinese Cooking Wine a dash

Method :
1. Prepare Radish Cake : Heat 1 tbsp of cooking oil in a wok. Fry dried shrimps, Chinese Sausage and mushroom until fragrant. Ladle out and set aside.
2. Mix 250ml water with Rice flour, Corn flour and Potato Starch flour and set aside.
3. Place remaining 250 ml water in a pot with shredded radish. Bring to boil. Add in sugar and salt seasoning.  Pour boiling mixture into flour mixture in (2).
4. Stir well. Return mixture into pot. Heat over low heat and stir continuously. Once mixture starts to thicken a little add in (1).
5. Continue stirring until mixture becomes almost pasty.
6. Pour mixture into an oiled 21 cm square tin.
7. Steam over vigorously boiling water for 35mins.
8. Cool down completely (refrigerating over night if possible). (Rice cake will still be soft after steaming. Do not try to cut)
9. Cut Radish Cake into small squares. Heat some oil in a frying pan. Sear cake over high heat to crisp the surface.
10. In a hot wok, heat oil . Add bean sprouts, chives and spring onion. Stir fry briefly, then add eggs and cook until just beginning to set.
11. Add radish cake and ingredients for seasoning. Fry until fragrant and egg is cooked. Dish out and serve hot.

Sunday, June 19, 2011

Raisin Danish Butter Cookies

Raisin Cookies 2

Raisin Cookies 3

I had mentioned in my earlier Danish Butter Cookies post that I was just one cookie short to complete the full array in the nostalgic blue tin. Here it is , my last instalment of the Danish Butter Cookie collection. Made during that short interval just after I got back from Korea last weekend and before I scuttle off again on Sunday, I did my best to snap a couple of photos before packing these up to bring for my colleagues in Taiwan.

This version, unfortunately did not taste quite like my favourite coconut raisin cookie in the blue tin. Possibly because the coconut component was insufficient in the recipe. If I were to tweak this further, I would probably try to increase the amount of dessicated coconut and find ways to incoporate some coconut cream or oil into the recipe. Nevertheless, if you had enjoyed the earlier sable cookies recipe, this will still have the buttery flavour and the light crisp texture that we had loved about the recipe.

For now, let me leave you with this very short post. Will cook once I get my travel laundry done :)
Raisin Cookies 1(250)
Recipe :

95g              Unsalted Butter
1g                Fleur de Sel
1/8 tsp         Vanilla extract
40g              Powdered sugar
15g              Egg white
100g            Plain flour
15g              Dessicated Coconut
20g              Raisins chopped.

Method :
1. Preheat oven to 180C
2. In a mixing bowl, whisk unsalted butter with Fleur de Sel until creamy.
3. Add in egg white.
4. Add in flour and dessicated coconut, raisins and mix until well combined.
5. Roll the dough in between 2 sheets of plastic to 0.3cm thick.
Chill the sheet in the fridge for 30mins or more. Cut the dough into desired shapes using a cookie cutter.
6. Bake at 180C for 10-12 mins or until golden brown.
8. Cool down and store in air tight container.


Sunday, June 12, 2011

Madeleine C'bon - Pierre Herme's Apricot Caramel Madeleine

Madeleine 3

Madeleine 1

Yes, I am forging ahead, yet again with Pierre Herme's recipes. I can't seem to get enough of it - not so much because he is THE pastry guru but because there are so much to discover in terms of technique and methods in the recipes documented in this particular book, Le Livre des fours sees et melleux de Pierre Herme . In my last post, I was exposed to the methology of using cooked egg yolks in a butter cookie recipe to achieve a crisp texture. Today, just as I thought I have understood enough about madeleines, the famous little French cakes that have come to be associated with Proust, I find interesting elements in Pierre Herme's recipes that started me wondering and thinking about these scallop shaped snacks again. After I had acquired my very expensive madeleine pan in Paris, I milked it as much as I could by making madeleines, here, here and here...

As pretty as they may look, they were, honestly beginning to bore me... the crumbly, not very moist texture did not exactly stimulate moreish inclination. The 2 elements in this recipe that made my eyes pop were : the incorporation of inverted sugar and caramel. Most of the other recipes I had worked with looked more like a straight forward sponge formulation.

Inverted sugar, for those who may not be familiar, is actually sucrose broken down by water to form Fructose and Glucose. These are smaller molecules and are known to be sweeter. The products made with inverted sugar tend to retain their moistness and softness better. Professional bakers normally reach for a product known as Trimoline when the recipe calls for inverted sugar. I, however, did not bother with that and just used Glucose to substitute the inverted sugar.

I will have to say that this is by far, the most tender and moist Madeleine I have made. I was at first concerend that the recipe, with so many sugar components, would be too sweet but suprisingly, it wasn't. Addition of the glucose does yield a more tender and moist crumb. The caramel (I cheated by using bottled Dulce de Leche), I thought ,gave more body and creaminess to the little cake. This was then balanced by the bits of fruity apricots.

Madeleine 2
One word of caution about baking a madeleine - make sure you work with the right baking temperature. When the temperature is too low, the batter will fail to 'swell' and you will not get the famous hump on the cake. Not only that but the crust will remain moist. When you have the right temperature, the levening agent will puff the cake correctly to yield the hump. In addition, the crust will be dried out a little to offer a nice textural contrast to the tender crumbs.

For me now, this is THE madeleine recipe for me.

Madeleine 3(250)
Recipe

36g                            Castor Sugar
10g                            Invert Sugar (I use glucose)
1g                              Vanilla Essence
65g                            Egg
65g                            Plain Flour
2g                              Baking powder
65g                            Clarified butter/ melted butter
25g                            Dried Apricots

37g                           Caramel ( I used Dulce de Leche)

Caramel
40g                          Castor sugar
40g                          Fresh cream

Method :
1. Preheat oven (fan assisted mode) to 200C.
2. Sift flour and baking powder together.
3. Dice apricots into small bits.
4. In a mixing bowl, mix eggs, sugar, inverted sugar using a hand whisk until well blended. (do not whisk)
5. Add in Caramel and mix well.
6. Add in sifted flour in 3 additions mixing well after each addition.
7. Add in melted butter in 3 additions, mixing well after each addition.
8. Add in apricots.
9. Leave to stand for 20mins.
10. Place batter into a piping bag and pipe into a buttered and floured mandeleine pan.
11. Bake at 200C for 7 mins.

Caramel :
1. Place sugar in a heavy saucepan. Wet the surface of the sugar with just enough water. Heat sugar until melted and turns brown (3-4 mins)
2. Remove from heat and carefully add in cream and stir until smooth. Leave to cool down.

Monday, June 6, 2011

Pierre Herme's Sable a L'olive Noir Recipe - Black Olive Cookies Recipe

Olive Sable 5

Olives 2

Olive Sable 2

I have often been told that I look young for my age and because of that, I have always celebrated it to almost the extent of flaunting it...on many occasions, telling people that I am almost half a century old - which is really, not too far from the truth. I guess everyone, especially those from the fairer sex would be happy to look younger. However, sometimes, working in a male-dominated industry, to look like you've just graduated from college can often work against you. However,over the years, I have also learnt that as much as appearance can set a formative impression in others, what is often more important is the first conservations you hold with the other party. It is when you speak that you can either affirm or overturn their prejudice. It is from that point onwards that credibility gets a chance to build and gradually be allowed to develop into something bigger, such as respect. I am, as you can see, still on the Pierre Herme trail. Referencing from his book, Le Livre des fours sees et melleux de Pierre Herme which gave me the Sable Viennois, I found many other interesting but simple recipes. It is amazing how once satisfaction has been delivered, trust follows - almost unconditionally.

This is another Sable recipe but is based on a technique that I have never worked before. Different from Sable Viennois which uses egg white or the more common ones that uses wet egg/egg yolk, this recipe works with cooked egg yolk. The egg yolk is cooked fully and mashed up into fine crumbs. A small quantity of this is then added to the creamed butter.
I understand that this is not an unique methology but for me this is new and I was suitably intrigued.

The texture of the cookie is totally unlike the shortbread which is more compact and crumbly in a melty sort of way. It is neither the same as the Sable Viennois, the crispness of which has a more airy quality to it. This cookie is crisp with an light crumbly snap. It was magical and my immediate impulse was to create a chocolate chip version next time.

Olives
The other reason that drew me to the cookie was the incorporation of Black Olives and EVO in the recipe. A more adult and sophisticated taste, this is perfect for those who prefer a savoury cookie to the usual sweet ones.

I can't be more pleased to add this to my cookie repertoire. I will never look at cookies in the same way again.

Olive Sable 2(250)
Recipe :
5g Cooked Egg Yolk(Cooked & passed through a fine mesh)
65g Unsalted butter
2g Fleur de Sel
35g Powder sugar
25g EVO (Extra Virgin Olive Oil)
15g Corn Flour
80g Plain flour
25g Black Olives in Oil (finely minced)

Method :
1. Preheat oven to 170C (fan assisted mode)
2. Lightly beat an egg yolk and microwave at high for 30secs until cooked. (if you don't have a MW oven, you can hard boil your egg and remove the egg yolk from the hard boiled egg)
3. While the egg yolk is still warm, press it through a fine mesh.
4. In a mixing bowl, whisk together, softened butter, Fleur de Sel until creamy.  Add powdered sugar and cream until homogenous.
5. Lower the mixing speed and gradually add in the EVO.
6. Add in sifted plain flour and corn flour.
7. Fold in minced black olives.
8. Roll out dough between 2 sheets of cling wrap to 0.6-0.8cm thick. (Alternatively, you can roll the dough into a log)
9. Refrigerate to firm.
10. Cut dough using cookie cutter or slice log with a knife.
11. Bake at 170C for 12 minutes until brown.

Thursday, June 2, 2011

Expanding on Pierre Hermes' Sable Vennois Recipe - Sugared Danish Butter Cookies

DBC 2-1

DBC5

DBC 6

As much as I admire gourmet flavours and sophisticated recipes, I know I am not a good cook. I have neither the skills, the experience nor the deftness to create intricate and sophisticated dishes. Unlike full time housewives tasked with enormous responsibilities and with loads of practical experience stashed under their belts, I am at best, only pretending to cook in my kitchen. However, I would also admit that I like my food to make me look like a good cook... hence my quest and my penchant for 'simple gourmet recipes' that taste great and pack a punch of  wow...

If you are rolling your eyes now at the sight of yet another sable vennois post, sorry dear... this is my blog, I cook and I post what I like. I had liked how the sables tasted and I had felt gratified by the way these had resonated with many. Until recently, I had never thought that having someone read my post and attempt my shared recipe with raving success could be so rewarding and satisfying. I now realise I had underestimated the power of sharing. To all those who had recently tried the recipes in the last few posts, thank you for sharing your satisfaction with me - they had really made my day...

There is something magical about this recipe and I am determined to create the full collection in the very popular blue tin. This is an easily identifiable shape... I don't remember seeing cookies that come in this 'pretzel' shape except for those in the Danish Butter Cookie Tin. I bought the cookie cutter years ago and have never used it. Now that I have found the right recipe for it, I just can't wait.

DBC 3-1

DBC7
In the previous posts, the cookie dough was piped from a piping bag. For ths creation, I have chosen to roll out the soft dough into a sheet, chill it to firm before cutting with the cookie cutter. Straight forward approach that does not require a nobel prize winning scientist to figure out but sometimes, we are too fixated with a recipe and just need a little nudge to move things out of the box.... in my case, the nudge came in the form of this twisted cookie cutter :) .

There is another advantage in shaping the dough this way - the thicker slice actually made the cookie less delicate to store and transport. Many would remember the pretzel shaped variety in the blue tin came crusted with grainy sugar. My sugar is not coarse enough to create the same effect but the slight crunch from the grains nevertheless added good texture to the cookie. To be honest, out of the 4-5 varieties normally encased in the blue tin, the sugar crusted versions were my least favourite. The ones that would run out first would always be the plain round wreaths (like what I made the last time), followed by the coconut raisin cookie...  So stay tuned - if I succeed in my experiment with the coconut raisin butter cookie, I would technically have the full range from the Blue Cookie Tin... :)  So - which is your favourite variety from the blue tin?

DBC (250)

Recipe :
95g               Unsalted Butter
1g                 Fleur de Sel
1/8 tsp          Vanilla paste (the recipe originally asked for 2-3 pinches of Vanilla powder)
40g               Powdered Sugar
15g               Egg White
115g             All purpose flour
Method :
1. Preheat oven to 180C.
2. In a mixing bowl, whisk unsalte butter with Fleur de Sel until creamy.
3. Add in powdered sugar and whisk until homogenous and creamy.
4. Add in egg white. ( The mixture may curdle a little but it will smoothen out after flour is added.
5. Add in flour and mix until well combined.
6. Roll the dough in between 2 sheets of plastic to 0.3cm thick. Chill in the fridge for 30mins or more. Cut the dough into desired shapes using a cookie cutter. Sprinkle with coarse grain sugar.
7. Bake at 180C for 10 -12 mins or until golden brown.
8. Cool down and store in air tight container.

LinkWithin

Related Posts with Thumbnails