Announcement

This site will be migrating to a new address.
Please visit me at @Køkken and change your subscription to this blog to my RSS Feed

You Will Be Redirected!

Please do not leave any more messages on this blog. I will not be publishing or responding to any more comments left here. You will be automatically redirected to http://www.atkokken.com All posts have been migrated. You will be able to locate any posts by performing a quick search at my new site. Thank you.

Wednesday, August 31, 2011

Lotus Seed Paste Pau - 莲蓉包

Lotus bun5

Lotus Bun1

lotus bun10

I shall officially admit that the yeasted species have bewitched me. First the sweet soft buns and now, the snowy white chinese steamed buns aka Paus.  I have been making paus everyday over the long weekend here and have been enjoying every minute of it. It helps when the friends and family to whom these were distributed gave positive feedback. I am happy to have a chance to work on  this again as it is rare nowadays that I  get to repeat the same recipe. The best way to hone and improve is really to practice - there is absolutely no other ways around it.

The versatile Pau recipe makes this alot easier as there are many different types of filling that one can vary to retain it's allure.

Today, I take the easy way out by wrapping it with White Lotus Paste. Easy because, this is readily available at this time of the year when Mooncake Festival is just round the corner. Almost all bakery ingredient outlets now carry a variety of lotus paste. I got mine from Kwong Cheong Thye - a low sugar version from Hong Kong that is fragrant and smooth.
Lotus Bun7

Make these small enough and you may find yourself devouring one bun after another like me. I like my Paus bulging with filling. I used to feel very cheated when the commercially available versions stinge on the quantity of the filling. Now that I am making these myself, I am beginning to think that apart from the reason for cost stinging,  poor pau making technique may have something to do with the pithy dollop of filling. To pile on the filling in the buns, the dough needs to be rolled out carefully such that the center is thicker and the peripheral rim thinner. Failure to do this, would usually have the filling burst through the thin dough when it is being steamed.

With enough practice, I am now able to pile on more filling than dough for this lotus paste bun. So fulfilling, so generous and oh so satisfying!
So what Pau should I attempt next?

P.S. : In case you are wondering about the sear mark on the buns... I stamp these with the searing iron I bought a few years back in Japan... curiosity got the better of me then and it has been sitting in my kitchen drawer ever since... :)

Lotus bun5(250-1)
Recipe :
Dough Recipe found here

Filling : ready made lotus paste.

Method :
Please refer to here.
Size of dough for each bun is 19g. Weight of lotus paste portion for each bun is 22g.

Sunday, August 28, 2011

Bourke Street Bakery's Chocolate Sour Cherry Cookies

ChocoCookie6


ChocoCookie9

ChocoCookie1


If ever there was a fraternity devoted to cookie lovers, it would most likely be split into 2 sects, the chewy diehards and the crispy advocates.  I, for one, belong to the latter union. I have never quite learnt to appreciate the fudgy texture that the chewy cookie lovers so swoon over. I like my biscuits/cookies light and crisp...as exemplified by the sables featured here and here.

Having said that, I do wish to pay tribute to Bourke Street Bakery's Chocolate Sour Cherry Cookies.  These are super-rich chocolate biscuits that when baked to perfection, is crisp on the outside and fudge-like in the the center - a clever recipe that not only addresses the needs of both sections of the fraternity but hold all chocolate lovers captive as well.

An easy recipe to follow, this has been tried by many. Ellie of Almost Bourdain/ Gourmand Recipe had first strongly recommended me to try this when I was gripped by the Bourke Street Bakery fever a while ago.
ChocoCookie4

A great basic recipe, the flavours can be tweaked by modifying the level of bitterness in the dark chocolate, injecting more tartness with tangy fruits or imparting textural crunch with nuts. Absolutely delicious eaten on its own, I was equally besotted when I dunked it in milk. A cookie and a glass of milk - I get enough energy pow for the whole morning!

ChocoCookie3(250)
Recipe : (Adapted from here )

235g           Dark Chocolate
150g           Plain flour
40g             Unsweetened cocoa powder
1.5 tsp         Baking soda
1/2 tsp         Salt
100g           Unsalted butter softened
240g           Soft brown sugar
2                 Eggs
85g             Dried sour cherries

Method:
1. Sift flour, cocoa powder, baking soda and salt. Melt chocolate over a ban marie.
2. Set oven to 165C.
3. In a mixing bowl, cream butter with sugar until light and creamy.
4. Add in eggs one at a time until well mixed.
5. Add in (1) in 3 additions, mixing well after every addition.
6. Add in melted chocolate.
7. Fold in sour cherries.
8. The batter will be quite sticky. Refrigerate for 10mins and shape the batter with ice-cream scoop or spoon onto a cookie baking sheet - ensuring enough spacing between cookie for spreading.
9. Bake at 165C for 15-20 mins until risen and quite cracked on top. Cool on the trays and eat. Store in an air tight container for up to 3 days.

Saturday, August 20, 2011

Chinese Chicken Pau - Following The Heritage Trail

Pau8

Pau9

Pau3

When I started blogging about 2 years ago, someone left a nice message for me in my comment column. An outstanding baker, this lady had commented how happy she was to see a fellow Singaporean blogger bake French pastry when most of the time, the local food blogging scene are only limited to chiffon cakes, brownies, muffins....  I felt flattered by the comments but at the same time, an uneasiness had also set in. As much as I enjoy experimenting with macarons, madeleines and cupcakes, I also know that these have never been part of my core heritage. I grew up in a humble Asian household where we ate more kuehs than pastries.

It would be sad if our generation and the younger generations that follow would only know how to bake macarons and cupcakes. That is why I was really thrilled when I was able to get a place in Valerie Kong's Pau Class at Shermay's Cooking School. A hands-on class, we got to prepare our own Pau dough from scratch and we also learnt how to roll and pleat the dough - a skill I had desperately wanted to acquire and improve. Valerie's simple and clear instructions was easy to follow and quite a few of us were suprised that we were able to get the hang of it pretty quickly.

Pau4
Emboldened by the session, I decided to compare the different Pau recipes I have in my cookbook library. This dough recipe that I am sharing here is not Valerie's recipe. This is a Mantou recipe that I found in a Hong Kong Dim Sum cookbook. The amount of yeast and baking powder for this recipe is much lower than Valeries' and I was intrigued by the addition of milk to the dough. What was missing from the cookbook was clear instructions. So the newly acquired knowledge at the hands-on Pau class was really valuable. I am very very pleased with this recipe - an easy dough to handle, the buns turn out very soft and fluffy.  I had used Valerie's Chicken filling for this exercise so I will not publish the recipe here. However, with a dough like this, one can easily wrap it with one's favourite filling - be it sweet or savoury.

I would be proud to present these Pau to family and friends. I know that many will be pleased for these are flavours and food that we have grown up with.

P.S. : If you are interested to learn about Pau making, look out for Valerie's  classes at Shermay's. I heard that all the Pau classes are now full so the earliest that these will be repeated would most likely be next year. So you may want to enquire with the school.

P.S. : I am also hoping that this would qualify for Edith's Heritage Food Trail event. Somewhat unorthodox as it does not really celebrate my Hainanese heritage in particular but I do hope you can join in the fun at Edith's.

Pau7(250)
Dough Recipe : (from Dim Sum in Hong Kong)

Hong Kong Flour            150g
Dry Yeast                         2g
Baking powder                 2g
Sugar                                28g
Milk                                  75g
Shortening (crisco)           2g (or lard)

Method :

1. Place all ingredients into a mixer and blend until smooth at low speed.
2. Ferment for 10mins at room temperature.
3. Blend in mixer again for 5 mins.
4. Divide the dough into pieces of 19g each. Roll out to form a round wrapping of about 2 inches in diameter.
5. Place filling in the center of the wrapping and pleat the edge to seal the bun with a round top.
6. Proof Pau at room temperature for 45 mins.
7. Steam Pau over boiling water for 15mins.


Sunday, August 14, 2011

Sweet Soft Bun Roll With Chocolate Ganache

Choc Roll6

Choco Roll7

Choc Roll2

As much as my blog is my own indulgent space and that I can choose to be cavalier about it if I wanted to, I do find myself wanting to believe that as I continue to leave little toe prints in the blogosphere, I am bettering myself at the same time. I have learnt heaps since I have started blogging, and have been inspired by many great fellow bloggers who have displayed such mind boggling dedication in the ways they manage their own spaces.

Dedication, passion and discipline play vital roles in what we do in our life everyday. They are, for example, the fuel that powered my mother's ability to stay at home full time to bring up her 3 children without any dosmetic help. Whether it was a chore or a joy, she had played her role remarkably well and I know, because we are the results of her effort.

I have to believe that, if my mother can juggle her roles so well, then surely  I, as her daugher, should  be able to do so with something as trivial as blogging and working...  

I have been traveling for a week now and am glad that I am now back in Hong Kong where I have free access to Blogger. Once I run back into Mainland China tomorrow, I can forget about even leaving a comment on blogger. I had prepared 3 dishes before I left home to be posted while I am on the road - a silent commitment I have made to myself to be consistent and dedicated.

When I had decided to make this chocolate soft roll, I had thought that it would be easy for I already had the full-bodied chocolate ganache from my chocolate macarons sitting in my fridge. However, little had I known that shaping the dough into a cone shape could be more tricky than I had thought.

Rolling out the bread dough into long strings without them breaking apart requires the dough to be perfectly proofed and the seams of each piece of dough well tucked. The final shaped buns did not manifest the tapering snail-shell appearance I was hoping for. The buns made from my original sweet soft buns was soft and fluffy. Filled with the full bodied chocolate ganache, it was difficult to stop at one bun. So till I get back from my travels to share more goodies, I leave you with these chocolatey tea time treats.

Choc Roll6(250)-1
Recipe :

Sweet Soft Buns Recipe here.
Dark Chocolate Ganache Recipe here.

Method:
1. After the first proofing (40mins), divide the dough into 40g portion.
2. Let the portioned dough proof for 10 mins.
3. On a lightly floured board, shape each piece of dough into an oval football shape.
4. Flatten (3) with the palm of the hand, fold the dough into half, length wise. Tuck in the seam to close it.
5. Roll (4) on a lightly floured board.into a long noodle like string until it is about 40cm long.
6. Twirl (5) round a cornette mold and let the dough proof again for another 40mins.
7. Brush with egg wash and bake for 12-15 mins at 175C until golden brown.
8. Remove from oven, cool down completely, demold and pipe in Dark Chocolate Ganache.

Monday, August 8, 2011

Coconut Sweet Soft Buns- 65C Tangzhong Method

Coconut Buns1

Coconut Buns2

Coconut Buns7

Coconut Buns8

Coconut Buns10

Last week, someone had asked me if I had tried any of the Tangzhong (water roux method) bread recipe from what has now become the 'tangzhong bread bible', 65C Tangzhong Bread by Yvonne C.

The method documented in the book is a true water roux method where a little bread flour is mixed with water and heated to 65C. This resultant liquid starch is then added to the rest of the bread flour to yield a super soft and fluffy bread.

The sweet soft buns I had made earlier, uses a variation of the water roux.

Yvonne C's recipes are easy to follow. Although some may feel intimidated by the process of cooking the flour to precisely 65C,  this is really not too difficult if you have a candy thermometer to help you monitor the temperature.
The water roux prepared this way is wetter and more watery than the my previous recipe. With so much moisture, I was looking forward to a softer and fluffier bread. However, unfortunately, the recipe calls for more flour (almost 30% more) and very little tebutter. The xture of these buns, although, still relatively soft, were much coarser and drier compared to my previous recipe. The only consolation is that the buns were wrinkle free. I do wonder, however, if I had not cooked the water roux correctly. I will try to repeat this again to confirm.

I have chosen to fill these buns with grated coconut cooked in palm sugar syrup. Together with red bean paste, the grated coconut filled bun has to be one of those local classic buns we grew up with. These can still be found in neighbourhood bakery stores - often sold in a 2x3 block. I don't think these old fashioned filled buns will ever go obsolete but as the younger generation becomes more spoilt for choices with BreadTalks' fancy flavours and the wide selection of western breads that are easily accessible to us today, these less stylish dough will most likely not stir up as much excitement as they did for us during our younger days. For me, I will gladly still eat them for breakfast every morning....
Coconut Buns1(250)
Recipe:
A.
Tangzhong (Water roux)
Bread flour          50g
Water                  250g

B.
Bread flour          210g
Plain flour           56g
Milk powder       20g
Castor sugar        42g
Salt                      1/2 tsp
Yeast                   6g

C.
Egg                     1
Water                  85g
Tangzhong         84g
D.
Unsalted butter   22g

Coconut Filling :
Grated coconut         250g
Gula Melaka             50g
Salt                           Pinch
Pandan Leaves         4 pieces
Water                      80g

Method :

1. Mix A together and cook over low heat until 65C - stirring all the time while cooking. When it is cooked, the mixture should look like starchy glue and you should be able to see the stirring lines in the dough. Remove from heat and cool down at room temperature.

2. Tie the Pandan leaves into a bit knot and boil it with gula melaka and water until gula melaka is completely dissolved. Remove the pandan leave and strain the syrup in to a heavy saucepan. Add grated coconut and cook until mixture is dry and fragrant.

3. Mix B with C in a mixing bowl and using a dough hook stir until mixture forms a dough. Add D and continue mixing at medium to high speed (about 15-20mins) until the dough is no longer tacky to touch. At this point, stretch the dough to check that it will not break easily ( window pane test).

4. Transfer dough into an oiled bowl, cover with plastic wrap and let it prove for 40mins.

5. Divide dough into small portions of 40g each. Roll each small portion into a smooth ball and all to prove for another 10mins.

6. Flatten each small ball and wrap with a tbsp of grated coconut filling. Seal the dough to form a ball again.

7. Let the buns prove for another 40 mins.

8. Brush with egg solution and bake at 175C for 15mins until golden brown.

Thursday, August 4, 2011

Rainbow Kueh Lapis - Steamed 9 Layer Kueh

Lapis8

Lapis10

Singapore's National Day falls on 9th August. We are 46 this year and I thought it appropriate to celebrate the month of August with a little Heritage treat that we all grew up with.

The colourful steamed 9 layer kueh is one that we are all familiar with. I grew up enjoying this treat, mostly for breakfast. Hands up, those who would eat this by peeling it off layer by layer....for kids, this kueh offers a chance to play with food and savour them at the same time. As adults, as much as we are tempted to fiddle with the layers, social decorum in the grown-up world has taught us to eat it with more 'grace' and 'propriety'.

Lapis 1

There are many variations to the recipe. Most use a mixture of Tapioca flour, Rice flour, Mung Bean Flour and Sago flour. I had attended Valerie Kong's Kueh Class last weekend at Shermay's Cooking School. Her recipe is extremely simple and uses only Tapioca flour and Rice flour. The result is a very soft and tender kueh with delicious fragrance from freshly squeezed coconut milk.
For those who are interested in her class, I believe she is still conducting one more class this month.

I am not publishing her recipe but would gladly refer you to another recipe which I have found in my cookbook collection- Patricia Lee's Delicious Nyonya Kuehs and Desserts. Will definitely try this out to compare.

Lapis7(250)
Recipe (From Patricia Lee's Delicious Nyonya Kuehs and Desserts

480g         Tapioca flour
150g         Sago flour
35g           Mung Bean flour
50g           Rice flour
720ml       Thick coconut milk
650g         Sugar
1liter         Water
3-4            Pandan Leaves, knotted
Pinch        Salt
Food colouring (red and green)

Method : 
1. Boil sugar with pandan leaves in 1 liter of water until sugar melts. Strain the syrup and dilute with water to make to 1.5 liters

2. Mix all the flour and salt together. Pour coconut milk a little at a time and mix till smooth. Set aside.
3. Pour the syrup from (1) into the flour mixture. Stir constantly till well blended.
4. Divide mixture into 3 portions. Leave one portion uncoloured. Mix each of the other 2 portions with red and green colouring.
5. Grease a 9" square baking tin with a little oil. Place the in in a steamer and steam until hot. Pour in the uncoloured mixture (90g) and steam for about 6-8 mins.  Repeat another layer with the uncoloured mixture.
6. Repeat step (5) with other coloured batter until all batter is used up. Top layer must be red. Leave the cake to cool at room temeprature for 7-8 hours before cutting.

Monday, August 1, 2011

Pierre Herme's Macaron au Chocolate Amer

Chocolate Mac1

Choc Mac4

Choc Mac9

A while back, I was on a roll with Pierre Herme's sables. I was so entrenched in those recipes that for a while I thought I had found a new defining moment for myself.  You've probably noticed that I am currently in the mood for macarons and what better way to merge the two obsessions than to experiment with  the Macaron Master's recipes?

Pierre Herme's macarons have to be the most celebrated in the pastry world. My first encounter with the Macaron was at Laduree when I was in Paris for the first time almost 10 years ago. At that time, I was staying at a hotel at Champs Elysees and I was ignorant about Laduree's fame. I ventured in one Sunday morning because it was a pretty restaurant/ cafe and I wanted to have breakfast.  I recall being overwhelmed by the queue and the crowd hovering over the pastry counter. It was then that I spotted these colourful, gem-like pastries.  I  joined the queue and bought a gift box of macarons which I brought back to the office as souvenirs.

When I returned to Paris again 2 years ago, I could have gone to 
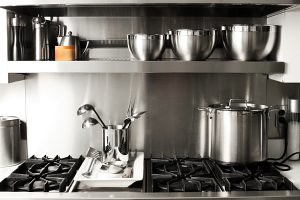
Pierre Herme's Patisserie, but strangely, I didn't feel compelled to do so. Perhaps it was because I had already seen his creations in Tokyo or perhaps I had other higher priorities like shopping for cookware at E.Dehillerin...

Whatever it is, it has not stopped me from lusting after his coveted cookbook Macarons. Available only in French now, I am waiting fervently for the English translation. In the mean time, I have tried to search for others who may have baked from the book. 2 recipes stood out, one is a 
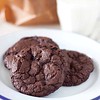
Ketchup Macaron recipe which is too unorthodox for me. The other is this Macaron au Chocolate Amer which incorporates melted 100% Chocolate.  Chocolate has the infamous reputation of destabilising meringue and up till now, I have never quite come across any recipe that calls for the use of melted chocolate in a macaron biscuit or even a chocolate chiffon ( I have only come across one recipe). Cocoa powder is most commonly used and a good quality cocoa powder like Valrhona will give a deep rich chocolate hue to the pastry.

Choc Mac5
I did not succeed during my first attempt because I had been too confident and had gone ahead to bake it at 155C like I have done before.  The shell of the macaron,  though looked smooth and lovely in the oven turned out to be quite soft. Upon cooling, this immediately turned all puny and wrinkled.  Luckily, with macarons, I have cultivated the habit of piping a few macarons on 2 small sheets for test baking. This allows me to check for proper drying which can be reflected in the proper development of the macaron feet.
I reverted back to the instructions in the recipe which called for baking the macarons at 180C with fan mode.

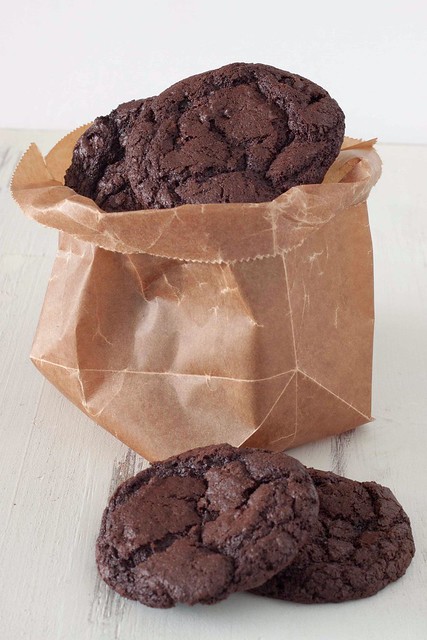
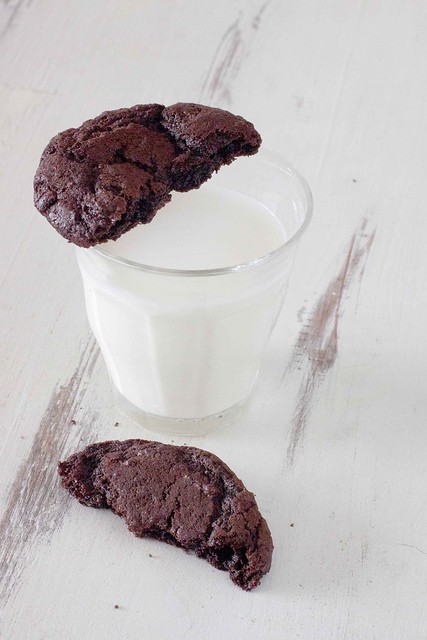
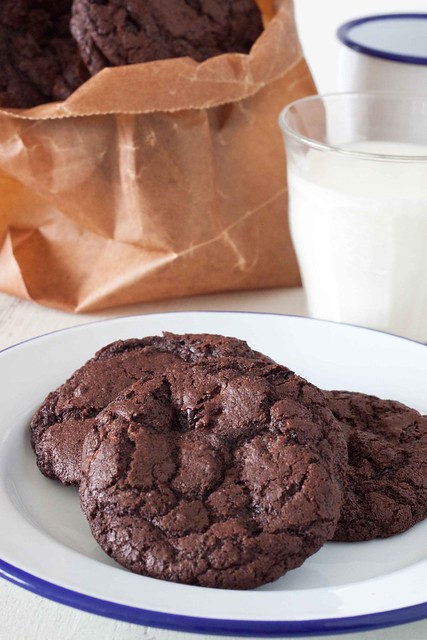
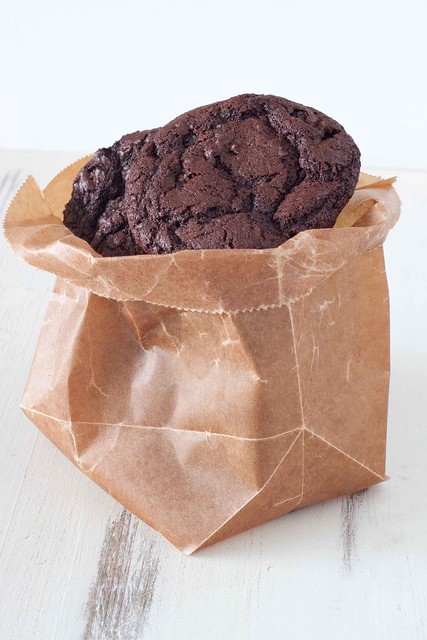
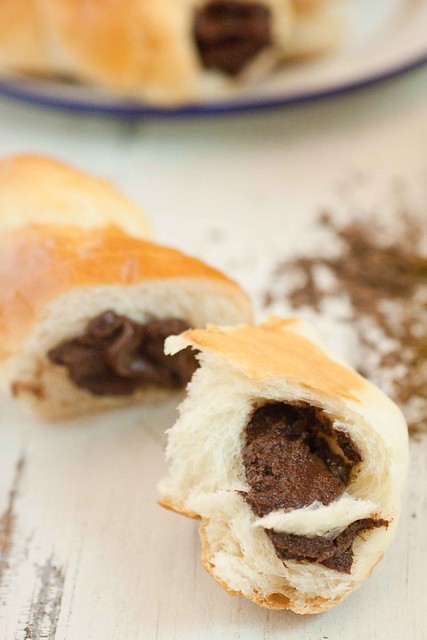
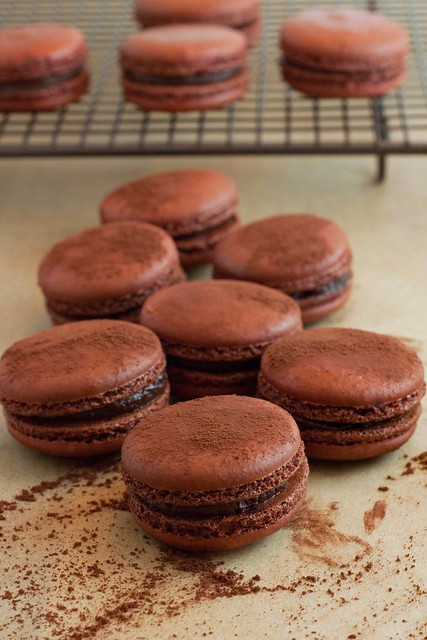
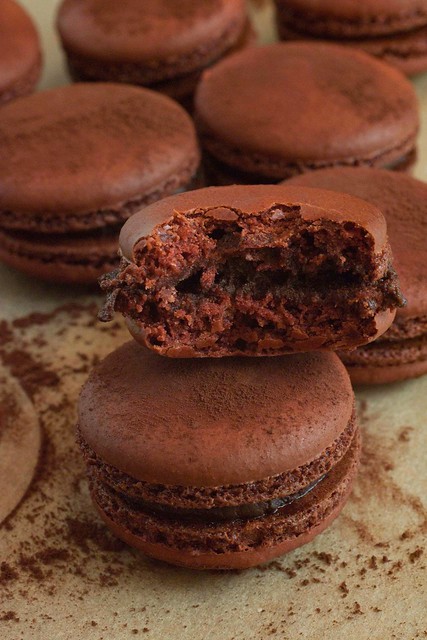
This time round, the macarons turned out well. The shell is not as crisp as the last 2 recipes but  slowly crystalised over time to yield a very delicate thin shell with a sponge-like chewy center- most fascinating.
The beauty of this recipe is that the 100% Cocoa is so bitter,  it actually neutralizes the sweetness of the meringue quite effectively.

Choc Mac9(250)
Recipe : (from here
Shell
150g       Almond Meal
150g       Icing Sugar

55g       Egg White A
2g         Red colouring

150g       Castor Sugar
2.5 tbsp   Water

55g         Egg White

60g         100% Dark Chocolate

Ganache Filling

180g       70% Dark Chocolate
20g         100% Dark Chocolate
200g       Cream
70g         Butter (room temperature)

Method :
To make the shells
Line 2-3 baking sheets with baking parchment. Mark the parchment with circles 1½in/3.8mm wide (I drew around a piping nozzle of the correct diameter), spacing them ¾in/2cm apart. Turn the paper over (the circles should show through).
Sift the icing sugar and ground almonds (you’ll need a fairly wide mesh sieve for this) into a large bowl.
Chop the 100% cocoa solids chocolate and put it in a bowl over a pan of just-simmering water, leaving it to melt and reach a temperature of 122F/50C.
Divide the egg whites into two equal portions.
Mix the food colouring into one portion and add to the bowl with the icing sugar and almonds (no need to mix it).
Put the mineral water in a small pan and add the granulated sugar. Heat gently until the sugar dissolves, then boil the syrup using a thermometer to track its temperature.
Meanwhile, put the other half of the egg whites in a bowl and plug in the electric beaters. When the syrup reaches 240F/115C, begin to beat the second quantity of egg whites to soft peaks.
Once the syrup reaches 244F/118C, pour it slowly on to the whites, beating all the time. Keep beating until the mixture returns to a soft peak consistency and has cooled to 122F/50C. (This egg white-syrup mousse is what chefs call an Italian meringue.)
Add the beaten egg whites to the bowl with the icing sugar and almonds.
Mix, then add the melted chocolate. Once it is incorporated, beat the mixture hard with a wooden spoon for a minute or so, without trying to incorporate more air.
Spoon the mixture into a piping bag fitted with a ³/8in/10mm plain tip. (Depending on the size of your piping bag, you’ll probably need to do this in three or four batches.)
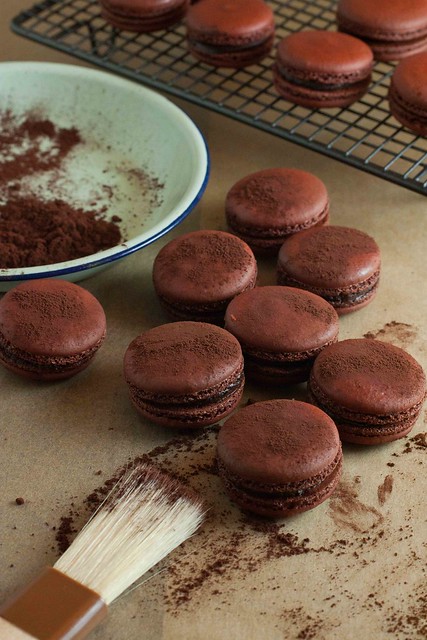
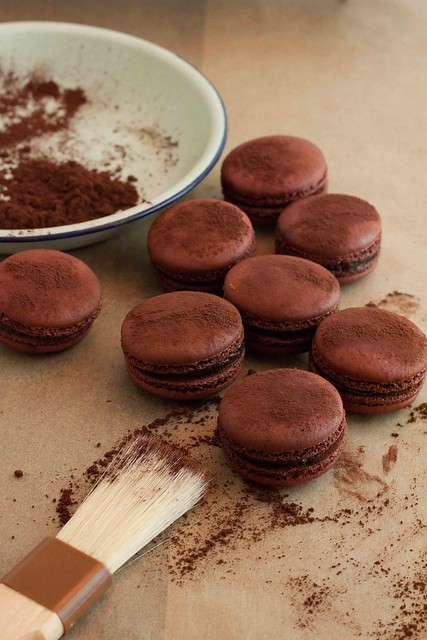
Pipe the mixture onto baking sheets lined with the parchment paper marked with circles. Using a sifter, sprinkle lightly with powdered cocoa (you’re aiming for a few freckles, not an even dusting).
Tap the baking sheets on a work surface covered with kitchen towel.
Let the shells stand for half an hour, until a skin forms on the surface. Meanwhile, preheat the oven to 350F/180C/gas mark 4.
Slide the baking sheets into the preheated oven. Bake for 12 minutes, quickly opening and shutting the oven door twice during the cooking time to let the steam escape.
Take the baking sheets out of the oven. Slide the sheets of parchment paper with shells onto a work surface and leave to cool.
To make the ganache
Cut the butter into pieces.
Put the chocolate into a bowl. Boil the cream and pour about a third at a time onto the chopped chocolate, mixing each time. The mixture will separate and look grainy, but keep mixing and it will come together.
Allow the chocolate mixture to cool to 122F/50C.
Add the chopped butter and beat until smooth.
Pour into a wide dish. Press clingfilm onto the surface of the ganache and refrigerate until thick enough to pipe.
To assemble the macarons
Spoon the ganache into a pastry bag fitted with a ³/?in/10mm plain tip. Pipe a generous mound onto a shell, then top with another shell, twisting lightly so that the filling spreads and bulges enticingly.
Store covered in the fridge for at least 24 hours to allow the inside of the macaron shells to soften.
Bring back to room temperature before eating.

LinkWithin

Related Posts with Thumbnails